This article covers the desperate situation where you had generated one or more instances, instructed Amazon to use a SSH Key Pair certs where only you have the Private Key, your instances are running, for example, an eCommerce site, running for months, and then you loss your Private Key (.pem file), and with it the SSH access to your instances’ Data.
Actually I’ve seen this situation happening several times, in actual companies. Mainly Start ups. And I solved it for them.
Assuming that you didn’t have a secondary method to access, which is another combination of username/password or other user/KeyPairs, and so you completely lost the access to the Database, the Webservers, etc… I’m going to show you how to recover the data.
For this article I will consider an scenario where there is only one Instance, which contains everything for your eCommerce: Webserver, code, and Database… and is a simple config, with a single persistent drive.
Warning: be very careful as if you use ephemeral drives, contents will be lost is you power off the instance.
Method 1: Quicker, launching a new instance from the previous
Step1: The first step you will take is to close the access from outside, using the Firewall, to avoid any new changes going to the disk. You can allow access to the instance only from your static Ip in the office/home.
Step 2: You’ll wait for 5 minutes to allow any transaction going on to conclude, and pending writes to be flushed to disk.
Step 3: From Amazon AWS Console, EC2, you’ll request an Snapshot. That step is to try to get extra security. Taking an Snapshot from a live, mounted, filesystem, is not the best of ideas, specially of a Database, but we are facing a desperate situation so we’re increasing the numbers of leaving this situation without Data loss. This is just for extra security and if everything goes well at the end you will not need this snapshot.
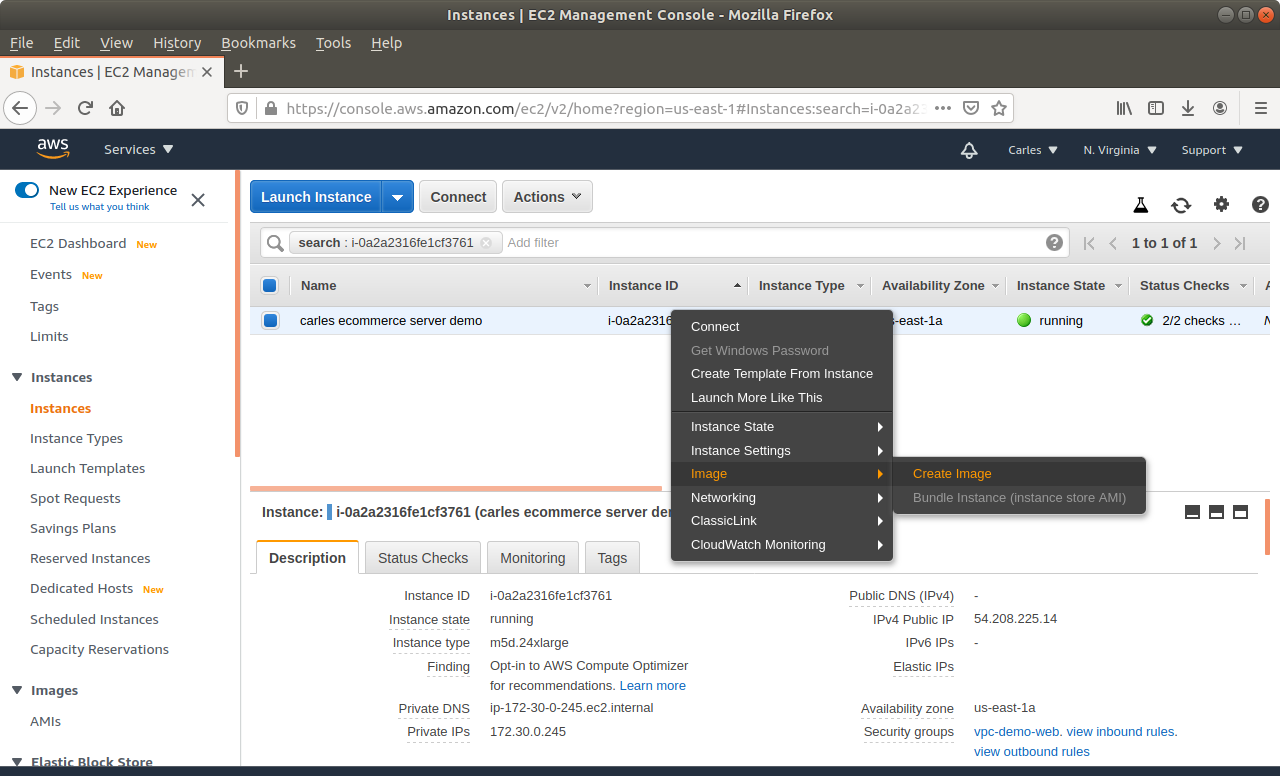
Make sure you select No reboot.
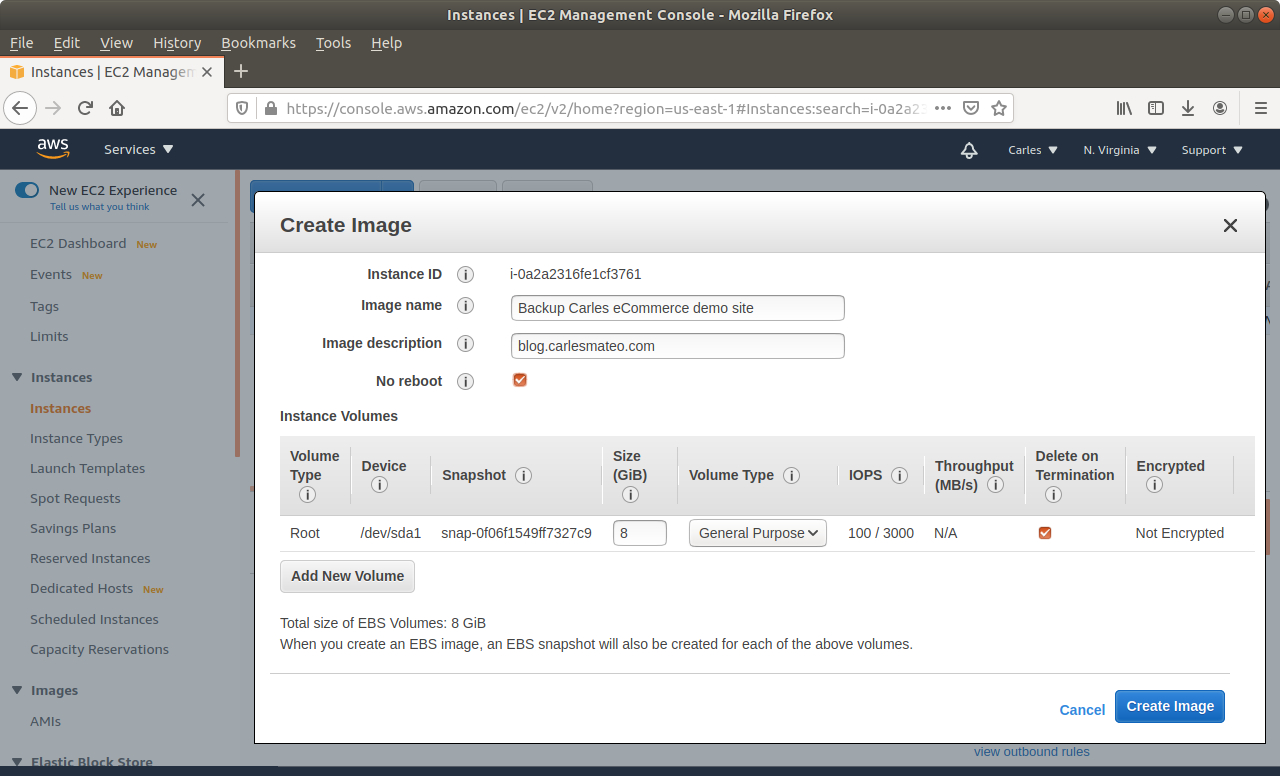
Step 4: Be very careful if you have extra drives and ephemeral drives.
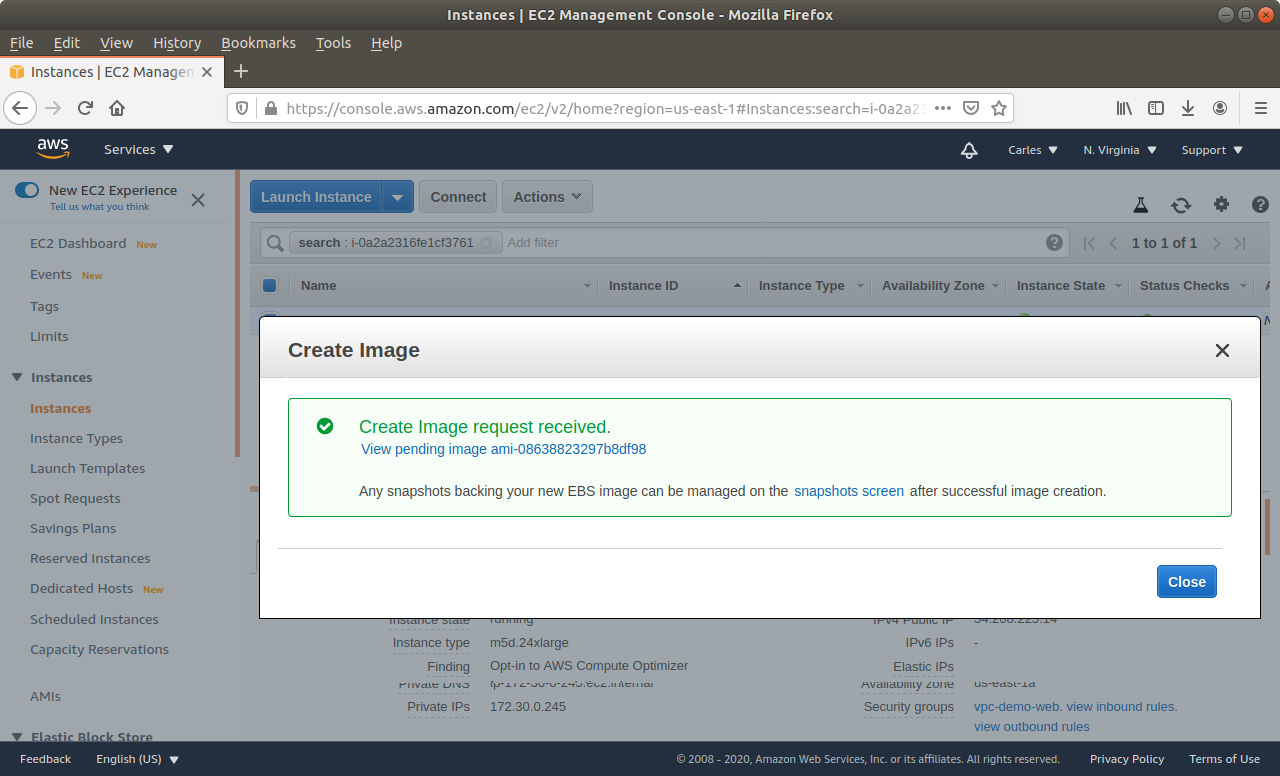
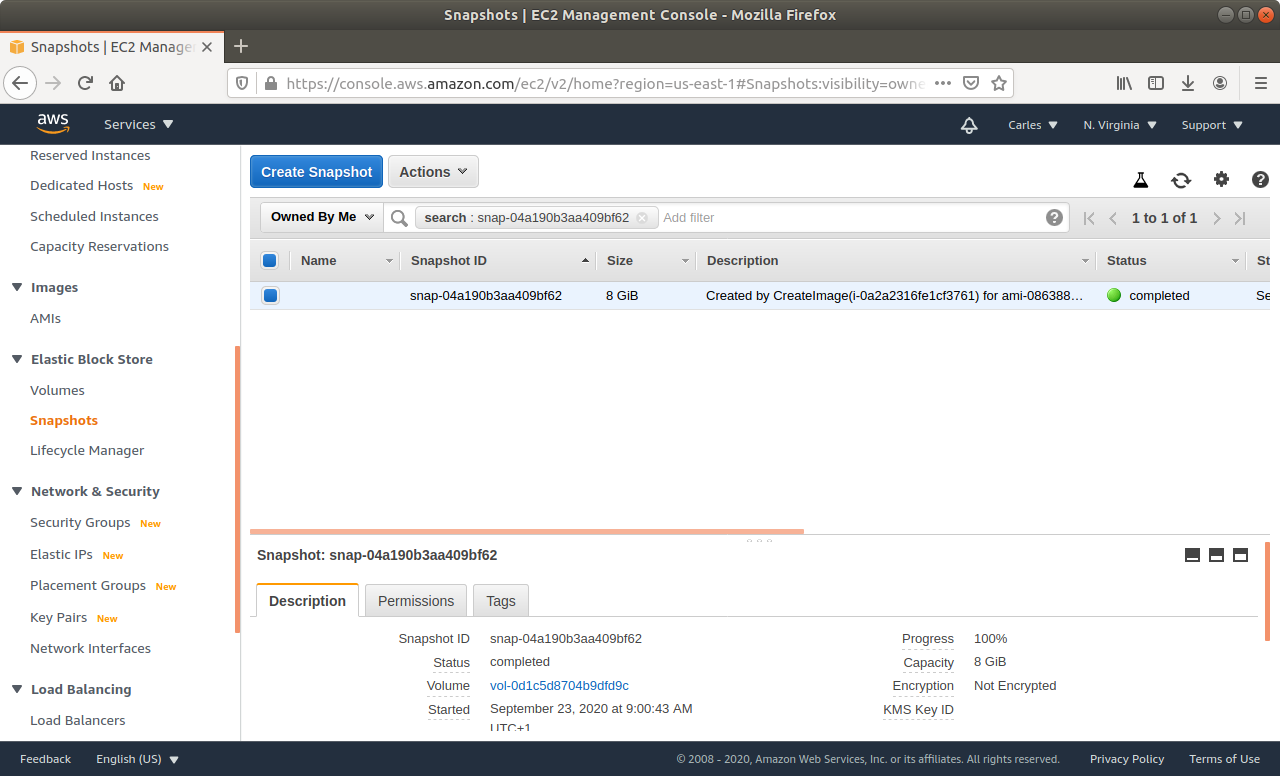
Step 5: Wait till the Snapshot completes.
Step 6: Then request a graceful poweroff. Amazon will try to poweroff the Server in a gentle way. This may take two minutes.
Step 7: When the instance is powered off, request a new Snapshot. This is the one we really want. The other was just to be more safe. If you feel confident you can just unclick No Reboot on the previous Step and do only one Snapshot.
Step 8: Wait till the Snapshot completes.
Step 9: Generate and upload the new key you will use to AWS Console, or ask Amazon to generate a key pair for you. You can do it while creating the new instance through the wizard.
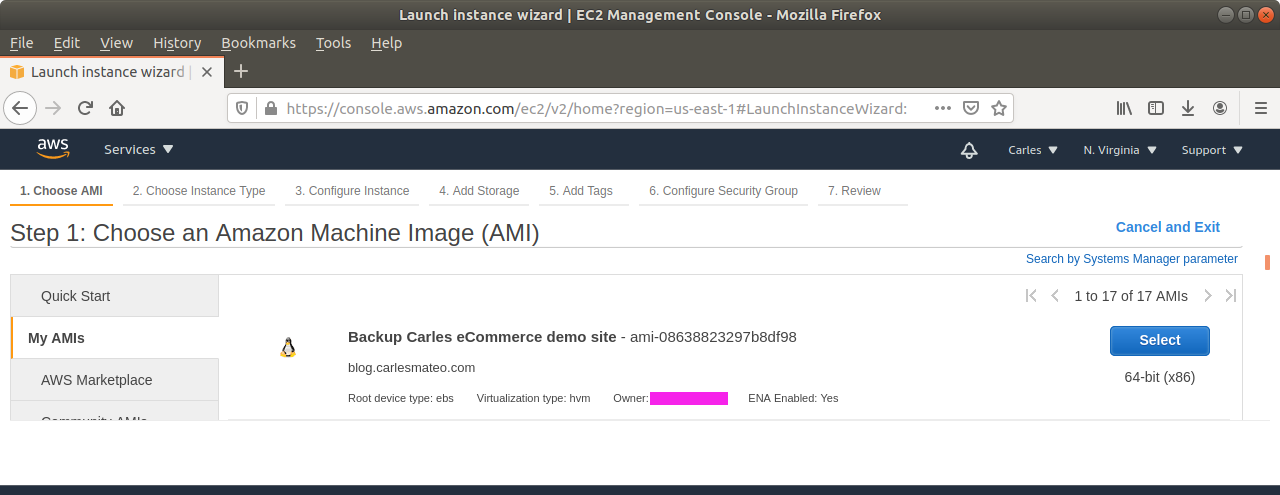
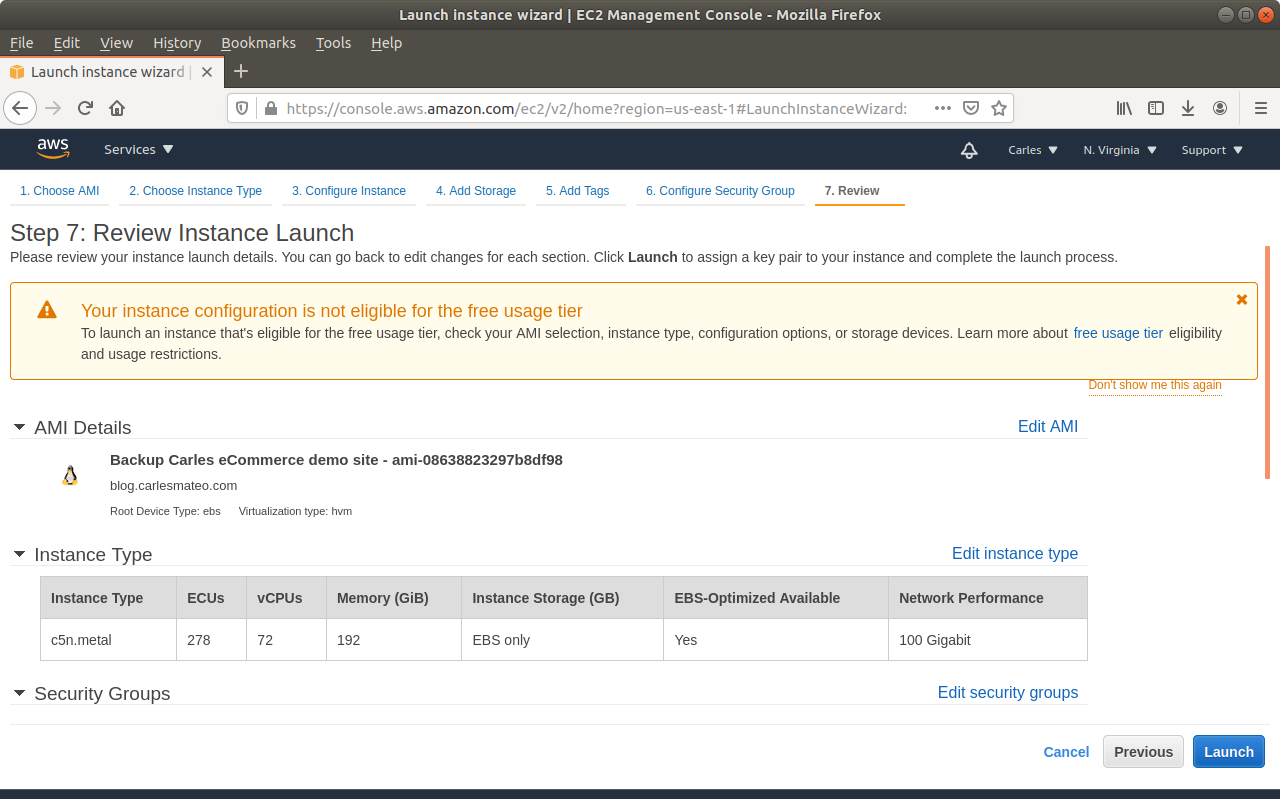
Step 10: Launch a new instance, based on your snapshot AMI. This will generate a copy of your previous instance (using the Snapshot) for the new one. Select the new Key pair. Finish assigning the Security groups, the elastic ip…
Step 11: Start the new instance. You can select a different flavor, like a more powerful instance, if you prefer. (scale vertically)
Step 12: Test your access by login via SSH with the new pair keys and from your static Ip which has access in the Firewall.
ssh -i /home/carles/Desktop/Data/keys/carles-ecommerce.pem ubuntu@54.208.225.14
Step 13: Check that the web Starts correctly, check the Database logs to see if there is any corruption. Should not have any if graceful shutdown went well.
Step 14: Reopen the access from the Firewall, so the world can connect to your instance.
Method 2: Slower, access the Data and rebuild whatever you need
The second method is exactly the same until Step 6 included.
Step 7: After this, you will create a new instance based on your favorite OS, with a new pair of Keys.
Step 8: You’ll detach the Volume from the eCommerce previous instance (the one you lost access).
Step 9: You’ll attach the Volume to the new instance.
Step 10: You’ll have access to the Data from the previous instance in the new volume. type cat /proc/partitions or df -h to see the mountpoints available. You can then download or backup, or install the Software again and import the Database…
Step 11: Check that everything works, and enable the access worldwide to the Web in the Firewall (Security Group Inbound Rules).
If you are confident enough, you can use this method to upgrade the OS or base Software of your instance, making it part of your maintenance window. For example, to get the last version of Ubuntu or CentOS, MySQL, Python or PHP, etc…