Claude AI hands on creating a Book e-Commerce and fixing errors, PHPStorm, PHP, Docker Desktop, MySQL in Windows
I’ll show the process of a creation of a web application for a e-Commerce book store.
The most important is to define a good requirements prompt. I created a file named docs/promptia.md
Set the quality to the max in youtube to be able to see the screen clearly.
It takes long time, so unless you want to see all the process in real time, use the chapters I added to skip to the parts you’re interested.
Chapters in the youtube video:
00:00 Tell Claude to create a web app based on docs/promptia.md 18:29 Claude asks permission to run Powershell commands 19:02 Application created 19:37 Check in PHPStorm the promptia.md 19:51 Add to git and Commit with PHPStorm 20:27 Create and launch containers 20:50 Create the containers 20:54 Launch containers 21:10 Show in Docker Desktop 21:23 Display in logs entrypoint.sh 22:04 composer install 22:19 Error: missing composer require symfony/yaml 22:32 Asking Claude to fix the error 23:50 Destroy project to ensure it is build without errors (for later in Production) 24:28 Create destroy-project.bat 25:42 Re-creating the containers 25:52 Re-creating without cache 29:20 Containers launched in Docker Desktop 30:10 composer update 30:28 Checking engine container error in a .yaml in Claude Code 31:13 Error non-existent service “doctrine system cache pool” 31:34 Inside the engine container curl http://127.0.0.1 Http Error 500 31:44 composer dump-env dev 31:57 Error a non-empty secret is required Http Error 500 32:14 Showing Claude the error, so it fixes it 33:12 Check from the engine container curl http://127.0.0.1 33:42 Error could not find the driver 33:51 Asking Claud to fix the error 34:05 Finding the error in the logs 34:27 I ask Claude, to continue with the log entry, after it finishes 35:16 Claude fixes the first problem and starts analyzing the second 35:35 Claude finds and fixes the second problem (introduced by Claude before) 37:12 Creating the Database with the Command 37:32 A new curl, and a new error found (introduced by Claude before) 37:58 Requesting to Claude to fix the error 38:25 Claude fixes the error 38:30 The new website loads correctly 39:00 Viewing register form (needs work) 39:05 Request a script to enter to mysql via CLI 40:02 I open the new script login_to_mysql.sh in PHPStorm 40:23 Trying the CLI Command to init the Database Schema 40:39 Giving chmod +x from Docker (for commiting to the repo) 40:45 login_to_mysql.sh fails (due an error introduced by Claude before) 40:58 finding extension=pdo_mysql in php.ini on the container duplicated 41:10 Asking Claude to remove the error 41:37 Claude realizes the error 41:45 Logged to MySQL with the script 42:05 DESC orders; 42:18 Asking Claude a refactor or prices from DECIMAL to Integers 43:53 Ask next questions while Claude is still working 46:56 Update the Command to reflect the new field changes 48:00 Copy the ALTER TABLE 48:05 Execute in the MySQL in Docker Desktop 48:12 Schema updated in docs/scheme.md 48:18 Add a field “public_name” 48:58 Update MySQL with the ALTER
I completed my ZFS on Ubuntu 20.04 LTS book. I had an error in an actual hard drive so I added a Troubleshooting section explaining how I fixed it.
I paused for a while the advance of my book Python: basic exercises for beginners, as my colleague Michela is translating it to Italian. She is a great Engineer and I cannot be more happy of having her help.
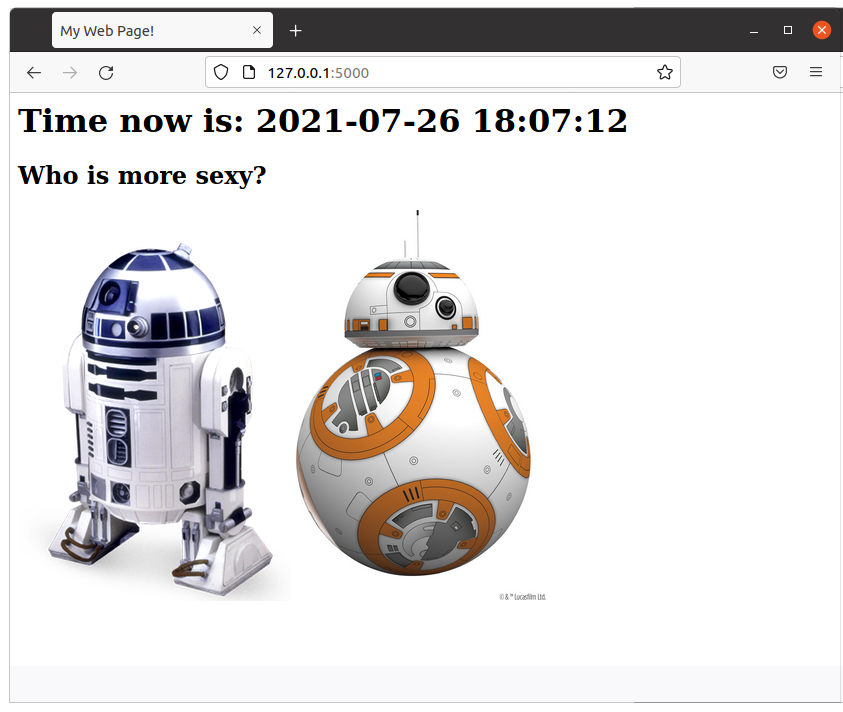
I added a new article about how to create a simple web Star Wars game using Flask. As always, I use Docker and a Dockerfile to automate the deployment, so you can test it without messing with your local system. The code is very simple and easy to understand.
This way I set an entry in /etc/hosts and I can do all the tests I want.
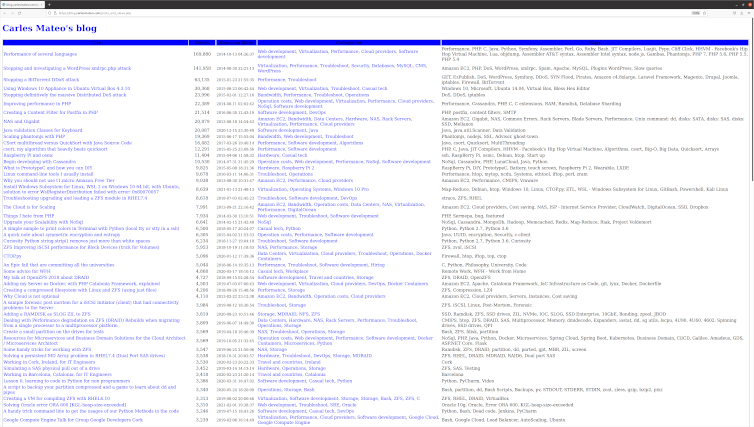
I added a new section to the blog, is a link where you can see all the articles published, ordered by number of views. /posts_and_views.php
Is in the main page, just after the recommended articles. Here you can see the source code.
I removed the Categories:
Storage
ZFS
In favor of:
Hardware
Storage
ZFS
So the articles with Categories in the group deleted were reassigned the Categories in the second group.
Visually:
I removed some annoying lines from the Quick Selection access. They came from inherited CSS properties from my WordPress, long time customized, and I created new styles for this section.
I adjusted the line-height to avoid separation between lines being too much.
I added a link in the section of Other Engineering Blogs that I like, to the great https://github.com/lesterchan site, author of many super cool WordPress plugins.
My dump takes 88MB, not much, but I compress it with gzip.
gzip wp_mysiteZ.sql
It takes only 15MB compressed.
Do not forget the parameter –databases even if only one database is exported, otherwise the CREATE DATABASE and USE `wp_mysiteZ`; will not be added to your dump.
I will need to take some data form the mysql database, referring to the user used for accessing the blog’s database.
I always keep the CREATE USER and the GRANT permissions, if you don’t check the wp-config.php file. Note that the SQL format to create users and grant permissions may be different from a SQL version to another.
I create a file named mysql.sql with this part and I compress with gzip.
Checking PHP version
php -v
PHP 7.3.23 (cli) (built: Oct 21 2020 20:24:49) ( NTS )
Copyright (c) 1997-2018 The PHP Group
Zend Engine v3.3.23, Copyright (c) 1998-2018 Zend Technologies
WordPress is updated, and PHP is not that old.
The new Ubuntu 20.04 LTS comes with PHP 7.4. It will work:
php -v
PHP 7.4.3 (cli) (built: Jul  5 2021 15:13:35) ( NTS )
Copyright (c) The PHP Group
Zend Engine v3.4.0, Copyright (c) Zend Technologies
    with Zend OPcache v7.4.3, Copyright (c), by Zend Technologies
The Dockerfile
FROM ubuntu:20.04

MAINTAINER Carles Mateo

ARG DEBIAN_FRONTEND=noninteractive

# RUN echo "nameserver 8.8.8.8" > /etc/resolv.conf

RUN echo "Europe/Ireland" | tee /etc/timezone

# Note: You should install everything in a single line concatenated with
#       && and finalizing with
# apt autoremove && apt clean

#       In order to use the less space possible, as every command
#       is a layer

RUN apt update && apt install -y apache2 ntpdate libapache2-mod-php7.4 mysql-server php7.4-mysql php-dev libmcrypt-dev php-pear git mysql-server less zip vim mc && apt autoremove && apt clean

RUN a2enmod rewrite

RUN mkdir -p /www

# If you want to activate Debug
# RUN sed -i "s/display_errors = Off/display_errors = On/" /etc/php/7.2/apache2/php.ini
# RUN sed -i "s/error_reporting = E_ALL & ~E_DEPRECATED & ~E_STRICT/error_reporting = E_ALL/" /etc/php/7.2/apache2/php.ini
# RUN sed -i "s/display_startup_errors = Off/display_startup_errors = On/" /etc/php/7.2/apache2/php.ini
# To Debug remember to change:
# config/{production.php|preproduction.php|devel.php|docker.php}
# in order to avoid Error Reporting being set to 0.

ENV PATH_WP_MYSITEZ /var/www/wordpress/wp_mysitez/
ENV PATH_WORDPRESS_SITES /var/www/wordpress/

ENV APACHE_RUN_USER  www-data
ENV APACHE_RUN_GROUP www-data
ENV APACHE_LOG_DIR   /var/log/apache2
ENV APACHE_PID_FILE  /var/run/apache2/apache2.pid
ENV APACHE_RUN_DIR   /var/run/apache2
ENV APACHE_LOCK_DIR  /var/lock/apache2
ENV APACHE_LOG_DIR   /var/log/apache2

RUN mkdir -p $APACHE_RUN_DIR
RUN mkdir -p $APACHE_LOCK_DIR
RUN mkdir -p $APACHE_LOG_DIR
RUN mkdir -p $PATH_WP_MYSITEZ

# Remove the default Server
RUN sed -i '/<Directory \/var\/www\/>/,/<\/Directory>/{/<\/Directory>/ s/.*/# var-www commented/; t; d}' /etc/apache2/apache2.conf

RUN rm /etc/apache2/sites-enabled/000-default.conf

COPY wp_mysitez.conf /etc/apache2/sites-available/

RUN chown --recursive $APACHE_RUN_USER.$APACHE_RUN_GROUP $PATH_WP_MYSITEZ

RUN ln -s /etc/apache2/sites-available/wp_mysitez.conf /etc/apache2/sites-enabled/

# Please note: It would be better to git clone from another location and
# gunzip and delete temporary files in the same line,
# to save space in the layer.
COPY *.sql.gz /tmp/

RUN gunzip /tmp/*.sql.gz; echo "Starting MySQL"; service mysql start && mysql -u root < /tmp/wp_mysitez.sql && mysql -u root < /tmp/mysql.sql; rm -f /tmp/*.sql; rm -f /tmp/*.gz
# After this root will have password assigned

COPY *.zip /tmp/

COPY services_up.sh $PATH_WORDPRESS_SITES

RUN echo "Unzipping..."; cd /var/www/wordpress/; unzip /tmp/*.zip; rm /tmp/*.zip

RUN chown --recursive $APACHE_RUN_USER.$APACHE_RUN_GROUP $PATH_WP_MYSITEZ

EXPOSE 80

CMD ["/var/www/wordpress/services_up.sh"]
Services up
For starting MySQL and Apache I relay in services_up.sh script.
#!/bin/bash
echo "Starting MySql"
service mysql start

echo "Starting Apache"
service apache2 start
# /usr/sbin/apache2 -D FOREGROUND

while [ true ];
do
    ps ax | grep mysql | grep -v "grep "
    if [ $? -gt 0 ];
    then
        service mysql start
    fi
    sleep 10
done
You see that instead of launching apache2 as FOREGROUND, what keeps the loop, not exiting from my Container is a while [ true ]; that will keep looping and checking if MySQL is up, and restarting otherwise.
MySQL shutting down
Some of my sites receive DoS attacks. More than trying to shutdown my sites, are spammers trying to publish comment announcing fake glasses, or medicines for impotence, etc… also some try to hack into the Server to gain control of it with dictionary attacks or trying to explode vulnerabilities.
The downside of those attacks is that some times the Database is under pressure, and uses more and more memory until it crashes.
More memory alleviate the problem and buys time, but I decided not to invest more than $6 USD per month on this old site. I’m just keeping the contents alive and even this site still receives many visits. A restart of the MySQL if it dies is enough for me.
As you have seen in my Dockerfile I only have one Docker Container that runs both Apache and MySQL. One of the advantages of doing like that is that if MySQL dies, the container does not exit. However I could have had two containers with both scripts with the while [ true ];
When planning I decided to have just one single Container, all-in-one, as when I export the image for a Backup, I’ll be dealing only with a single image, not two.
Building and Running the Container
I created a Bash script named build_docker.sh that does the build for me, stopping and cleaning previous Containers:
#!/bin/bash

# Execute with sudo

s_DOCKER_IMAGE_NAME="wp_sitez"

printf "Stopping old image %s\n" "${s_DOCKER_IMAGE_NAME}"
sudo docker stop "${s_DOCKER_IMAGE_NAME}"

printf "Removing old image %s\n" "${s_DOCKER_IMAGE_NAME}"
sudo docker rm "${s_DOCKER_IMAGE_NAME}"

printf "Creating Docker Image %s\n" "${s_DOCKER_IMAGE_NAME}"
# sudo docker build -t ${s_DOCKER_IMAGE_NAME} . --no-cache
sudo docker build -t ${s_DOCKER_IMAGE_NAME} .

i_EXIT_CODE=$?
if [ $i_EXIT_CODE -ne 0 ]; then
    printf "Error. Exit code %s\n" ${i_EXIT_CODE}
    exit
fi

echo "Ready to run ${s_DOCKER_IMAGE_NAME} Docker Container"
echo "To run type: sudo docker run -d -p 80:80 --name ${s_DOCKER_IMAGE_NAME} ${s_DOCKER_IMAGE_NAME}"
echo "or just use run_in_docker.sh"
echo
echo "Debug running Docker:"
echo "docker exec -it ${s_DOCKER_IMAGE_NAME} /bin/bash"
echo
I assign to the image and the Running Container the same name.
Running in Production
Once it works in local, I set the Firewall rules and I deploy the Droplet (VM) with Digital Ocean, I upload the files via SFTP, and then I just run my script build_docker.sh
And assuming everything went well, I run it:
sudo docker run -d -p 80:80 --name wp_mysitez wp_mysitez
I check that the page works, and here we go.
Some improvements
This could also have been put in a private Git repository. You only have to care about not storing the passwords in it. (Like the MySQL grants)
It may be interesting for you to disable directory browsing.
The build from the Git repository can be validated with a Jenkins. Here you have an article about setup a Jenkins for yourself.
I’ve released v. 0.99 of carleslibs package This package includes utilities for:
Files and Directories handling
Date/Time retrieval
Python version detection
You can install it with:
pip install carleslibs
The minimum requirement declared is Python 3.6, although they work with Python 3.5 and Python 2.7, as I want to drop support for no longer supported versions.
If you are enrolled with Linux Academy, I recommend you this Python course: Python 3 Scripting for System Administrators https://linuxacademy.com/cp/modules/view/id/168 Does not cover OOP, but it does a bit of Unit Testing, and talks a lot about PIP and Virtual Environments.
However we are going to run everything from a Docker Container so the only thing you need is to have installed Docker.
If you prefer to install MySql in your computer (or Virtual Box instance) directly, skip the Docker steps.
Dockerfile
The Dockerfile is the file that Docker uses to build the Docker Container.
Ours is like that:
FROM ubuntu:20.04

MAINTAINER Carles Mateo

ARG DEBIAN_FRONTEND=noninteractive

RUN apt update && apt install -y python3 pip mysql-server vim mc wget curl && apt-get clean

RUN pip install mysql-connector-python

EXPOSE 3306

ENV FOLDER_PROJECT /var/mysql_carles

RUN mkdir -p $FOLDER_PROJECT

COPY docker_run_mysql.sh $FOLDER_PROJECT
COPY start.sql $FOLDER_PROJECT
COPY src $FOLDER_PROJECT

RUN chmod +x /var/mysql_carles/docker_run_mysql.sh

CMD ["/var/mysql_carles/docker_run_mysql.sh"]
The first line defines that we are going to use Ubuntu 20.04 (it’s a LTS version).
We install all the apt packages in a single line, as Docker works in layers, and what is used as disk space in the previous layer is not deleted even if we delete the files, so we want to run apt update, install all the packages, and clean the temporal files in one single step.
I also install some useful tools like: vim, mc, less, wget and curl.
We expose to outside the port 3306, in case you want to run the Python code from your computer, but having the MySql in the Container.
The last line executes a script that starts the MySql service, creates the table, the user, and add two rows and runs an infinite loop so the Docker does not finish.
build_docker.sh
build_docker.sh is a Bash script that builds the Docker Image for you very easily.
It stops the container and removes the previous image, so your hard drive does not fill with Docker images if you do modifications.
It checks for errors building and it also remembers you how to run and debug the Docker Container.
#!/bin/bash

# Execute with sudo

s_DOCKER_IMAGE_NAME="blog_carlesmateo_com_mysql"

printf "Stopping old image %s\n" "${s_DOCKER_IMAGE_NAME}"
sudo docker stop "${s_DOCKER_IMAGE_NAME}"

printf "Removing old image %s\n" "${s_DOCKER_IMAGE_NAME}"
sudo docker rm "${s_DOCKER_IMAGE_NAME}"

printf "Creating Docker Image %s\n" "${s_DOCKER_IMAGE_NAME}"
sudo docker build -t ${s_DOCKER_IMAGE_NAME} . --no-cache

i_EXIT_CODE=$?
if [ $i_EXIT_CODE -ne 0 ]; then
    printf "Error. Exit code %s\n" ${i_EXIT_CODE}
    exit
fi

echo "Ready to run ${s_DOCKER_IMAGE_NAME} Docker Container"
echo "To run type: sudo docker run -d -p 3306:3306 --name ${s_DOCKER_IMAGE_NAME} ${s_DOCKER_IMAGE_NAME}"
echo "or just use run_in_docker.sh"
echo
echo "Debug running Docker:"
echo "docker exec -it ${s_DOCKER_IMAGE_NAME} /bin/bash"
echo
docker_run.sh
I also provide a script named docker_run.sh that runs your Container easily, exposing the MySql port.
#!/bin/bash

# Execute with sudo

s_DOCKER_IMAGE_NAME="blog_carlesmateo_com_mysql"

docker run -d -p 3306:3306 --name ${s_DOCKER_IMAGE_NAME} ${s_DOCKER_IMAGE_NAME}

echo "Showing running Instances"
docker ps
As you saw before I named the image after blog_carlesmateo_com_mysql.
I did that so basically I wanted to make sure that the name was unique, as the build_docker.sh deletes an image named like the name I choose, I didn’t want to use a generic name like “mysql” that may lead to you to delete the Docker Image inadvertently.
docker_run_mysql.sh
This script will run when the Docker Container is launched for the first time:
#!/bin/bash

# Allow to be queried from outside
sed -i '31 s/bind-address/#bind-address/' /etc/mysql/mysql.conf.d/mysqld.cnf

service mysql start

# Create a Database, a user with password, and permissions
cd /var/mysql_carles
mysql -u root < start.sql

while [ true ]; do sleep 60; done
With sed command we modify the line 31 of the the MySQL config file so we can connect from Outside the Docker Instance (bind-address: 127.0.0.1)
As you can see it executes the SQL contained in the file start.sql as root and we start MySql.
Please note: Our MySql installation has not set a password for root. It is only for Development purposes.
start.sql
The SQL file that will be ran inside our Docker Container.
CREATE DATABASE carles_database;

CREATE USER 'python'@'localhost' IDENTIFIED BY 'blog.carlesmateo.com-db-password';
CREATE USER 'python'@'%' IDENTIFIED BY 'blog.carlesmateo.com-db-password';
GRANT ALL PRIVILEGES ON carles_database.* TO 'python'@'localhost';
GRANT ALL PRIVILEGES ON carles_database.* TO 'python'@'%';

USE carles_database;

CREATE TABLE car_queue (
    i_id_car int,
    s_model_code varchar(25),
    s_color_code varchar(25),
    s_extras varchar(100),
    i_right_side int,
    s_city_to_ship varchar(25)
);

INSERT INTO car_queue (i_id_car, s_model_code, s_color_code, s_extras, i_right_side, s_city_to_ship) VALUES (1, "GOLF2021", "BLUE7", "COND_AIR, GPS, MULTIMEDIA_V3", 0, "Barcelona");
INSERT INTO car_queue (i_id_car, s_model_code, s_color_code, s_extras, i_right_side, s_city_to_ship) VALUES (2, "GOLF2021_PLUGIN_HYBRID", "BLUEMETAL_5", "COND_AIR, GPS, MULTIMEDIA_V3, SECURITY_V5", 1, "Cork");
As you can see it creates the user “python” with the password ‘blog.carlesmateo.com-db-password’ for access local and remote (%).
It also creates a Database named carles_database and grants all the permissions to the user “python”, for local and remote.
This is the user we will use to authenticate from out Python code.
Then we switch to use the carles_database and we create the car_queue table.
We insert two rows, as an example.
select_values_example.py
Finally the Python code that will query the Database.
import mysql.connector

if __name__ == "__main__":
    o_conn = mysql.connector.connect(user='python', password='blog.carlesmateo.com-db-password', database='carles_database')
    o_cursor = o_conn.cursor()

    s_query = "SELECT * FROM car_queue"

    o_cursor.execute(s_query)

    for a_row in o_cursor:
        print(a_row)

    o_cursor.close()
    o_conn.close()
Nothing special, we open a connection to the MySql and perform a query, and parse the cursor as rows/lists.
Please note: Error control is disabled so you may see any exception.
Executing the Container
First step is to build the Container.
From the directory where you cloned the project, execute:
sudo ./build_docker.sh
Then run the Docker Container:
sudo ./docker_run.sh
The script also performs a docker ps command, so you can see that it’s running.
Then change to the directory where I installed the sample files:
cd /var/mysql_carles
And execute the Python 3 example:
python3 select_values_example.py
Tying together MySql and a Python Menu with Object Oriented Programming
In order to tie all together, and specially to give a consistent view to my students, to avoid showing only pieces but a complete program, and to show a bit of Objects Oriented in action I developed a small program which simulates the handling of a production queue for Volkswagen.
MySQL Library
First I created a library to handle MySQL operations.
lib/mysqllib.py
import mysql.connector


class MySql():

    def __init__(self, s_user, s_password, s_database, s_host="127.0.0.1", i_port=3306):
        self.s_user = s_user
        self.s_password = s_password
        self.s_database = s_database
        self.s_host = s_host
        self.i_port = i_port

        o_conn = mysql.connector.connect(host=s_host, port=i_port, user=s_user, password=s_password, database=s_database)
        self.o_conn = o_conn

    def query(self, s_query):
        a_rows = []

        o_cursor = self.o_conn.cursor()

        o_cursor.execute(s_query)

        for a_row in o_cursor:
            a_rows.append(a_row)

        o_cursor.close()

        return a_rows

    def insert(self, s_query):

        o_cursor = self.o_conn.cursor()

        o_cursor.execute(s_query)
        i_inserted_row_count = o_cursor.rowcount

        # Make sure data is committed to the database
        self.o_conn.commit()

        return i_inserted_row_count

    def delete(self, s_query):

        o_cursor = self.o_conn.cursor()

        o_cursor.execute(s_query)
        i_deleted_row_count = o_cursor.rowcount

        # Make sure data is committed to the database
        self.o_conn.commit()

        return i_deleted_row_count


    def close(self):

        self.o_conn.close()
Basically when this class is instantiated, a new connection to the MySQL specified in the Constructor is established.
We have a method query() to send SELECT queries.
We have a insert method, to send INSERT, UPDATE queries that returns the number of rows affected.
This method ensures to perform a commit to make sure changes persist.
We have a delete method, to send DELETE Sql queries that returns the number of rows deleted.
We have a close method which closes the MySql connection.
A Data Object: CarDO
Then I’ve defined a class, to deal with Data and interactions of the cars.
Initially I was going to have a CarDO Object without any logic. Only with Data.
In OOP the variables of the Instance are called Properties, and the functions Methods.
Then I decided to add some logic, so I can show what’s the typical use of the objects.
So I will use CarDO as Data Object, but also to do few functions like printing the info of a Car.
Queue Manager
Finally the main program.
We also use Object Oriented Programming, and we use Dependency Injection to inject the MySQL Instance. That’s very practical to do Unit Testing.
from lib.mysqllib import MySql
from do.cardo import CarDO


class QueueManager():

    def __init__(self, o_mysql):
        self.o_mysql = o_mysql

    def exit(self):
        exit(0)

    def main_menu(self):
        while True:
            print("Main Menu")
            print("=========")
            print("")
            print("1. Add new car to queue")
            print("2. List all cars to queue")
            print("3. View car by Id")
            print("4. Delete car from queue by Id")
            print("")
            print("0. Exit")
            print("")

            s_option = input("Choose your option:")
            if s_option == "1":
                self.add_new_car()
            if s_option == "2":
                self.see_all_cars()
            if s_option == "3":
                self.see_car_by_id()
            if s_option == "4":
                self.delete_by_id()

            if s_option == "0":
                self.exit()

    def get_all_cars(self):
        s_query = "SELECT * FROM car_queue"

        a_rows = self.o_mysql.query(s_query)
        a_o_cars = []

        for a_row in a_rows:
            i_id_car = a_row[0]
            s_model_code = a_row[1]
            s_color_code = a_row[2]
            s_extras = a_row[3]
            i_right_side = a_row[4]
            s_city_to_ship = a_row[5]

            o_car = CarDO(i_id_car=i_id_car, s_model_code=s_model_code, s_color_code=s_color_code, s_extras=s_extras, i_right_side=i_right_side, s_city_to_ship=s_city_to_ship)
            a_o_cars.append(o_car)

        return a_o_cars

    def get_car_by_id(self, i_id_car):
        b_success = False
        o_car = None

        s_query = "SELECT * FROM car_queue WHERE i_id_car=" + str(i_id_car)

        a_rows = self.o_mysql.query(s_query)

        if len(a_rows) == 0:
            # False, None
            return b_success, o_car

        i_id_car = a_rows[0][0]
        s_model_code = a_rows[0][1]
        s_color_code = a_rows[0][2]
        s_extras = a_rows[0][3]
        i_right_side = a_rows[0][4]
        s_city_to_ship = a_rows[0][5]

        o_car = CarDO(i_id_car=i_id_car, s_model_code=s_model_code, s_color_code=s_color_code, s_extras=s_extras, i_right_side=i_right_side, s_city_to_ship=s_city_to_ship)
        b_success = True

        return b_success, o_car

    def replace_apostrophe(self, s_text):
        return s_text.replace("'", "´")

    def insert_car(self, o_car):

        s_sql = """INSERT INTO car_queue
                                (i_id_car, s_model_code, s_color_code, s_extras, i_right_side, s_city_to_ship)
                         VALUES
                                (""" + str(o_car.get_i_id_car()) + ", '" + o_car.get_s_model_code() + "', '" + o_car.get_s_color_code() + "', '" + o_car.get_s_extras() + "', " + str(o_car.get_i_right_side()) + ", '" + o_car.get_s_city_to_ship() + "');"

        i_inserted_row_count = self.o_mysql.insert(s_sql)

        if i_inserted_row_count > 0:
            print("Inserted", i_inserted_row_count, " row/s")
            b_success = True
        else:
            print("It was impossible to insert the row")
            b_success = False

        return b_success

    def add_new_car(self):
        print("Add new car")
        print("===========")

        while True:
            s_id_car = input("Enter new ID: ")
            if s_id_car == "":
                print("A numeric Id is needed")
                continue

            i_id_car = int(s_id_car)

            if i_id_car < 1:
                continue

            # Check if that id existed already
            b_success, o_car = self.get_car_by_id(i_id_car=i_id_car)
            if b_success is False:
                # Does not exist
                break

            print("Sorry, this Id already exists")

        s_model_code = input("Enter Model Code:")
        s_color_code = input("Enter Color Code:")
        s_extras = input("Enter extras comma separated:")
        s_right_side = input("Enter R for Right side driven:")
        if s_right_side.upper() == "R":
            i_right_side = 1
        else:
            i_right_side = 0
        s_city_to_ship = input("Enter the city to ship the car:")

        # Sanitize SQL replacing apostrophe
        s_model_code = self.replace_apostrophe(s_model_code)
        s_color_code = self.replace_apostrophe(s_color_code)
        s_extras = self.replace_apostrophe(s_extras)
        s_city_to_ship = self.replace_apostrophe(s_city_to_ship)

        o_car = CarDO(i_id_car=i_id_car, s_model_code=s_model_code, s_color_code=s_color_code, s_extras=s_extras, i_right_side=i_right_side, s_city_to_ship=s_city_to_ship)
        b_success = self.insert_car(o_car)

    def see_all_cars(self):
        print("")

        a_o_cars = self.get_all_cars()

        if len(a_o_cars) > 0:
            print(a_o_cars[0].get_car_header_for_list())
        else:
            print("No cars in queue")
            print("")
            return

        for o_car in a_o_cars:
            print(o_car.get_car_info_for_list())

        print("")

    def see_car_by_id(self, i_id_car=0):
        if i_id_car == 0:
            s_id = input("Car Id:")
            i_id_car = int(s_id)

        s_id_car = str(i_id_car)

        b_success, o_car = self.get_car_by_id(i_id_car=i_id_car)
        if b_success is False:
            print("Error, car id: " + s_id_car + " not located.")
            return False

        print("")
        o_car.print_car_info()
        print("")

        return True

    def delete_by_id(self):

        s_id = input("Enter Id of car to delete:")
        i_id_car = int(s_id)

        if i_id_car == 0:
            print("Invalid Id")
            return

        # reuse see_car_by_id
        b_found = self.see_car_by_id(i_id_car=i_id_car)
        if b_found is False:
            return

        s_delete = input("Are you sure you want to DELETE. Type Y to delete: ")
        if s_delete.upper() == "Y":
            s_sql = "DELETE FROM car_queue WHERE i_id_car=" + str(i_id_car)
            i_num = self.o_mysql.delete(s_sql)

            print(i_num, " Rows deleted")

            # if b_success is True:
            #     print("Car deleted successfully from the queue")


if __name__ == "__main__":

    try:

        o_mysql = MySql(s_user="python", s_password="blog.carlesmateo.com-db-password", s_database="carles_database", s_host="127.0.0.1", i_port=3306)

        o_queue_manager = QueueManager(o_mysql=o_mysql)
        o_queue_manager.main_menu()
    except KeyboardInterrupt:
        print("Detected CTRL + C. Exiting")
This program talks to MySQL, that we have started in a Docker previously.
We have access from inside the Docker Container, or from outside.
The idea of this simple program is to use a library for dealing with MySql, and objects for dealing with the Cars. The class CarDO contributes to the render of its data in the screen.
To enter inside the Docker once you have generated it and is running, do:
Time ago there was a web page that was rendered in blank for certain group of users.
The errors were coming from an Oracle instance. One SysAdmin restarted the instance, but the errors continued.
Often there are problems due to having two different worlds: Development and Production/Operations.
What works in Development, or even in Docker, may not work at Scale in Production.
That query that works with 100,000 products, may not work with 10,000,000.
I have programmed a lot for web, so when I saw a blank page I knew it was an internal error as the headers sent by the Web Server indicated 500. DBAs were seeing elevated number of errors in one of the Servers.
So I went straight to the Oracle’s logs for that Servers.
Just before this error, there was an error with a Query, and the PID matched, so it seemed cleared to me that the query was causing the crash at Oracle level.
Basically in our case, the query that was launched by the BackEnd was using more memory than allowed, which caused Oracle to kill it.
That is a tunnable that you can modify introduced in Oracle 10g.
You can see the current values first:
SQL> select
2 nam.ksppinm NAME,
3 nam.ksppdesc DESCRIPTION,
4 val.KSPPSTVL
5 from
6 x$ksppi nam,
7 x$ksppsv val
8 where nam.indx = val.indx and nam.ksppinm like '%kgl_large_heap_%_threshold%';

NAME                              | DESCRIPTION                       | KSPPSTVL
=============================================================================================
_kgl_large_heap_warning_threshold | maximum heap size before KGL      | 4194304
                                    writes warnings to the alert log
---------------------------------------------------------------------------------------------
_kgl_large_heap_assert_threshold  | maximum heap size before KGL      | 4194304
                                    raises an internal error
So, _kgl_large_heap_warning_threshold is the maximum heap before getting a warning, and _kgl_large_heap_assert_threshold is the maximum heap before getting the error.
Depending in your case the solution can be either:
Breaking your query in several to reduce the memory used
Use paginating or LIMIT
Set a bigger value for those tunnables.
It will work setting 0 for these to variables, although I don’t recommend it to you, as you want your Server to kill queries that are taking more memory than you want.
To increase the value of , you have to update it. Please note it is in bytes, so for 32MB is 32 * 1024 * 1024, so 33,554,432, and using spfile:
SQL> alter system set "_kgl_large_heap_warning_threshold"=33554432scope=spfile ;
SQL> shutdown immediate
SQL> startup
SQL> show parameter _kgl_large_heap_warning_threshold
NAME TYPE VALUE
==================================|=========|===============
_kgl_large_heap_warning_threshold | integer | 33554432
Me, with 4 more Senior BackEnd Engineers wrote the new e-Commerce for a multinational.
The old legacy Software evolved into a different code for every country, making it impossible to be maintained.
The new Software we created used inheritance to use the same base code for each country and overloaded only the specific different behavior of every country, like for the payment methods, for example Brazil supporting “parcelados” or Germany with specific payment players.
We rewrote the old procedural PHP BackEnd into modern PHP, with OOP and our own Framework but we had to keep the transactional code in existing MySQL Procedures, so the logic was split. There was a Front End Team consuming our JSONs. Basically all the Front End code was cached in Akamai and pages were rendered accordingly to the JSONs served from out BackEnd.
It was a huge success.
This e-Commerce site had Campaigns that started at a certain time, so the amount of traffic that would come at the same time would be challenging.
The project was working very well, and after some time the original Team was split into different projects in the company and a Team for maintenance and evolutives was hired.
At certain point they started to encounter duplicate transactions, and nobody was able to solve the mystery.
I’m specialized into fixing impossible problems. They used to send me to Impossible Missions, and I am famous for solving impossible problems easily.
So I started the task with a SRE approach.
The System had many components and layers. The problem could be in many places.
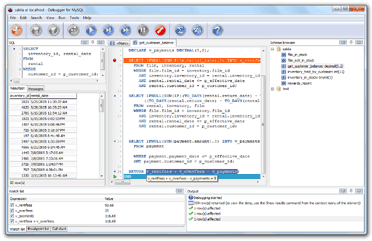
I had in my arsenal of tools, Software like mysqldebugger with which I found an unnoticed bug in decimals calculation in the past surprising everybody.
Previous Engineers involved believed the problem was in the Database side. They were having difficulties to identify the issue by the random nature of the repetitions.
Some times the order lines were duplicated, and other times were the payments, which means charging twice to the customer.
Redis Cluster could also play a part on this, as storing the session information and the basket.
But I had to follow the logic sequence of steps.
If transactions from customer were duplicated that mean that in first term those requests have arrived to the System. So that was a good point of start.
With a list of duplicated operations, I checked the Webservers logs.
That was a bit tricky as the Webserver was recording the Ip of the Load Balancer, not the ip of the customer. But we were tracking the sessionid so with that I could track and user request history. A good thing was also that we were using cookies to stick the user to the same Webserver node. That has pros and cons, but in this case I didn’t have to worry about the logs combined of all the Webservers, I could just identify a transaction in one node, and stick into that node’s log.
I was working with SSH and Bash, no log aggregators existing today were available at that time.
So when I started to catch web logs and grep a bit an smile was drawn into my face. :)
There were no transactions repeated by a bad behavior on MySQL Masters, or by BackEnd problems. Actually the HTTP requests were performed twice.
And the explanation to that was much more simple.
Many Windows and Mac User are used to double click in the Desktop to open programs, so when they started to use Internet, they did the same. They double clicked on the Submit button on the forms. Causing two JavaScript requests in parallel.
When I explained it they were really surprised, but then they started to worry about how they could fix that.
Well, there are many ways, like using an UUID in each request and do not accepting two concurrents, but I came with something that we could deploy super fast.
I explained how to change the JavaScript code so the buttons will have no default submit action, and they will trigger a JavaScript method instead, that will set a boolean to True, and also would disable the button so it can not be clicked anymore. Only if the variable was False the submit would be performed. It was almost impossible to get a double click as the JavaScript was so fast disabling the button, that the second click will not trigger anything. But even if that could be possible, only one request would be made, as the variable was set to True on the first click event.
That case was very funny for me, because it was not necessary to go crazy inspecting the different layers of the system. The problem was detected simply with HTTP logs. :)
People often forget to follow the logic steps while many problems are much more simple.
As a curious note, I still see people double clicking on links and buttons on the Web, and some Software not handling it. :)
This article covers the desperate situation where you had generated one or more instances, instructed Amazon to use a SSH Key Pair certs where only you have the Private Key, your instances are running, for example, an eCommerce site, running for months, and then you loss your Private Key (.pem file), and with it the SSH access to your instances’ Data.
Actually I’ve seen this situation happening several times, in actual companies. Mainly Start ups. And I solved it for them.
Assuming that you didn’t have a secondary method to access, which is another combination of username/password or other user/KeyPairs, and so you completely lost the access to the Database, the Webservers, etc… I’m going to show you how to recover the data.
For this article I will consider an scenario where there is only one Instance, which contains everything for your eCommerce: Webserver, code, and Database… and is a simple config, with a single persistent drive.
Warning: be very careful as if you use ephemeral drives, contents will be lost is you power off the instance.
Method 1: Quicker, launching a new instance from the previous
Step1: The first step you will take is to close the access from outside, using the Firewall, to avoid any new changes going to the disk. You can allow access to the instance only from your static Ip in the office/home.
Step 2: You’ll wait for 5 minutes to allow any transaction going on to conclude, and pending writes to be flushed to disk.
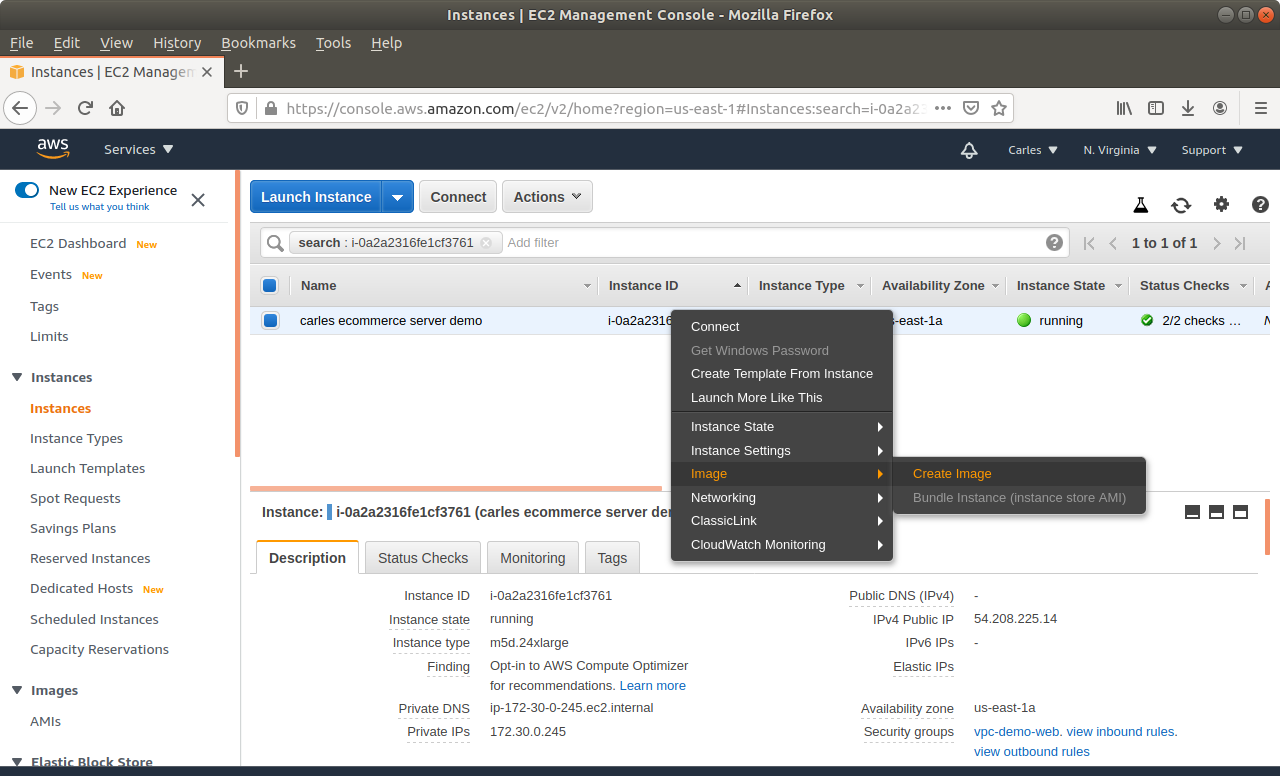
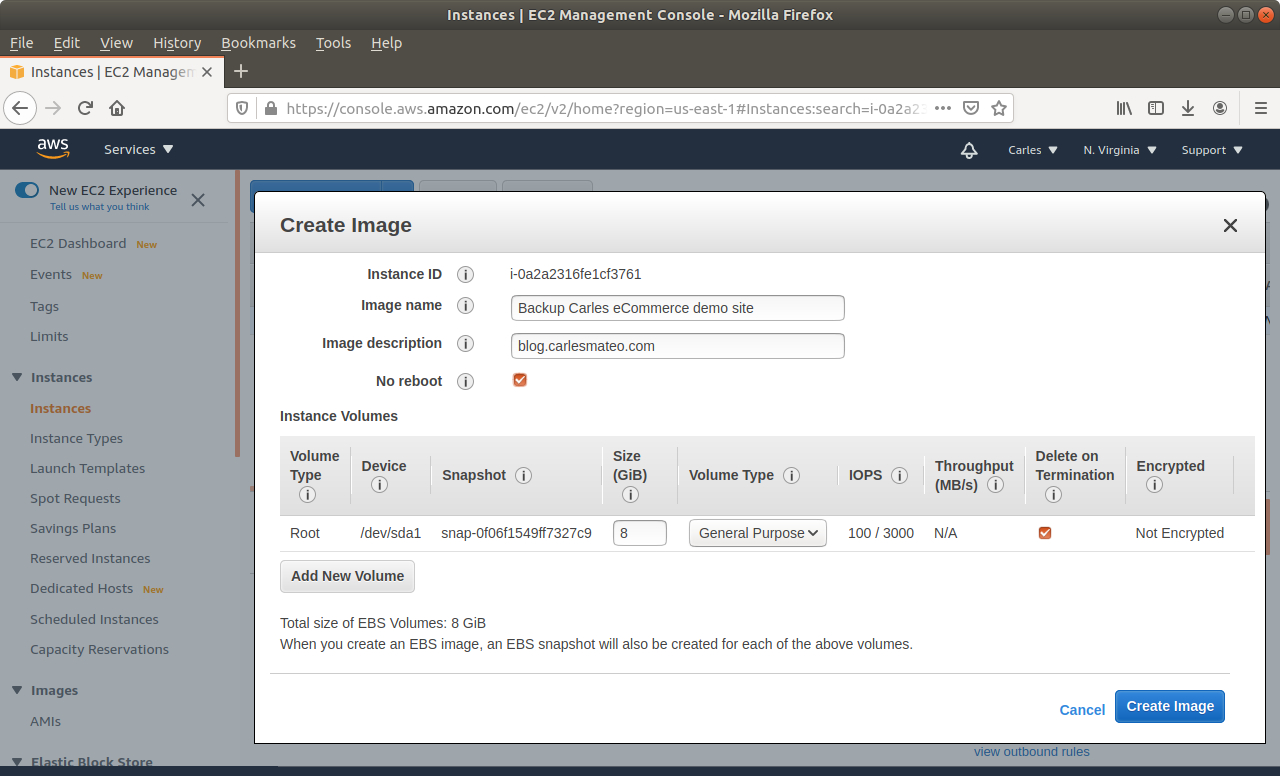
Step 3: From Amazon AWS Console, EC2, you’ll request an Snapshot. That step is to try to get extra security. Taking an Snapshot from a live, mounted, filesystem, is not the best of ideas, specially of a Database, but we are facing a desperate situation so we’re increasing the numbers of leaving this situation without Data loss. This is just for extra security and if everything goes well at the end you will not need this snapshot.
Make sure you select No reboot.
Step 4: Be very careful if you have extra drives and ephemeral drives.
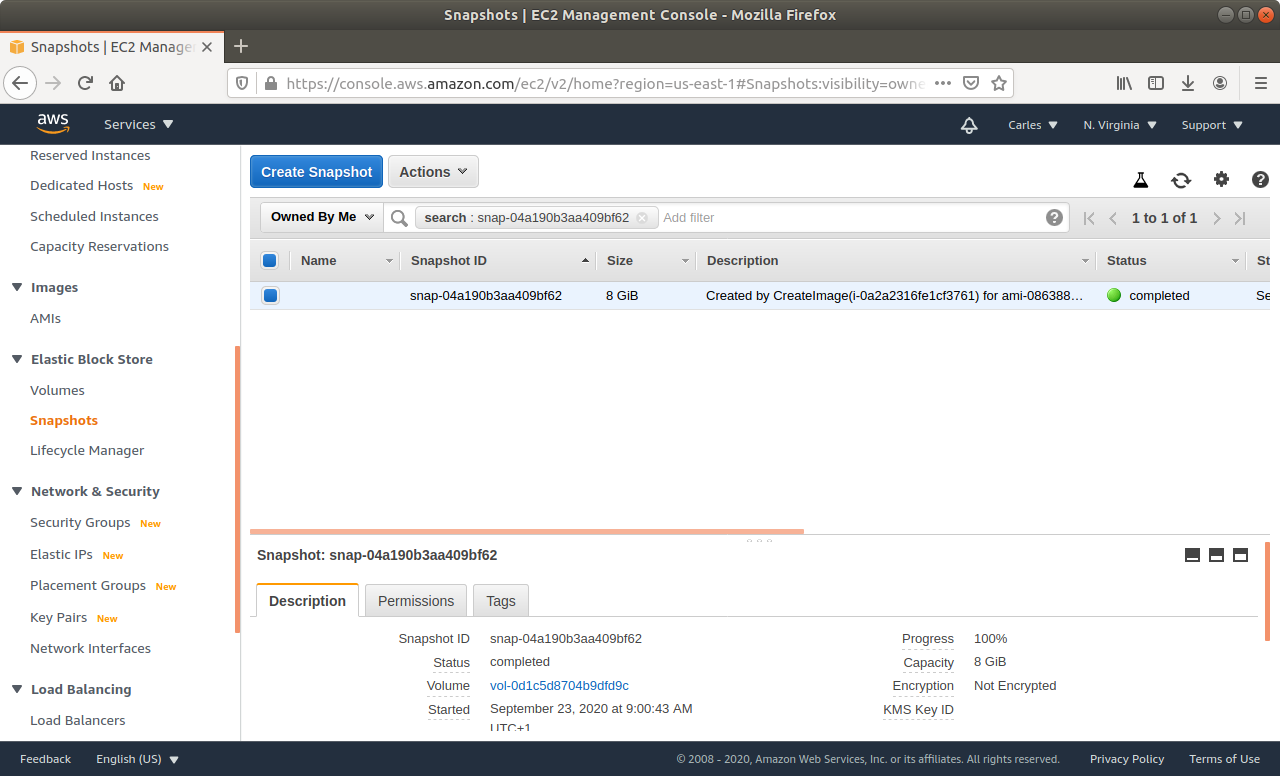
Step 5: Wait till the Snapshot completes.
Step 6: Then request a graceful poweroff. Amazon will try to poweroff the Server in a gentle way. This may take two minutes.
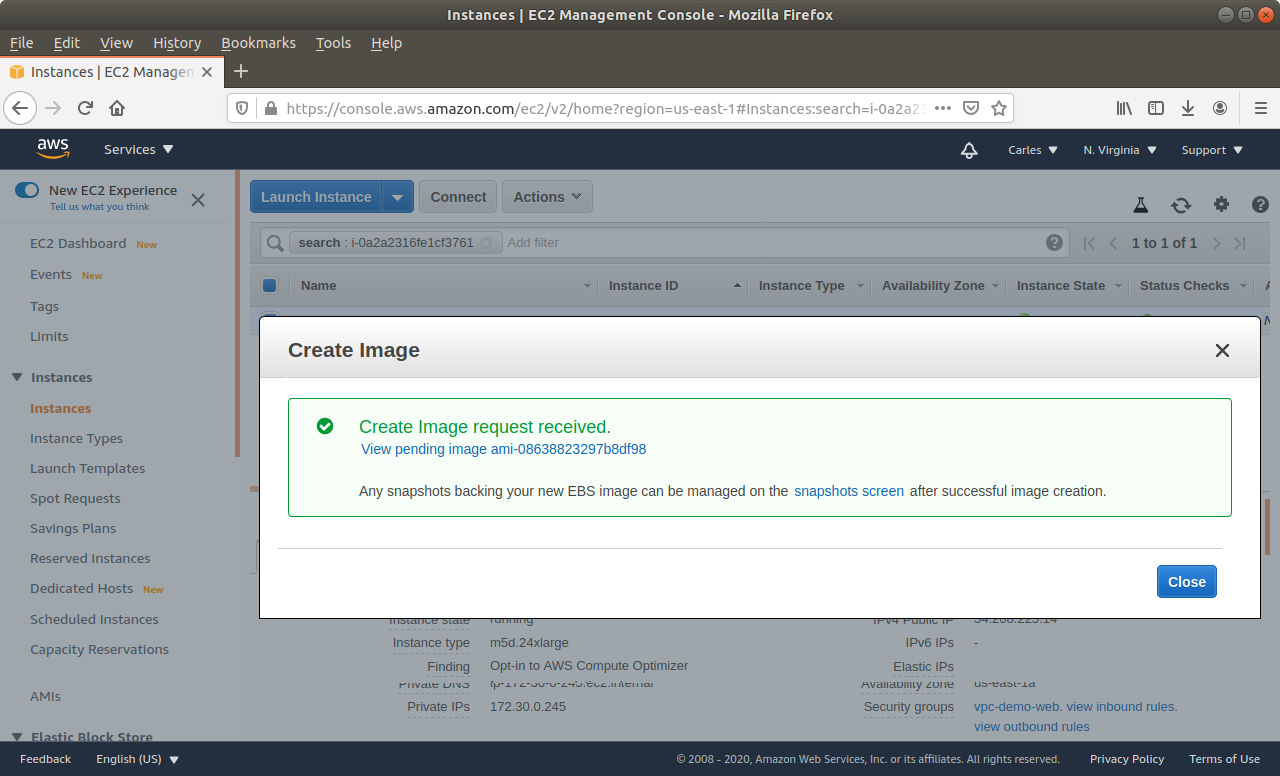
Step 7: When the instance is powered off, request a new Snapshot. This is the one we really want. The other was just to be more safe. If you feel confident you can just unclick No Reboot on the previous Step and do only one Snapshot.
Step 8: Wait till the Snapshot completes.
Step 9: Generate and upload the new key you will use to AWS Console, or ask Amazon to generate a key pair for you. You can do it while creating the new instance through the wizard.
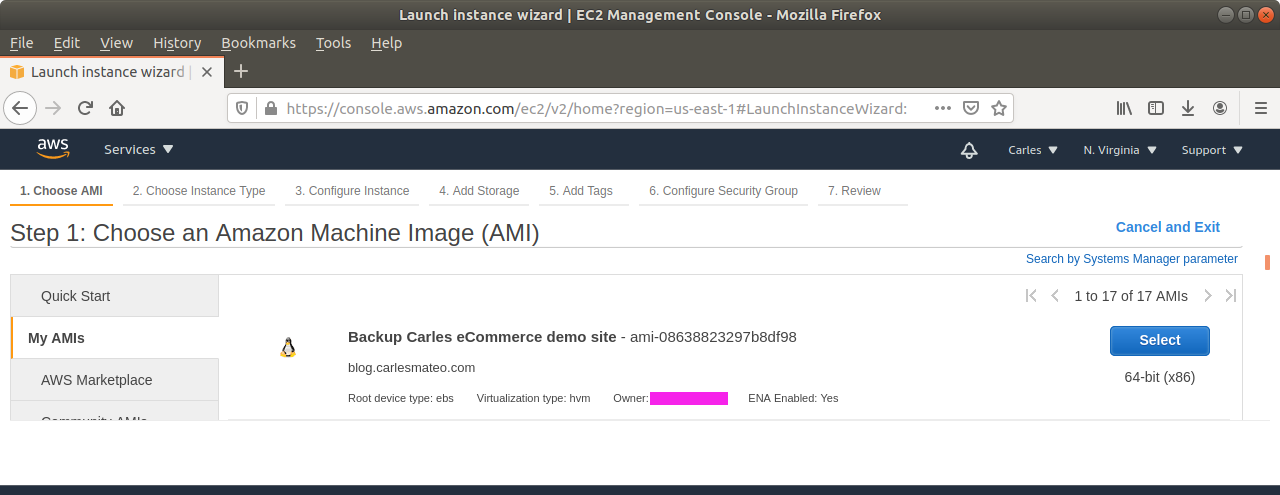
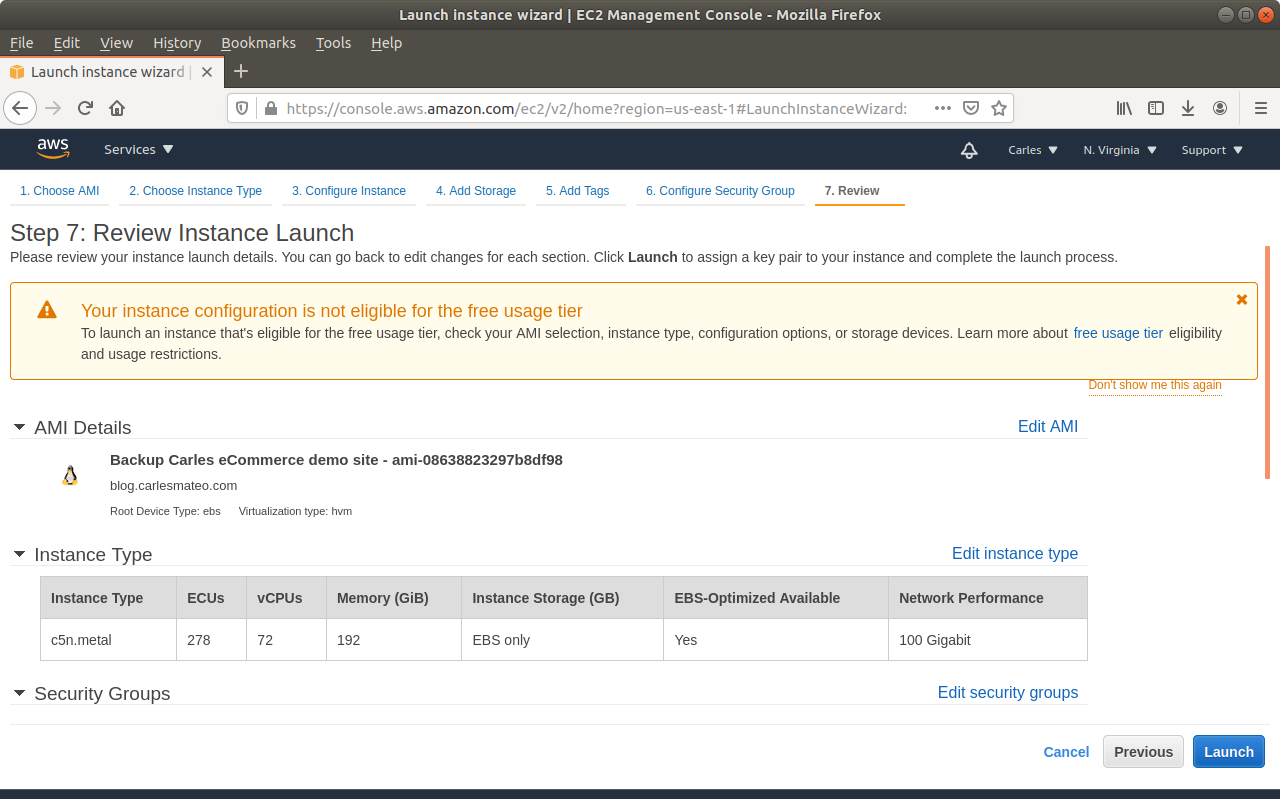
Step 10: Launch a new instance, based on your snapshot AMI. This will generate a copy of your previous instance (using the Snapshot) for the new one. Select the new Key pair. Finish assigning the Security groups, the elastic ip…
Step 11: Start the new instance. You can select a different flavor, like a more powerful instance, if you prefer. (scale vertically)
Step 12: Test your access by login via SSH with the new pair keys and from your static Ip which has access in the Firewall.
Step 13: Check that the web Starts correctly, check the Database logs to see if there is any corruption. Should not have any if graceful shutdown went well.
Step 14: Reopen the access from the Firewall, so the world can connect to your instance.
Method 2: Slower, access the Data and rebuild whatever you need
The second method is exactly the same until Step 6 included.
Step 7: After this, you will create a new instance based on your favorite OS, with a new pair of Keys.
Step 8: You’ll detach the Volume from the eCommerce previous instance (the one you lost access).
Step 9: You’ll attach the Volume to the new instance.
Step 10: You’ll have access to the Data from the previous instance in the new volume. type cat /proc/partitions or df -h to see the mountpoints available. You can then download or backup, or install the Software again and import the Database…
Step 11: Check that everything works, and enable the access worldwide to the Web in the Firewall (Security Group Inbound Rules).
If you are confident enough, you can use this method to upgrade the OS or base Software of your instance, making it part of your maintenance window. For example, to get the last version of Ubuntu or CentOS, MySQL, Python or PHP, etc…
I wanted to automate certain operations that we do very often, and so I decided to do a PoC of how handy will it be to create GUI applications that can automate tasks.
As locating information in several repositories of information (ldap, databases, websites, etc…) can be tedious I decided to create a small program that queries LDAP for the information I’m interested, in this case a Location. This small program can very easily escalated to launch the VPN, to query a Database after querying LDAP if no results are found, etc…
I share with you the basic application as you may find interesting to create GUI applications in Python, compatible with Windows, Linux and Mac.
I’m super Linux fan but this is important, as many multinationals still use Windows or Mac even for Engineers and SRE positions.
With the article I provide a Dockerfile and a docker-compose.yml file that will launch an OpenLDAP Docker Container preloaded with very basic information and a PHPLDAPMIN Container.
This is a great new for scaling performance in the Data Centers. For routers, switches…
And this makes me think about all the Architects that are using Memcached and Redis in different Servers, in Networks of 1Gbps and makes me want to share with you what a nonsense, is often, that.
So the idea of having Memcache or Redis is just to cache the queries and unload the Database from those queries.
But 1Gbps is equivalent to 125MB (Megabytes) per second.
Local RAM Memory in Servers can perform at 24GB and more (24,000,000 Megabytes) per second, even more.
A PCIE NVMe drive at 3.5GB per second.
A local SSD drive without RAID 550 MB/s.
A SSD in the Cloud, varies a lot on the provider, number of drives, etc… but I’ve seen between 200 MB/s and 2.5GB/s aggregated in RAID.
In fact I have worked with Servers equipped with several IO Controllers, that were delivering 24GB/s of throughput writing or reading to HDD spinning drives.
If you’re in the Cloud. Instead of having 2 Load Balancers, 100 Front Web servers, with a cluster of 5 Redis with huge amount of RAM, and 1 MySQL Master and 1 Slave, all communicating at 1Gbps, probably you’ll get a better performance having the 2 LBs, and 11 Front Web with some more memory and having the Redis instance in the same machine and saving the money of that many small Front and from the 5 huge dedicated Redis.
The same applies if you’re using Docker or K8s.
Even if you just cache the queries to drive, speed will be better than sending everything through 1 Gbps.
This will matter for you if your site is really under heavy load. Most of the sites just query the MySQL Server using 1 Gbps lines, or 2 Gbps in bonding, and that’s enough.