Extend existing Single ZFS disk with a mirror without losing the Data on the existing HDD
This is an answer that I did to a question in askubuntu.
Question:
I have one HDD formatted as single disc zfs system on my server. It looks like the following:
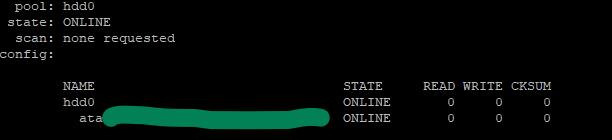
Now I want to convert this to a zfs mirror without formatting the original disk. Any ideas?
Result should be something like:
hdd0
   mirror0
       ata-........................
       ata-........................
Answer:
I reproduced your case in a VM and paste here step by step. :)
Note: First of all, please do a backup of your data. I added an empty new disk, so ZFS had no doubt what was the master drive. Although you should have no problem as the first drive already forms part of the pool, a backup is recommended.
Quick answer: You need the zpool attach command.
Basically:
sudo zpool attach hdd0 existinghdd blankhdd |
After, do:
zpool status |
And you will see that a mirror has been created. Your data on the already existing drive will be keep, and will be replicated to the new one (Resilvered).
As ZFS only copys the actual information this process will take more or less depending on the amount of Data.
In my VM 300 GB were replicated in 3 seconds, while my experience with SAS and SATA drives, I was Resilvering 10 TB in less than 24 hours (for that I was using drives from 10TB to 14TB SAS) .
Now the long answer with everything I did in my Virtual Box VM:
lsblk --scsi |
identify the two empty drives by:
| ls /dev/disk/by-id/ |
Select one of them and create a pool like your: sudo zpool create hdd0 id_of_mydrive
See that pool /hdd0 has been created and mounted on root.
sudo zpool status sudo zpool list sudo ls -al /hdd0 |
Fill with some random data (or better copy files there) to generate a drive like data like you. I generated from random:
| sudo dd id=/dev/urandom of=/hdd0/file.000 bs=1M count=100 status=progress sudo dd id=/dev/urandom of=/hdd0/file.001 bs=1M count=100 status=progress sudo dd id=/dev/urandom of=/hdd0/file.002 bs=1M count=100 status=progress |
Then I got the checksum and saved to verify later.
sudo su # Please note I continue as root sha512sum file.000 > file.000.sha512 sha512sum file.001 > file.001.sha512 sha512sum file.002 > file.002.sha512 |
zpool list shows nearly 100GB of space.
zpool attach hdd0 id_of_mydrive id_of_the_drive_to_add |
zpool status will show:
pool: hdd0 state: ONLINE scan: resilvered 301M in 0 days 00:00:03 with 0 errors…NAME STATE READ WRITE CKSUMhdd0mirror-0ata-VBOX_HARDDISK_VBa8... ONLINE 0 0 0ata-VBOX_HARDDISK_VB8c... ONLINE 0 0 0errors: No known data errors
I verified the checksums.
zpool list will return as well 99GB of space available, as two drives of 100GB are being used in mirror.
So as kaulex mentioned the format is: zpool attach
Where device is your previous vdev with data (the single hard drive with Data in the ZFS pool named ‘hdd0’).
As I did you want to use the Id of the device and not the name, so you will use the identifier in /dev/disk/by-id/ and not sdb, sdc… (Please note, adding /dev/ is not necessary). The reason to do not use device names like sdb, sdc, sdea, etc… is that those names may change why live is running or between reboots. The id never changes. In real systems, not Virtual Box, they may start by wwn or ata.
Rules for writing a Comment