Tag Archives: screen

Swap, swappiness, Servers not responding

I have read a lot of wrong recommendations about the use of Swap and Swappiness so I want to bring some light about it.

The first to say is that every project is different, so it is not possible to make a general rule. However in most of the cases we want systems to operate as fast and efficiently as possible.

So this suggestions try to covert 99% of the cases.

By default Linux will try to be as efficient as possible. So for example, it will use Free Memory to keep IO efficient by keeping in Memory cache and buffers.

That means that if you are using files often, Linux will keep that information cached in RAM.

The swappiness Kernel setting defines what tradeoff will take Linux between keeping buffers with Free Memory and using the available Swap Memory.

# sysctl vm.swappiness
vm.swappiness = 60

The default value is 60 and more or less means that when RAM memory gets to 60%, swap will start to be used.

And so we can find Servers with 256GB of RAM, that when they start to use more than 153 GB of RAM, they start to swap.

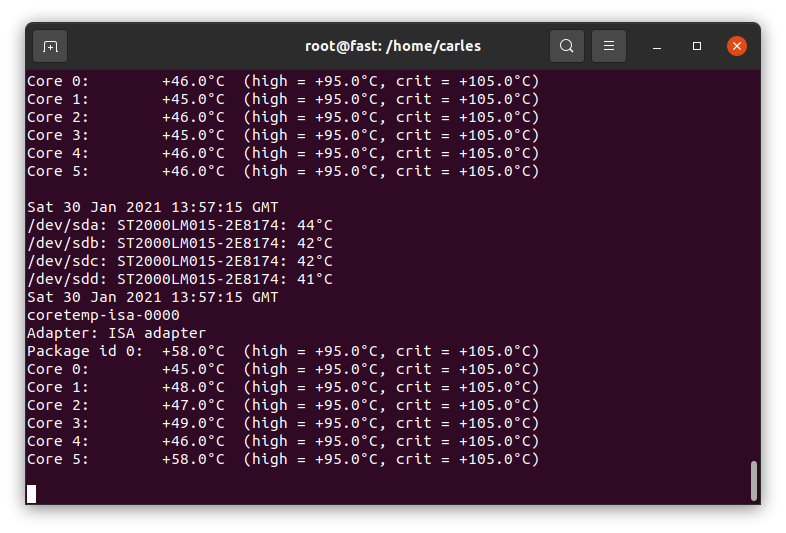
Let’s analyze the output of free -h:

carles@vbi78g:~/Desktop/Software/checkswap$ free -h
              total        used        free      shared  buff/cache   available
Mem:          2.9Gi       1.6Gi       148Mi        77Mi       1.2Gi       1.1Gi
Swap:         2.0Gi        27Mi       2.0Gi

So from this VM that has 2.9GB of RAM Memory, 1.6GB are used by applications.

The are 148MB that can immediately used by Applications, and there are 1.2GB in buffers/cache. Does that means that we can only use 148MB (plus swap)?. No, that mean that Linux tried to optimize io speed by keeping 1.2GB of RAM memory in buffers. But this is the best effort of Linux to have performance, for real applications will be also able to use 1.1GB that corresponds to the available field.

About swap, from 2GB, only 27MB have been used.

As vm.swappiness is set to 60, more RAM will be swapped out to swap, even if we have lots available.

As I said every case is different. If we are talking about a Desktop that has NVMe drives, the impact will be low. But if we are talking about a Server that is a hypervisor running VMs and has high usage on CPU and has the swap partition or the swap in a file, that could lead to huge problems. If there is a physical Server with a single spinning drive (or logical unit through RAID), and one partition is for Swap, and the other for mountpoints, and a process is heavily reading/writing to a partition mounted (an elastic search, or a telegraf, prometheus…), and the System tries to swap, then they will be competing for the magnetic head of disk, slowing down everything.

If you take a look on how the process of swapping memory pages from the memory to disk, you will understand that applications may need certain pages before being able to run, so in many cases we get to lock situations, that force everything to wait.

In my career I found Servers that temporarily stopped responding to ping. After a while ping came back, I was able to ssh and uptime showed that the Server did not reboot.

I troubleshooted that, and I saw a combination of high CPU usage spikes and Swap usage.

Using iostat and iotop I monitored what was speed of transference of only 1 MB/second!!.

I even did swapoff and it took one hour to free 4 GB swap partition!.

I also saw swap partition being in a spinning disk, and in another partition of the same spinning drive, having a swapfile. Magnetic spinning drives can only access one are of the drive at the same time, so that situation, using swap is very bad.

And I have seen situations were the swap or swapfile was mounted in a block device shared via network with the Server (like iSCSI or NFS), causing terrible performance when swapping.

So you have to adapt the strategy according to the project.

My preferred strategy for Compute Nodes and NoSQL Databases is to not use swap at all. In other cases, like MySQL Databases I may set swappiness to preferably to 1 or to 10.

I quote here the recommendations from couchbase docs:

The Linux kernel’s swappiness setting defines how aggressively the kernel will swap memory pages versus dropping pages from the page cache. A higher value increases swap aggressiveness, while a lower value tells the kernel to swap as little as possible to disk and favor RAM. The swappiness range is from 0 to 100, and most Linux distributions have swappiness set to 60 by default.

Couchbase Server is optimized with its managed cache to use RAM, and is capable of managing what should be in RAM and what shouldn’t be. Allowing the OS to have too much control over what memory pages are in RAM is likely to lower Couchbase Server’s performance. Therefore, it’s recommended that swappiness be set to the levels listed below.

https://docs.couchbase.com/server/current/install/install-swap-space.html

Another theme, is when you log to a Server and you see all the Swap memory in use.

Linux may have moved the pages that were less used, and that may be Ok for some cases, for example a Cron Service that waits and runs every 24 hours. It is safe to swap that (as long as the swap IO is decent).

When Kernel Swaps it may generate locks.

But if we log to a Server and all the Swap is in use, how can we know that the Swap has been quiet there?.

Well, you can use iostat or iotop or you can:

cat /proc/vmstat

This file contains a lot of values related to Memory, we will focus on:

pswpin 508992338
pswpout 280871088

In https://superuser.com/questions/785447/what-is-the-exact-difference-between-the-parameters-pgpgin-pswpin-and-pswpou you can find very interesting description of those values. I paste here an excerpt:

Paging refers to writing portions, termed pages, of a process’ memory to disk.
Swapping, strictly speaking, refers to writing the entire process, not just part, to disk.
In Linux, true swapping is exceedingly rare, but the terms paging and swapping often are used interchangeably.

page-out: The system’s free memory is less than a threshold “lotsfree” and unnused / least used pages are moved to the swap area.
page-in: One process which is running requested for a page that is not in the current memory (page-fault), it’s pages are being brought back to memory.
swap-out: System is thrashing and has deactivated a process and it’s memory pages are moved into the swap area.
swap-in: A deactivated process is back to work and it’s pages are being brought into the memory.

Values from /proc/vmstat:

pgpgin, pgpgout – number of pages that are read from disk and written to memory, you usually don’t need to care that much about these numbers

pswpin, pswpout – you may want to track these numbers per time (via some monitoring like prometheus), if there are spikes it means system is heavily swapping and you have a problem.

In this actual example that means that since the start of the Server there has been 508992338 Page Swap In (with 4K memory pages this is 1,941 GB, so almost 2 TB transferred) and for Page Swat Out (with 4K memory pages this is 1,071 GB, so 1 TB of transferred). I’m talking about a Server that had a 4GB swap partition in a spinning disk and a 12 GB swapfile in another ext4 partition of the same spinning disk.

The 16 GB of swap were in use and iotop showed only two sources of IO, one being 2 VMs writing, another was a journaling process writing to the mountpoint where the swapfile was. That was an spinning drive (underlying hardware was raid, for simplicity I refer to one single drive. I checked that both spinning drives were healthy and fast). I saw small variations in the size of the Swap, so I decided to monitor the changes in pswpin and pswpout in /proc/vmstat to see how much was transferred from/to swap.

I saw then how many pages were being transferred!.

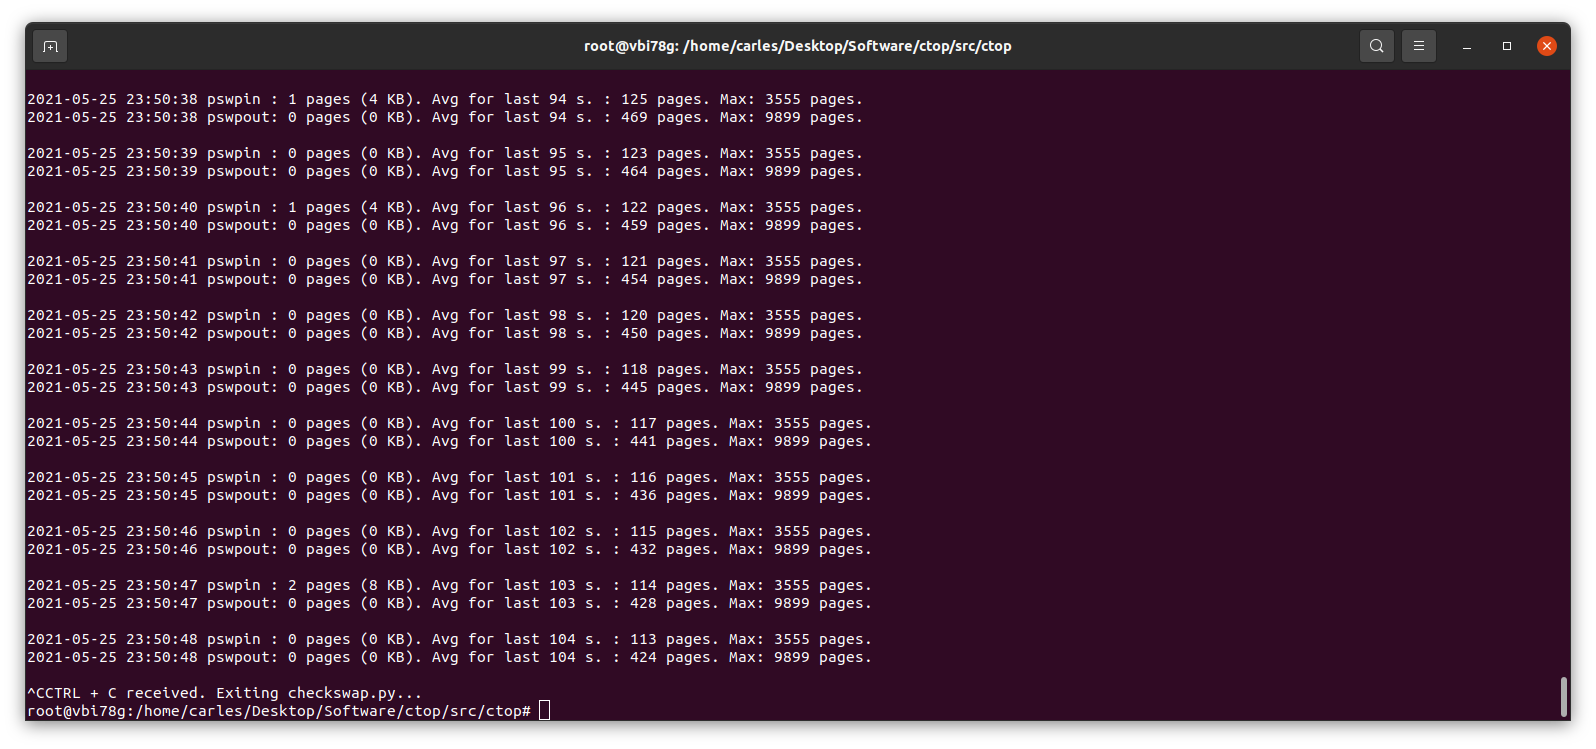
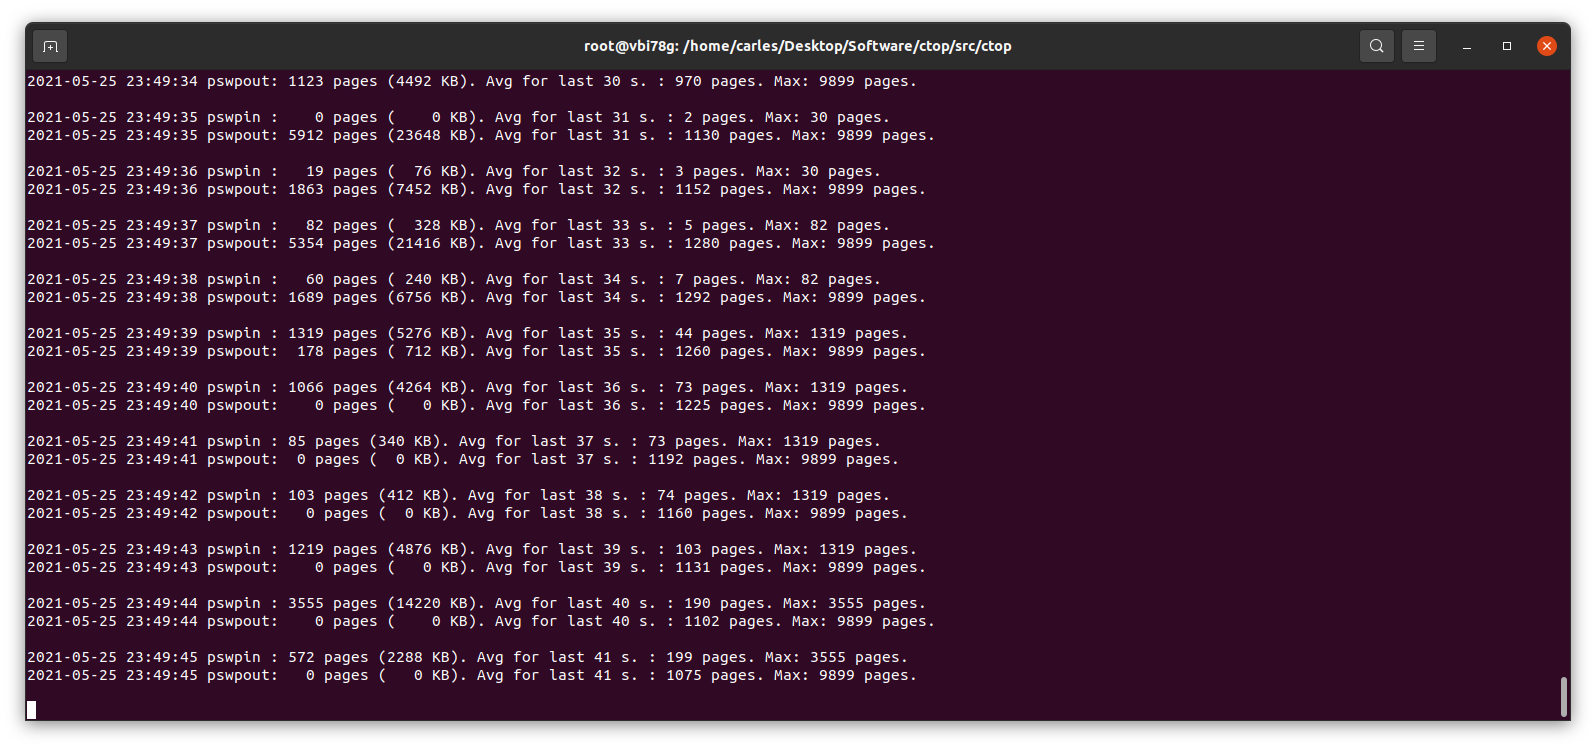
I wrote a small Python program to track those changes:

https://gitlab.com/carles.mateo/checkswap

This little program works in Python 2 and Python 3, and will show the evolution of pswpin and pswpout in /proc/vmstat and will offer the average for last 5 minutes and keep the max value detected as well.

As those values show the page swaps since the start of the Server, my little program, makes the adjustments to show the Page Swaps per second.

A cheap way to reproduce collapse by using swap is using VirtualBox: install an Ubuntu 20.04 LTS in there, with 2 GB of less of memory, and one single core. Ping that VM from elsewhere.

Then you may run a little program like this in order to force it to swap:

#!/usr/bin/env python3
a_items = []
i_total = 0
# Add zeros if your VM has more memory
for i in range(0, 10000000):
    i_total = i_total + i
    a_items.append(i_total)

And checkswap will show you the spikes:

Many voices are discordant. Some say swappiness default value of 60 is good, as Linux will use the RAM memory to optimize the IO. In my experience, I’ve seen Hypervisors Servers running Virtual Machines that fit on the available physical RAM and were doing pure CPU calculations, no IO, and the Hypervisor was swapping just because it had swappiness to 60. Also having swap on spinning drives, mixing swap partition and swapfile, and that slowing down everything. In a case like that it would be much better not using Swap at all.

In most cases the price of Swapping to disk is much more higher than the advantage than a buffer for IO brings. And in the case of a swapfile, well, it’s also a file, so my suspect is that the swapfile is also buffered. Nothing I recommend, honestly.

My program https://gitlab.com/carles.mateo/checkswap may help you to demonstrate how much damage the swapping is doing in terms of IO. Combine it with iostat and iotop --only to see how much bandwidth is wasted writing and reading from/to swap.

You may run checkswap from a screen session and launch it with tee so results are logged. For example:

python3 checkswap.py | tee 2021-05-27-2107-checkswap.log

If you want to automatically add the datetime you can use:

python3 checkswap.py | tee `date +%Y-%m-%d-%H%M`-checkswap.log

Press CTRL + a and then d, in order to leave the screen session and return to regular Bash.

Type screen -r to resume your session if this was the only screen session running in background.

An interesting reflection from help Ubuntu:

The “diminishing returns” means that if you need more swap space than twice your RAM size, you’d better add more RAM as Hard Disk Drive (HDD) access is about 10³ slower then RAM access, so something that would take 1 second, suddenly takes more then 15 minutes! And still more then a minute on a fast Solid State Drive (SSD)…

https://help.ubuntu.com/community/SwapFaq

Do you have a swap history that you want to share?.

A simple Bash one line script to log the temperature of your HDDs and CPUs in Ubuntu

I’ve been helping to troubleshoot the reason one Commodity Server (with no iDrac/Ilo ipmi) is powering off randomly. One of the hypothesis is the temperature.

This is a very simple script that will print the temperature of the HDDs and the CPU and keep to a log file.

First you need to install hddtemp and lm-sensors:

sudo apt install hddtemp lm-sensors

Then this is the one line script, that you should execute as root:

while [ true ]; do date | tee -a /var/log/hddtemp.log; hddtemp /dev/sda /dev/sdb /dev/sdc /dev/sdd | tee -a /var/log/hddtemp.log; date | tee -a /var/log/cputemp.log; sensors | tee -a /var/log/cputemp.log; sleep 2; done

Feel free to change sleep 2 for the number of seconds you want to wait, like sleep 10.

Press CTRL + C to interrupt the script at any time.

You can execute this inside a screen session and leave it running in Background.

Note that I use tee command, so the output is print to the screen and to the log file.

Some handy tricks for working with ZFS

Last Update: 2022-04-16 14:50 Irish time

Adding a RAM drive as SLOG (ZIL)

I came with this solution when one of my 4U60 Servers had two slots broken. You’ll not use this in Production, as SLOG loses its function, but I managed to use one $40K USD broken Server and to demonstrate that the Speed of the SLOG device (ZFS Intented Log or ZIL device) sets the constraints for the writing speed.

The ZFS DRAID config I was using required 60 drives, basically 58 14TB Spinning drives and 2 SSD for the SLOG ZIL. As I only had 58 slots I came with this idea.

This trick can be very useful if you have a box full of Spinning drives, and when sharing by iSCSI zvols you get disconnected in the iSCSI Initiator side. This is typical when ZFS has only Spinning drives and it has no SLOG drives (dedicated fast devices for the ZIL, ZFS INTENDED LOG)

Create a single Ramdrive of 10GB of RAM:

modprobe brd rd_nr=1 rd_size=10485760 max_part=0

Confirm ram0 device exists now:

ls /dev/ram*

Confirm that the pool is imported:

zpool list

Add to the pool:

zpool add carles-N58-C3-D16-P2-S4 log ram0

In the case that you want to have two ram devices as SLOG devices, in mirror.

zpool add carles-N58-C3-D16-P2-S4 log mirror <partition/drive 1> <partition/drive 2>

It is interesting to know that you can work with partitions instead of drives. So for this test we could have partitioned ram0 with 2 partitions and make it work in mirror. You’ll see how much faster the iSCSI communication goes over the network. The writing speed of the ZIL SLOG device is the constrain for ingesting Data from the Network to the Server.

Creating a partition bigger than 2TiB

Master Boot Record (MBR) based partitioning is limited to 2TiB however GUID Partition Table (GPT) has a limit of 8 ZiB.

That’s something very simply, but make you lose time if you’re partitioning big iSCSI Shares, or ZFS Zvols, so here is the trick:

[root@CTRLA-18 ~]# cat /etc/redhat-release 
 Red Hat Enterprise Linux Server release 7.6 (Maipo)
 [root@CTRLA-18 ~]# parted /dev/zvol/N58-C19-D2-P1-S1/vol54854gb 
 GNU Parted 3.1
 Using /dev/zd0
 Welcome to GNU Parted! Type 'help' to view a list of commands.
 (parted) mklabel gpt
 Warning: The existing disk label on /dev/zd0 will be destroyed and all data on this disk will be lost. Do you want to continue?
 Yes/No? y                                                                 
 (parted) print                                                            
 Model: Unknown (unknown)
 Disk /dev/zd0: 58.9TB
 Sector size (logical/physical): 512B/65536B
 Partition Table: gpt
 Disk Flags: 
 Number  Start  End  Size  File system  Name  Flags
 (parted) mkpart primary 0GB 58.9TB                                        
 (parted) print                                                            
 Model: Unknown (unknown)
 Disk /dev/zd0: 58.9TB
 Sector size (logical/physical): 512B/65536B
 Partition Table: gpt
 Disk Flags: 
 Number  Start   End     Size    File system  Name     Flags
  1      1049kB  58.9TB  58.9TB               primary
 (parted) quit                                                             
 Information: You may need to update /etc/fstab.
 [root@CTRLA-18 ~]# mkfs                                                   
 mkfs         mkfs.btrfs   mkfs.cramfs  mkfs.ext2    mkfs.ext3    mkfs.ext4    mkfs.minix   mkfs.xfs     
 [root@CTRLA-18 ~]# mkfs.ext4 /dev/zvol/N58-C19-D2-P1-S1/vol54854gb
 mke2fs 1.42.9 (28-Dec-2013)
....
[root@CTRLA-18 ~]# mount /dev/zvol/N58-C19-D2-P1-S1/vol54854gb /Data
[root@CTRLA-18 ~]# df -h
 Filesystem             Size  Used Avail Use% Mounted on
 /dev/mapper/rhel-root   50G  2.5G   48G   5% /
 devtmpfs               126G     0  126G   0% /dev
 tmpfs                  126G     0  126G   0% /dev/shm
 tmpfs                  126G  1.1G  125G   1% /run
 tmpfs                  126G     0  126G   0% /sys/fs/cgroup
 /dev/sdp1             1014M  151M  864M  15% /boot
 /dev/mapper/rhel-home   65G   33M   65G   1% /home
 logs                    49G  349M   48G   1% /logs
 mysql                  9.7G  128K  9.7G   1% /mysql
 tmpfs                   26G     0   26G   0% /run/user/0
 /dev/zd0                54T   20K   51T   1% /Data

ZFS is unable to use a disk

Some times, after creating many pools ZFS may be unable to create a new pool using a drive that is perfectly fine. In this situation, the ideal is wipe the first areas of it, or all of it if you want. If it’s an SSD that is very fast:

dd if=/dev/zero of=/dev/sdc bs=1M status=progress

The status=progress will show a nice progress bar.

Filling a half Petabyte pool as fast as possible

To fill a 60 drives pool composed by 10TB or 14TB spinning drives, so more than half PB, in order to test with real data, you can use this trick:

First, write to the Dataset directly, that’s way much more faster than using zvols.

Secondly, disable the ZIL, set sync=disabled.

Third, use a file in memory to avoid the paytime of reading the file from disk.

Fourth, increase the recordsize to 1M for faster filling (in my experience).

You can use this script of mine that does everything for you, normally you would like to run it inside an screen session, and create a Dataset called Data. The script will mount it in /Data (zfs set mountpoint=/data YOURPOOL/Data):

#!/usr/bin/env bash
# Created by Carles Mateo
FILE_ORIGINAL="/run/urandom.1GB"
FILE_PATTERN="/Data/urandom.1GB-clone."
# POOL="N56-C5-D8-P3-S1"
POOL="N58-C3-D16-P3-S1"
# The starting number, if you interrupt the filling process, you can update it just by updating this number to match the last partially written file
i_COPYING_INITIAL_NUMBER=1
# For 75% of 10TB (3x(16+3)+1 has 421TiB, so 75% of 421TiB or 431,104GiB is 323,328) use 323328
# i_COPYING_FINAL_NUMBER=323328
# For 75% of 10TB, 5x(8+3)+1 ZFS sees 352TiB, so 75% use 270336
# For 75% of 14TB, 3x(16+3)+1, use 453120
i_COPYING_FINAL_NUMBER=453120

# Creating an array that will hold the speed of the latest 1 minute
a_i_LATEST_SPEEDS=(0 0 0 0 0 0 0 0 0 0 0 0 0 0 0 0 0 0 0 0 0 0 0 0 0 0 0 0 0 0 0 0 0 0 0 0 0 0 0 0 0 0 0 0 0 0 0 0 0 0 0)
i_POINTER_SPEEDS=0
i_COUNTER_SPEEDS=-1
i_ITEMS_KEPT_SPEEDS=60
i_AVG_SPEED=0
i_FILES_TO_BE_COPIED=$((i_COPYING_FINAL_NUMBER-i_COPYING_INITIAL_NUMBER))

get_average_speed () {
# Calculates the Average Speed
   i_AVG_SPEED=0
   for i_index in {0..59..1}
       do
           i_SPEED=$((a_i_LATEST_SPEEDS[i_index]))
           i_AVG_SPEED=$((i_AVG_SPEED + i_SPEED))
       done
   i_AVG_SPEED=$((i_AVG_SPEED/((i_COUNTER_SPEEDS)+1)))
}


echo "Bash version ${BASH_VERSION}..."

echo "Disabling sync in the pool $POOL for faster speed"
zfs set sync=disabled $POOL
echo "Maximizing performance with recordsize"
zfs set recordsize=1M ${POOL}
zfs set recordsize=1M ${POOL}/Data
echo "Mounting the Dataset Data"
zfs set mountpoint=/Data ${POOL}/Data
zfs mount ${POOL}/Data

echo "Checking if file ${FILE_ORIGINAL} exists..."
if [[ -f ${FILE_ORIGINAL} ]]; then
    ls -al ${FILE_ORIGINAL}
    sha1sum ${FILE_ORIGINAL}
else
    echo "Generating file..."
    dd if=/dev/urandom of=${FILE_ORIGINAL} bs=1M count=1024 status=progress
fi

echo "Starting filling process..."
echo "We are going to copy ${i_FILES_TO_BE_COPIED} , starting from: ${i_COPYING_INITIAL_NUMBER} to: ${i_COPYING_FINAL_NUMBER}"

for ((i_NUMBER=${i_COPYING_INITIAL_NUMBER}; i_NUMBER<=${i_COPYING_FINAL_NUMBER}; i_NUMBER++));
    do
        s_datetime_ini=$(($(date +%s%N)/1000000))
        DATE_NOW=`date '+%Y-%m-%d_%H-%M-%S'`
        echo "${DATE_NOW} Copying ${FILE_ORIGINAL} to ${FILE_PATTERN}${i_NUMBER}"
        cp ${FILE_ORIGINAL} ${FILE_PATTERN}${i_NUMBER}
        s_datetime_end=$(($(date +%s%N)/1000000))
        MILLISECONDS=$(expr "$s_datetime_end" - "$s_datetime_ini")
        if [[ ${MILLISECONDS} -lt 1 ]]; then
            BANDWIDTH_MBS="Unknown (too fast)"
            # That sould not happen, but if did, we don't account crazy speeds
        else
            BANDWIDTH_MBS=$((1000*1024/MILLISECONDS))
            # Make sure the Array space has been allocated
            if [[ ${i_POINTER_SPEEDS} -gt ${i_COUNTER_SPEEDS} ]]; then
                # Add item to the Array the first times only
                a_i_LATEST_SPEEDS[i_POINTER_SPEEDS]=${BANDWIDTH_MBS}
                i_COUNTER_SPEEDS=$((i_COUNTER_SPEEDS+1))
            else
                a_i_LATEST_SPEEDS[i_POINTER_SPEEDS]=${BANDWIDTH_MBS}
            fi
            i_POINTER_SPEEDS=$((i_POINTER_SPEEDS+1))
            if [[ ${i_POINTER_SPEEDS} -ge ${i_ITEMS_KEPT_SPEEDS} ]]; then
                i_POINTER_SPEEDS=0
            fi
            get_average_speed
        fi
        i_FILES_TO_BE_COPIED=$((i_FILES_TO_BE_COPIED-1))
        i_REMAINING_TIME=$((1024*i_FILES_TO_BE_COPIED/i_AVG_SPEED))
        i_REMAINING_HOURS=$((i_REMAINING_TIME/3600))
        echo "File cloned in ${MILLISECONDS} milliseconds at ${BANDWIDTH_MBS} MB/s"
        echo "Avg. Speed: ${i_AVG_SPEED} MB/s Remaining Files: ${i_FILES_TO_BE_COPIED} Remaining seconds: ${i_REMAINING_TIME} s. (${i_REMAINING_HOURS} h.)"
    done

echo "Enabling sync=always"
zfs set sync=always ${POOL}
echo "Setting back recordsize to 128K"
zfs set recordsize=128K ${POOL}
zfs set recordsize=128K ${POOL}/Data
echo "Unmounting /Data"
zfs set mountpoint=none ${POOL}/Data

Creating a Sparse file that you can partition or create a loopback on it

I know, your laptop has 512GB of M.2 SSD or NVMe, so that’s it.

Well, you can create a sparse file much more bigger than your capacity, and use 0 bytes of it at all.

For example:

truncate -s 1600GB file_disk0.img

If the files are stored in / then you can add a loop device:

sudo losetup -f /file_disk0.img

I do with the 5 I created.

Then you can check that they exist with:

lsblk

or

cat /proc/partitions

The loop devices will appear under /dev/ now.

For some tests I did this in a Virtual Box Virtual Machine:

root@ansiblemaster:/home/carles# truncate -s 1GB /file_disk0.img
root@ansiblemaster:/home/carles# truncate -s 1GB /file_disk1.img
root@ansiblemaster:/home/carles# truncate -s 1GB /file_disk2.img
root@ansiblemaster:/home/carles# sudo losetup -f /file_disk0.img
root@ansiblemaster:/home/carles# sudo losetup -f /file_disk1.img
root@ansiblemaster:/home/carles# sudo losetup -f /file_disk2.img
root@ansiblemaster:/home/carles# lsblk
NAME                      MAJ:MIN RM   SIZE RO TYPE MOUNTPOINT
loop0                       7:0    0  61.9M  1 loop /snap/core20/1270
loop1                       7:1    0  94.5M  1 loop /snap/go/9028
loop2                       7:2    0  61.9M  1 loop /snap/core20/1328
loop3                       7:3    0    15M  1 loop /snap/aws-cli/130
loop4                       7:4    0  55.5M  1 loop /snap/core18/2344
loop5                       7:5    0 110.8M  1 loop /snap/core/12725
loop6                       7:6    0  55.5M  1 loop /snap/core18/2284
loop7                       7:7    0  67.8M  1 loop /snap/lxd/22753
loop8                       7:8    0  67.2M  1 loop /snap/lxd/21835
loop9                       7:9    0  38.7M  1 loop /snap/postgresql10/47
loop10                      7:10   0  43.6M  1 loop /snap/snapd/14978
loop11                      7:11   0    12M  1 loop /snap/slcli/2072
loop12                      7:12   0 254.4M  1 loop /snap/google-cloud-sdk/226
loop13                      7:13   0 293.2M  1 loop /snap/google-cloud-sdk/234
loop14                      7:14   0  43.6M  1 loop /snap/snapd/15177
loop15                      7:15   0  12.3M  1 loop /snap/slcli/2111
loop16                      7:16   0  99.4M  1 loop /snap/go/9415
loop17                      7:17   0 953.7M  0 loop 
loop18                      7:18   0 953.7M  0 loop 
loop19                      7:19   0 953.7M  0 loop 
sda                         8:0    0    20G  0 disk 
├─sda1                      8:1    0     1M  0 part 
├─sda2                      8:2    0     1G  0 part /boot
└─sda3                      8:3    0    19G  0 part 
  └─ubuntu--vg-ubuntu--lv 253:0    0    19G  0 lvm  /
sr0                        11:0    1  1024M  0 rom  
root@ansiblemaster:/home/carles# cat /proc/partitions 
major minor  #blocks  name

   7        0      63392 loop0
   7        1      96796 loop1
   7        2      63396 loop2
   7        3      15324 loop3
   7        4      56848 loop4
   7        5     113456 loop5
   7        6      56840 loop6
   7        7      69440 loop7
  11        0    1048575 sr0
   8        0   20971520 sda
   8        1       1024 sda1
   8        2    1048576 sda2
   8        3   19919872 sda3
 253        0   19918848 dm-0
   7        8      68856 loop8
   7        9      39632 loop9
   7       10      44632 loop10
   7       11      12244 loop11
   7       12     260484 loop12
   7       13     300224 loop13
   7       14      44676 loop14
   7       15      12584 loop15
   7       16     101792 loop16
   7       17     976562 loop17
   7       18     976562 loop18
   7       19     976562 loop19

Finally I create a ZFS pool:

root@ansiblemaster:/home/carles# zpool create zfspool raidz loop17 loop18 loop19
root@ansiblemaster:/home/carles# zpool status
  pool: zfspool
 state: ONLINE
  scan: none requested
config:

	NAME        STATE     READ WRITE CKSUM
	zfspool     ONLINE       0     0     0
	  raidz1-0  ONLINE       0     0     0
	    loop17  ONLINE       0     0     0
	    loop18  ONLINE       0     0     0
	    loop19  ONLINE       0     0     0

errors: No known data errors