When you see this error for the first time it can be pretty ugly to detect why it happens.
At personal level I use only Linux for my computers, with an exception of a windows laptop that I keep for specific tasks. But my employers often provide me laptops with windows.
I suffered this error for first time when I inherited a project, in a company I joined time ago. And I suffered some time later, by the same reason, so I decided to explain it easily.
In the project I inherited the build process was broken, so I had to fix it, and when this was done I got the mentioned error when trying to run the Container:
standard_init_linux.go:190: exec user process caused "no such file or directory"
The Dockerfile was something like this:
FROM docker-io.battle.net/alpine:3.10.0

LABEL Author="Carles Mateo" \
      Email="docker@carlesmateo.com" \
      MAINTAINER="Carles Mateo"

ENV SERVICE cservice

RUN set -ex

RUN echo "Creating directories and copying code" \
    && mkdir -p /opt/${SERVICE}

COPY config.prod \
    config.dev \
    config.st \
    requirements.txt \
    utils.py \
    cservice.py \
    tests/test_cservice.py \
    run_cservice.sh \
    /opt/${SERVICE}/

RUN echo "Setting work directory and listening port"
WORKDIR /opt/${SERVICE}
EXPOSE 7000

RUN echo "Installing dependencies" \
    && apk add build-base openldap-dev python3-dev py-pip \
    && pip3 install --upgrade pip \
    && pip3 install -r requirements.txt \
    && pip3 install pytest

ENTRYPOINT ["./run_cservice.sh"]
So the project was executing a Bash script run_cservice.sh, via Dockerfile ENTRYPOINT.
That script would do the necessary amends depending if the Container is launched with prod, dev, or staging parameter.
I debugged until I saw that the Container never executed this in the expected way.
A echo “Debug” on top of the Bash Script would be enough to know that very basic call was never executed. The error was first.
After much troubleshooting the Container I found that the problem was that the Bash script, that was copied to the container with COPY in the Dockerfile, from a Windows Machines, contained CRLF Windows carriage return. While for Linux and Mac OS X carriage return is just a character, LF.
In that company we all use Windows. And trying to build the Container worked after removing the CRLF, but the Bash script with CRLF was causing that problem.
When I replace the CRLF by Unix type LF, and rebuild the image, and ran the container, it worked lovely.
A very easy, manual way, to do this in Windows, is opening your file with Notepad++ and setting LF as carriage return. Save the file, rebuild, and you’ll see your Container working.
Please note that in the Dockerfile provided I install pytest Framework and a file calles tests/test_cservice.py. That was not in the original Dockerfile, but I wanted to share with you that I provide Unit Testing that can be ran from a Linux Container, for all my projects. What normally I do is to have two Dockerfiles. One for the Production version to be deployed, another for running Unit Testing, and some time functional testing as well, from inside the Docker Container. So strictly speaking for the production version, I would not copy the tests/test_cservice.py and install pytest. A different question are internal Automation Tools, where it may be interested providing a All-in-One image, that can run the Unit Testing before start the service. It is interesting to provide some debugging tools in out Internal Automation Tools, so we can troubleshoot what’s going on in case of problems. Take a look at my previous article about Python version for Docker and Automation tools, for more considerations.
I wanted to automate certain operations that we do very often, and so I decided to do a PoC of how handy will it be to create GUI applications that can automate tasks.
As locating information in several repositories of information (ldap, databases, websites, etc…) can be tedious I decided to create a small program that queries LDAP for the information I’m interested, in this case a Location. This small program can very easily escalated to launch the VPN, to query a Database after querying LDAP if no results are found, etc…
I share with you the basic application as you may find interesting to create GUI applications in Python, compatible with Windows, Linux and Mac.
I’m super Linux fan but this is important, as many multinationals still use Windows or Mac even for Engineers and SRE positions.
With the article I provide a Dockerfile and a docker-compose.yml file that will launch an OpenLDAP Docker Container preloaded with very basic information and a PHPLDAPMIN Container.
This is a trick to restart a Service that is running on a immutable Docker, with some change, and you need to refresh the values very quickly without having to roll the CI/CD Jenkins Pipeline and uploading a new image.
So why would you need to do that?.
I can think about possible scenarios like:
Need to roll out an urgent fix in a time critical manner
Jenkins is broken
Somebody screw it on the git master branch
Docker Hub is down
GitHub is down
Your artifactory is down
The lines between your jumpbox or workstation and the secure Server are down and you have really few bandwidth
You have to fix something critical and you only have a phone with you and SSH only
Maybe the Dockerfile had latest, and the latest image has changed
FROM os:latest
The ideal is that if you work with immutable images, you roll out a new immutable image and that’s it.
But if for whatever reason you need to update this super fast, this trick may become really handy.
Let’s go for it!.
Normally you’ll start your container with a command similar to this:
docker run -d --rm -p 5000:5000 api_carlesmateo_com:v7 prod
The first thing we have to do is to stop the container.
So:
docker ps
Locate your container across the list of running containers and stop it, and then restart without the –rm:
docker stop container_name
docker run -d -p 5000:5000 api_carlesmateo_com:v7 prod
the –rm makes the container to cleanup. By default a container’s file system persists even after the container exits. So don’t start it with –rm.
Ok, so login to the container:
docker exec -it container_name /bin/sh
Edit the config you require to change, for example config.yml
If what you have to update is a password, and is encoded in base64, encode it:
echo -n "ThePassword" | base64
VGhlUGFzc3dvcmQ=
Stop the container. You can do it by stopping the container with docker stop or from inside the container, killing the listening process, probably a Python Flask.
If your Dockerfile ends with something like:
ENTRYPOINT ["./webservice.py"]
And webservice.py has Python Flask code similar to this:
#!/usr/bin/python3
#
# webservice.py
#
# Author: Carles Mateo
# Creation Date: 2020-05-10 20:50 GMT+1
# Description: A simple Flask Web Application
#              Part of the samples of https://leanpub.com/pythoncombatguide
#              More source code for the book at https://gitlab.com/carles.mateo/python_combat_guide
#


from flask import Flask, request
import logging

# Initialize Flask
app = Flask(__name__)


# Sample route so http://127.0.0.1/carles
@app.route('/carles', methods=['GET'])
def carles():
    logging.critical("A connection was established")
    return "200"

logging.info("Initialized...")

if __name__ == "__main__":
    app.run(host='0.0.0.0', port=5000, debug=True)
Then you can kill the process, and so ending the container, from inside the container by doing:
This will finish the container the same way as docker stop container_name.
Then start the container (not run)
docker start container_name
You can now test from outside or from inside the container. If from inside:
/opt/webservice # wget localhost:5000/carles
Connecting to localhost:5000 (127.0.0.1:5000)
carles               100% |**************************************************************************************************************|     3  0:00:00 ETA
/opt/webservice # cat debug.log
2020-05-06 20:46:24,349 Initialized...
2020-05-06 20:46:24,359  * Running on http://0.0.0.0:5000/ (Press CTRL+C to quit)
2020-05-06 20:46:24,360  * Restarting with stat
2020-05-06 20:46:24,764 Initialized...
2020-05-06 20:46:24,771  * Debugger is active!
2020-05-06 20:46:24,772  * Debugger PIN: 123-456-789
2020-05-07 13:18:43,890 127.0.0.1 - - [07/May/2020 13:18:43] "GET /carles HTTP/1.1" 200 -
if you don’t use YAML files or what you need is to change the code, all this can be avoided as when you update the Python code, Flash realizes that and reloads. See this line in the logs:
2020-05-07 13:18:40,431 * Detected change in '/opt/webservice/wwebservice.py', reloading
The webservice.py autoreloads because we init Flask with debug set to on.
You can also start a container with shell directly:
Update: 2021-07-23 Ubuntu 19.04 is no longer available, so I updated the article in order to work with Ubuntu 20.04. and with PHP 7.4 and all their dependencies.
This was interesting under the point of view of dealing with elastic Ip’s, Amazon AWS Volumes, etc… but was a process basically manual. I could have generated an immutable image to start from next time, but this is another discussion, specially because that Server Instance has different base Software, including a MySql Database.
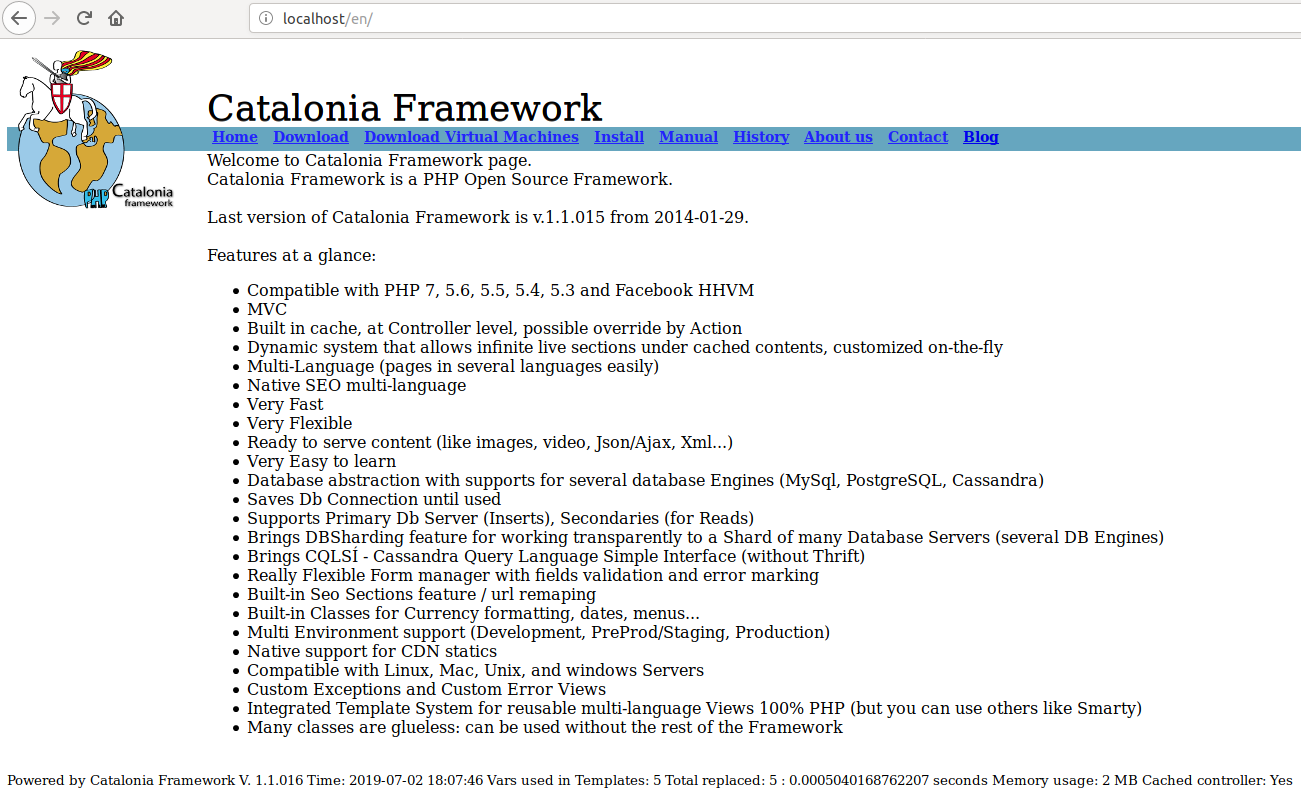
This time I want to explain, step by step, how to containerize my Server, so I can port to different platforms, and I can be independent on what the Server Operating System is. It will work always, as we defined the Operating System for the Docker Container.
So we start to use IaC (Infrastructure as Code).
So first you need to install docker.
So basically if your laptop is an Ubuntu 18.04 LTS or 20.04 LTS you have to:
sudo apt install docker.io
Start and Automate Docker
The Docker service needs to be setup to run at startup. To do so, type in each command followed by enter:
sudo systemctl start docker
sudo systemctl enable docker
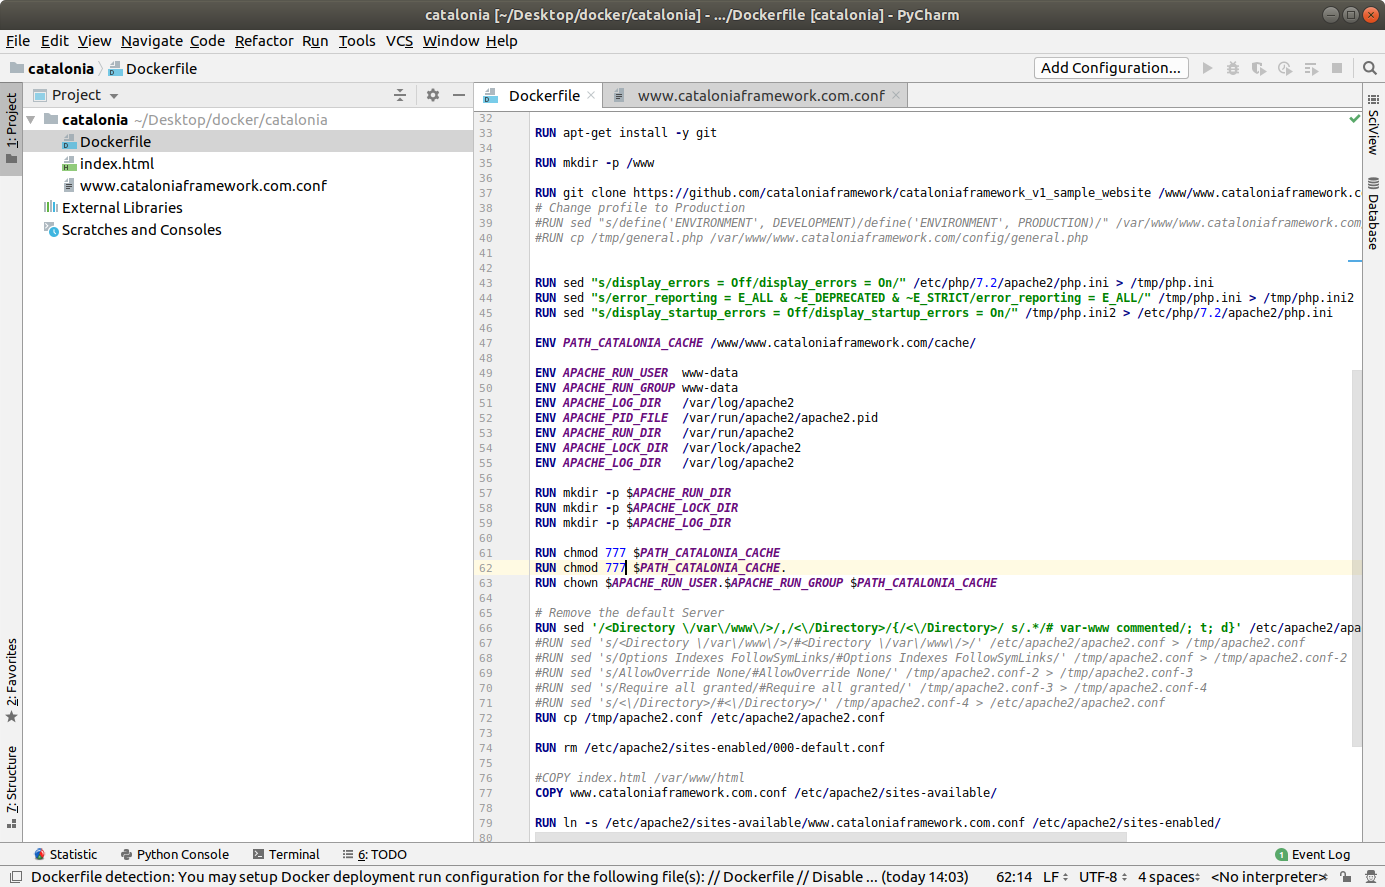
Create the Dockerfile
For doing this you can use any text editor, but as we are working with IaC why not use a Code Editor?.
You can use the versatile PyCharm, that has modules for understanding Docker and so you can use Control Version like git too.
This is the updated Dockerfile to work with Ubuntu 20.04 LTS
FROM ubuntu:20.04

MAINTAINER Carles <carles@carlesmateo.com>

ARG DEBIAN_FRONTEND=noninteractive

#RUN echo "nameserver 8.8.8.8" > /etc/resolv.conf

RUN echo "Europe/Ireland" | tee /etc/timezone

# Note: You should install everything in a single line concatenated with
#       && and finalizing with
# apt autoremove && apt clean

#       In order to use the less space possible, as every command is a layer
RUN apt update && apt install -y apache2 ntpdate libapache2-mod-php7.4 mysql-server php7.4-mysql php-dev libmcrypt-dev php-pear git && apt autoremove && apt clean

RUN a2enmod rewrite

RUN mkdir -p /www

# In order to activate Debug
# RUN sed -i "s/display_errors = Off/display_errors = On/" /etc/php/7.2/apache2/php.ini
# RUN sed -i "s/error_reporting = E_ALL & ~E_DEPRECATED & ~E_STRICT/error_reporting = E_ALL/" /etc/php/7.2/apache2/php.ini
# RUN sed -i "s/display_startup_errors = Off/display_startup_errors = On/" /etc/php/7.2/apache2/php.ini
# To Debug remember to change:
# config/{production.php|preproduction.php|devel.php|docker.php}
# in order to avoid Error Reporting being set to 0.

ENV PATH_CATALONIA /www/www.cataloniaframework.com/
ENV PATH_CATALONIA_WWW /www/www.cataloniaframework.com/www/
ENV PATH_CATALONIA_CACHE /www/www.cataloniaframework.com/cache/

ENV APACHE_RUN_USER  www-data
ENV APACHE_RUN_GROUP www-data
ENV APACHE_LOG_DIR   /var/log/apache2
ENV APACHE_PID_FILE  /var/run/apache2/apache2.pid
ENV APACHE_RUN_DIR   /var/run/apache2
ENV APACHE_LOCK_DIR  /var/lock/apache2
ENV APACHE_LOG_DIR   /var/log/apache2

RUN mkdir -p $APACHE_RUN_DIR
RUN mkdir -p $APACHE_LOCK_DIR
RUN mkdir -p $APACHE_LOG_DIR
RUN mkdir -p $PATH_CATALONIA
RUN mkdir -p $PATH_CATALONIA_WWW
RUN mkdir -p $PATH_CATALONIA_CACHE

# Remove the default Server
RUN sed -i '/<Directory \/var\/www\/>/,/<\/Directory>/{/<\/Directory>/ s/.*/# var-www commented/; t; d}' /etc/apache2/apache2.conf

RUN rm /etc/apache2/sites-enabled/000-default.conf

COPY www.cataloniaframework.com.conf /etc/apache2/sites-available/

RUN chmod 777 $PATH_CATALONIA_CACHE
RUN chmod 777 $PATH_CATALONIA_CACHE.
RUN chown --recursive $APACHE_RUN_USER.$APACHE_RUN_GROUP $PATH_CATALONIA_CACHE

RUN ln -s /etc/apache2/sites-available/www.cataloniaframework.com.conf /etc/apache2/sites-enabled/

# Note: You should clone locally and COPY to the Docker Image
#       Also you should add the .git directory to your .dockerignore file
#       I made this way to show you and for simplicity, having everything
#       in a single file
##RUN git clone https://github.com/cataloniaframework/cataloniaframework_v1_sample_website /www/www.cataloniaframework.com
##RUN git checkout tags/v.1.16-web-1.0
# In order to change profile to Production
# RUN sed -i "s/define('ENVIRONMENT', DOCKER)/define('ENVIRONMENT', PRODUCTION)/" /var/www/www.cataloniaframework.com/config/general.php
COPY *.php /www/www.cataloniaframework.com/www

# for debugging
#RUN apt-get install -y vim

RUN service apache2 restart

EXPOSE 80

CMD ["/usr/sbin/apache2", "-D", "FOREGROUND"]
This will copy the file www.cataloniaframework.com.conf that must be in the same directory that the Dockerfile file, to the /etc/apache2/sites-available/ folder in the container.
<VirtualHost *:80>
ServerAdmin webmaster@cataloniaframework.com# Uncomment to use a DNS name in a multiple VirtualHost Environment #ServerName www.cataloniaframework.com #ServerAlias cataloniaframework.com DocumentRoot /www/www.cataloniaframework.com/www
<Directory /www/www.cataloniaframework.com/www/>
Options -Indexes +FollowSymLinks +MultiViews AllowOverride All Order allow,deny allow from all Require all granted
</Directory>
ErrorLog ${APACHE_LOG_DIR}/www-cataloniaframework-com-error.log # Possible values include: debug, info, notice, warn, error, crit, # alert, emerg. LogLevel warn CustomLog ${APACHE_LOG_DIR}/www-cataloniaframework-com-access.log combined
</VirtualHost>
Stopping, starting the docker Service and creating the Catalonia image
service docker stop && service docker start
To build the Docker Image we will do:
docker build -t catalonia . --no-cache
I use the –no-cache so git is pulled and everything is reworked, not kept from cache.
Now we can run the Catalonia Docker, mapping the 80 port.
docker run -d -p 80:80 catalonia
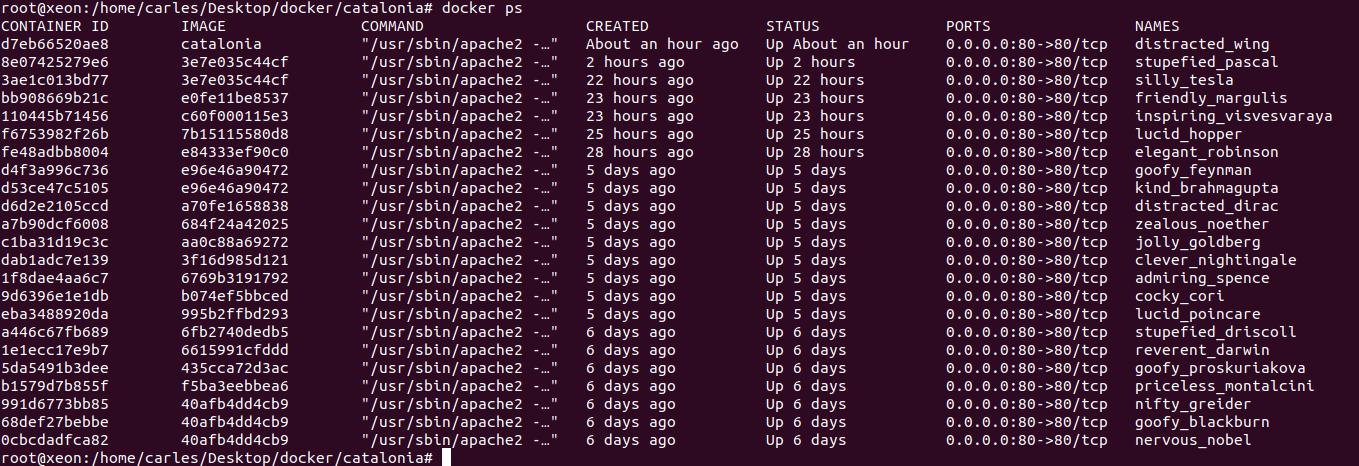
If you want to check what’s going on inside the Docker, you’ll do:
docker ps
And so in this case, we will do:
docker exec -i -t distracted_wing /bin/bash
Finally I would like to check that the web page works, and I’ll use my preferred browser. In this case I will use lynx, the text browser, cause I don’t want Firefox to save things in the cache.