v.0.29 and v.0.28 Python 3 Simple Exercises for Beginners Added a new section Games, with a first game “Guess my number”
Provided a solution for the recipe Exercise 3: Create a function that will ask a user for a number from Keyboard input, and return the result, only when the value is between the accepted ranges.
Added two new questions to the Quiz section.
Fixed a docstring in Recipes Exercise 4, referring to a String return value which it was an Integer.
Added an exercise for retrieving a JSON with your public Ip
Added a new exercise for converting bytes to kilobytes with two decimal positions.
Added a new exercise / recipe to SSH to a Server with Username and Password and execute a command, using the Paramiko library.
Added a new exercise / recipe to SSH to a Server with Username and Password and execute a command using Paramiko library. I added two examples executing commands uptime and df -h /
Show an alternative way to run Flask apps.
Added new interesting packages.
As long as covid is active I plan to keep the minimum price of each of my books at the minimum accepted by LeanPub which is USD $5.
I also enable bundles and enable LeanPub to make punctual discounts to make them even more affordable to humble pockets.
I’m going to teach an initiation to programming class, a live Zoom session of 1 hour, plus 15 minutes for questions, for Free. It will be a very basic starting class for absolute beginners.
It will be performed at a time around 19:00 Irish time, wich is 11:00 AM in Irivine, CA time, to maximize the opportunities for people to assist.
If you would like to join, write me an email:
There are not many spots available, but if there is no room for you this time I may contact you for the next time.
This version adds class StringUtils, and a set of methods to perform different useful tasks with Strings, like converting a number to the biggest unit with sense, like a large number of bytes to PB, a smaller one to TB, or GB, MB, KB, justifying strings to the right or to the left, and cap the number of chars to a specified one, etc…
I have many libraries that I’ve been building across the years, and I’m liberating them as Open Source, as soon as I have time to make sure that are compatible with Python 3.5 or superior (and with Python 2.6 when possible), and I have time to add a decent Unit Testing Code Coverage.
I try to release libraries that have no other dependencies. After that I’ll start releasing my libs that have dependencies, like to work with MySQL, SQLite, web scrapping, etc…
I had this idea after one my Python and Linux students with two laptops, a Mac OS X and a Windows one explained me that the Mac OS X is often taken by their daughters, and that the Windows 10 laptop has not enough memory to run PyCharm and Virtual Box fluently. She wanted to have a Linux VM to practice Linux, and do the Bash exercises.
So this article explains how to create a Ubuntu 20.04 LTS Docker Container, and execute a shell were you can practice Linux, Ubuntu, Bash, and you can use it to run Python, Apache, PHP, MySQL… as well, if you want.
You need to install Docker for Windows of for Mac:
Just pay attention to your type of processor: Mac with Intel chip or Mac with apple chip.
The first thing is to create the Dockerfile.
FROM ubuntu:20.04

MAINTAINER Carles Mateo

ARG DEBIAN_FRONTEND=noninteractive

RUN apt update && \
    apt install -y vim python3-pip &&  \
    apt install -y net-tools mc htop less strace zip gzip lynx && \
    pip3 install pytest && \
    apt-get clean

RUN echo "#!/bin/bash\nwhile [ true ]; do sleep 60; done" > /root/loop.sh; chmod +x /root/loop.sh

CMD ["/root/loop.sh"]
So basically the file named Dockerfile contains all the blueprints for our Docker Container to be created.
You see that I all the installs and clean ups in one single line. That’s because Docker generates a layer of virtual disk per each line in the Dockerfile. The layers are persistent, so even if in the next line we delete the temporary files, the space used will not be recovered.
You see also that I generate a Bash file with an infinite loop that sleeps 60 seconds each loop and save it as /root/loop.sh This is the file that later is called with CMD, so basically when the Container is created will execute this infinite loop. Basically we give to the Container a non ending task to prevent it from running, and exiting.
Now that you have the Dockerfile is time to build the Container.
For Mac open a terminal and type this command inside the directory where you have the Dockerfile file:
sudo docker build -t cheap_ubuntu .
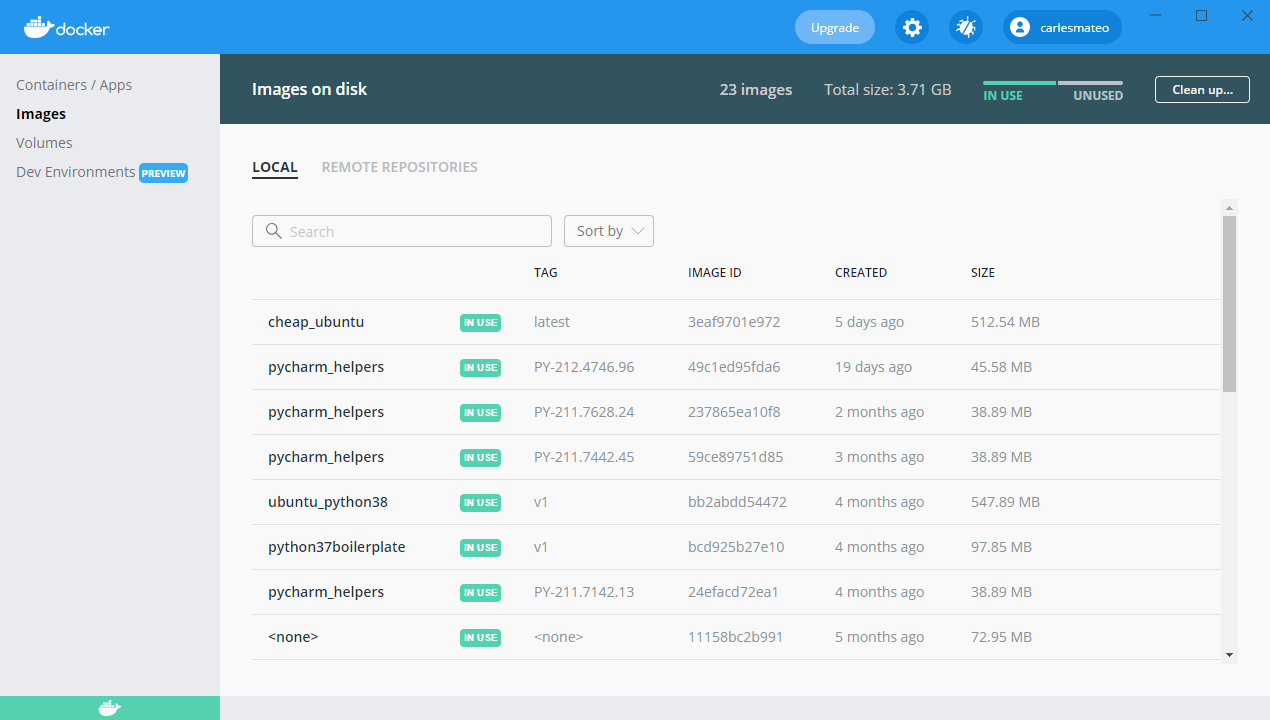
I called the image cheap_ubuntu but you can set the name that you prefer.
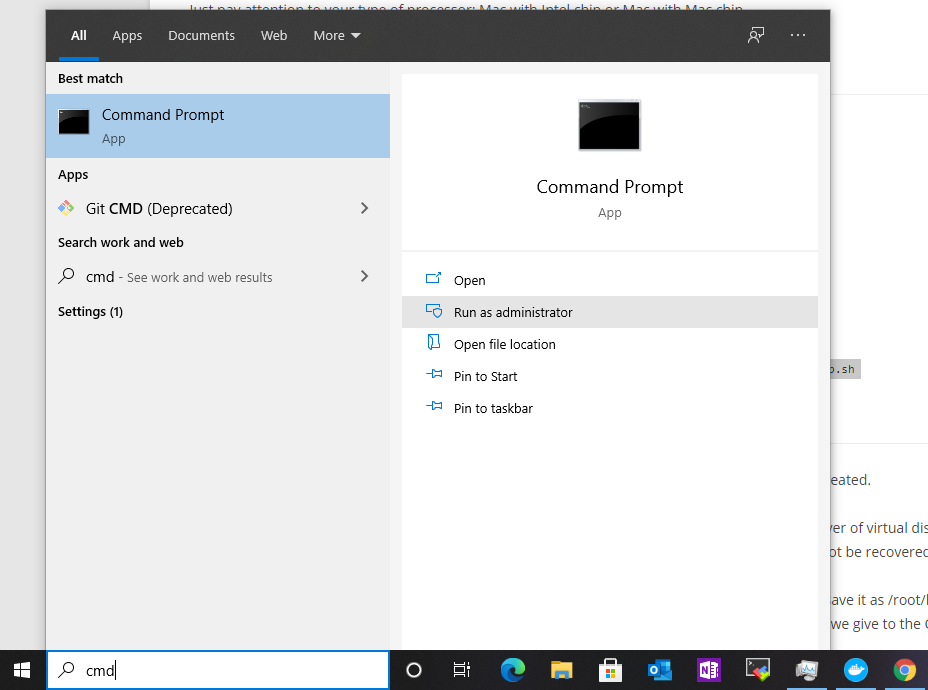
For Windows 10 open a Command Prompt with Administrative rights and then change directory (cd) to the one that has your Dockerfile file.
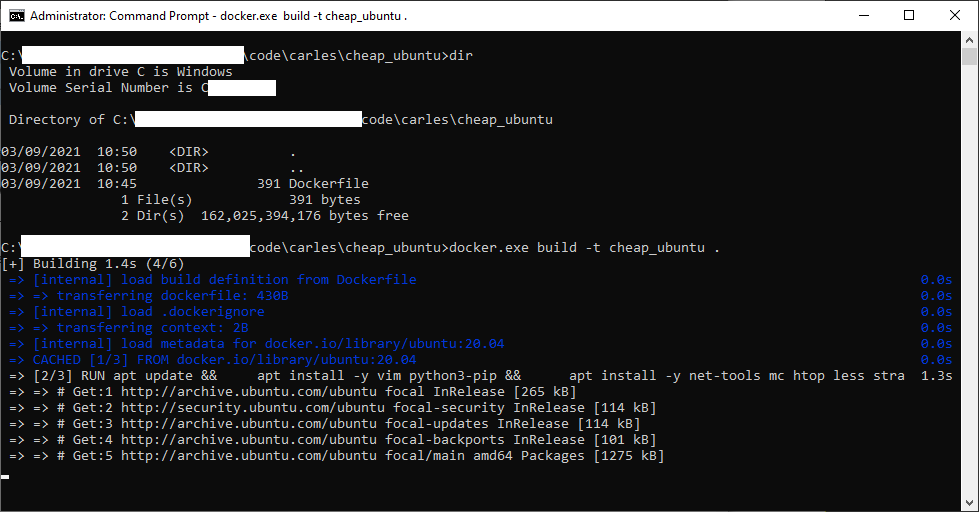
docker.exe build -t cheap_ubuntu .
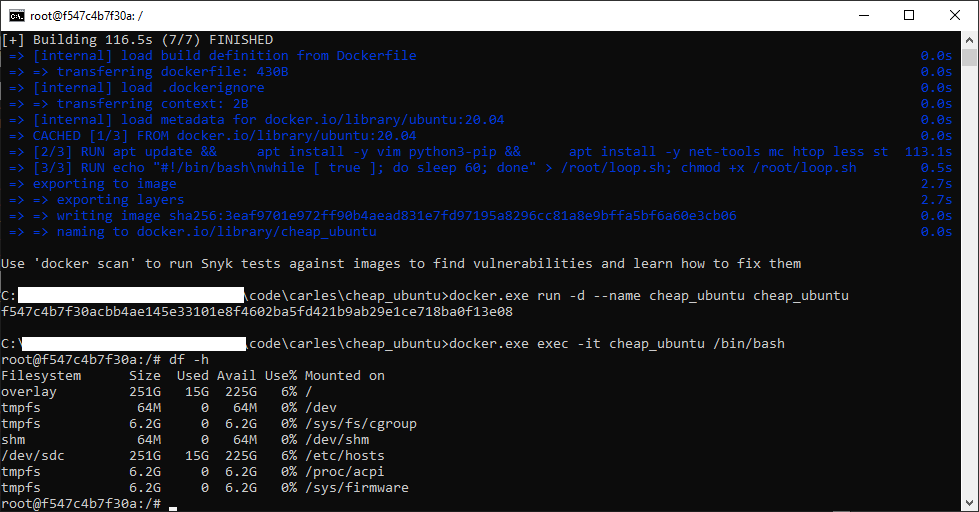
Image being built… (some data has been covered in white)
Now that you have the image built, you can create a Container based on it.
For Mac:
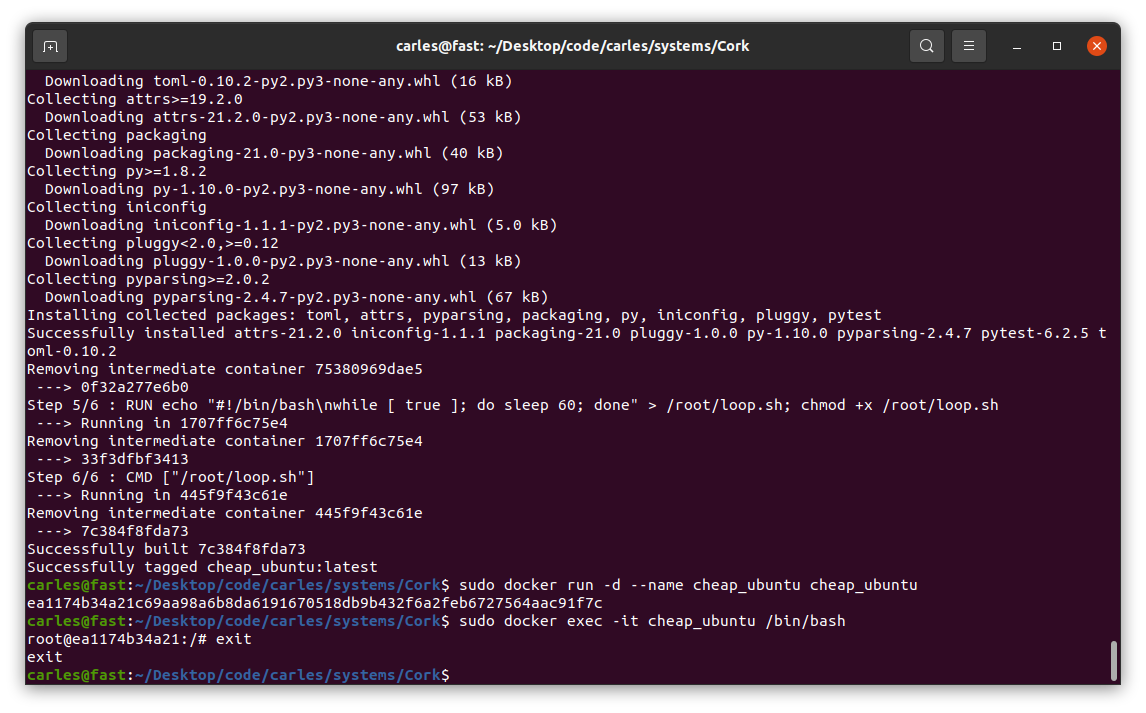
sudo docker run -d --name cheap_ubuntu cheap_ubuntu
For Windows (you can use docker.exe or just docker):
docker.exe run -d --name cheap_ubuntu cheap_ubuntu
Now you have Container named cheap_ubuntu based on the image cheap_ubuntu.
It’s time to execute an interactive shell and be able to play:
sudo docker exec -it cheap_ubuntu /bin/bash
For Windows:
docker.exe exec -it cheap_ubuntu /bin/bash
Our Ubuntu terminal inside Windows
Now you have an interactive shell, as root, to your cheap_ubuntu Ubuntu 20.04 LTS Container.
You’ll not be able to run the graphical interface, but you have a complete Ubuntu to learn to program in Bash and to use Linux from Command Line.
You will exit the interactive Bash session in the container with:
exit
If you want to stop the Container:
sudo docker stop cheap_ubuntu
Or for Windows:
docker.exe stop cheap_ubuntu
If you want to see what Containers are running do:
The addition I made to this version is StringUtils class which offer functionalities for handling amount conversions (to different units), number formatting, string formatting and align (left, right…). I added a 85% of Unit Testing Code Coverage.
Here you have some general information about how to install and how to use the package:
I completed my ZFS on Ubuntu 20.04 LTS book. I had an error in an actual hard drive so I added a Troubleshooting section explaining how I fixed it.
I paused for a while the advance of my book Python: basic exercises for beginners, as my colleague Michela is translating it to Italian. She is a great Engineer and I cannot be more happy of having her help.
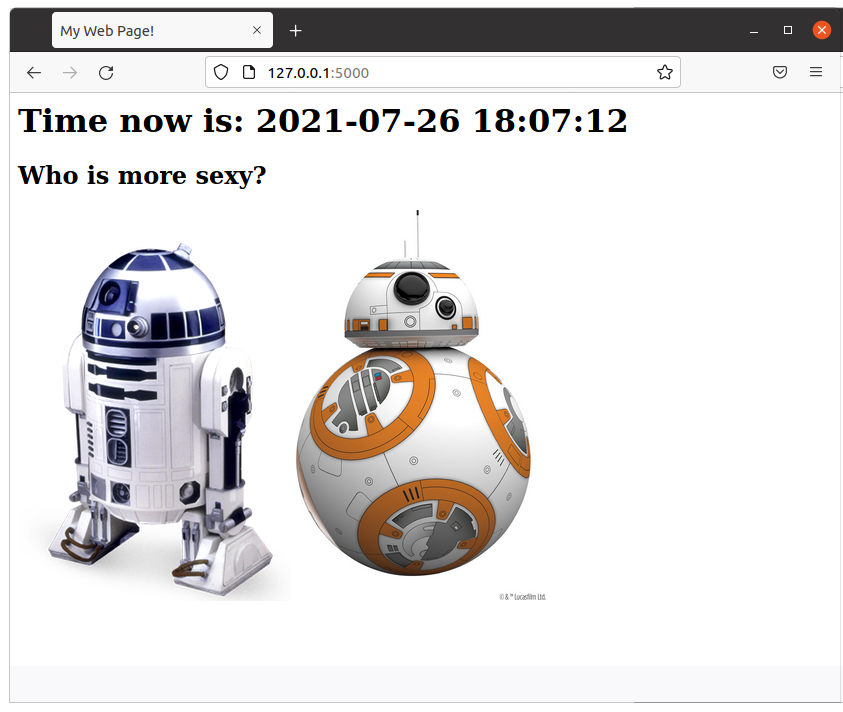
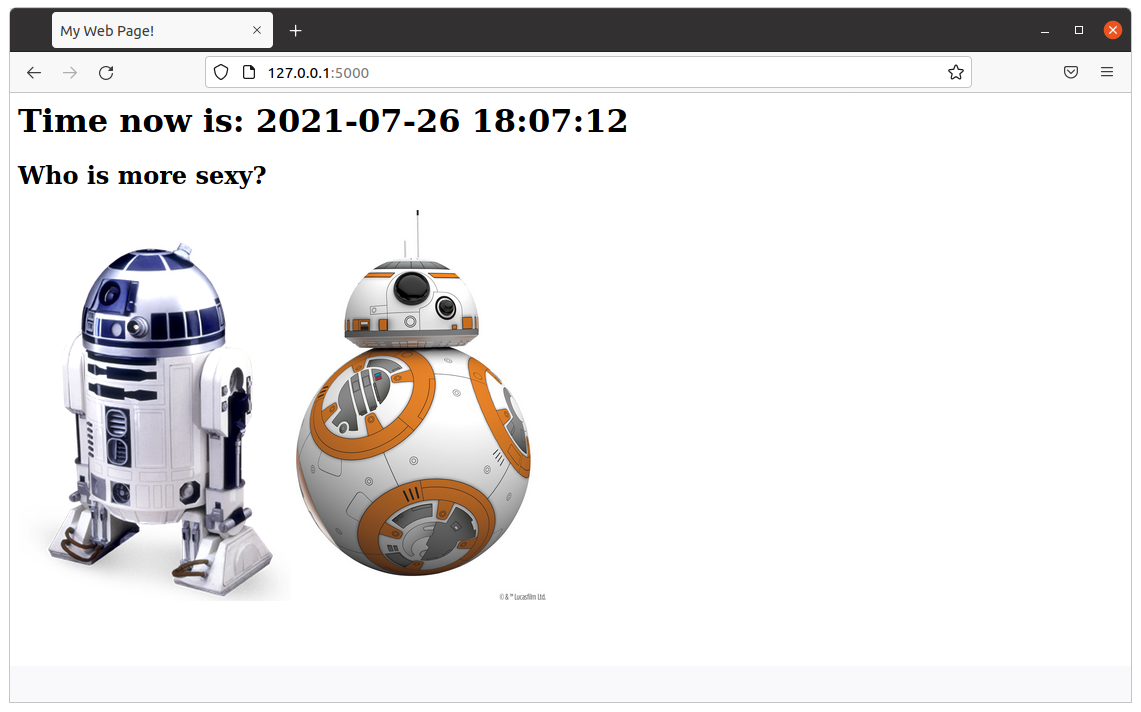
I added a new article about how to create a simple web Star Wars game using Flask. As always, I use Docker and a Dockerfile to automate the deployment, so you can test it without messing with your local system. The code is very simple and easy to understand.
This way I set an entry in /etc/hosts and I can do all the tests I want.
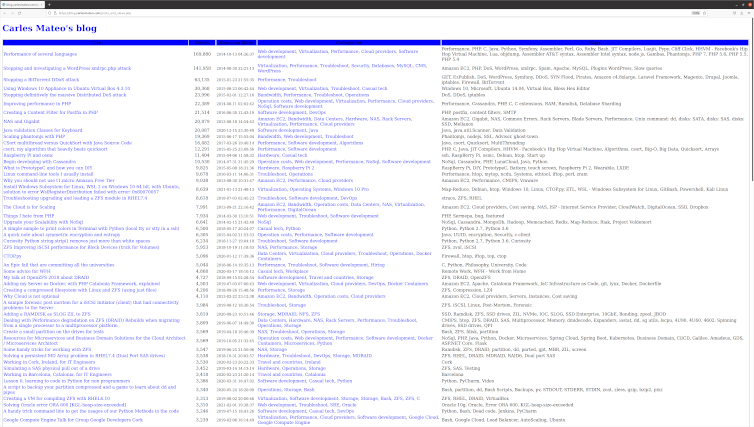
I added a new section to the blog, is a link where you can see all the articles published, ordered by number of views. /posts_and_views.php
Is in the main page, just after the recommended articles. Here you can see the source code.
I removed the Categories:
Storage
ZFS
In favor of:
Hardware
Storage
ZFS
So the articles with Categories in the group deleted were reassigned the Categories in the second group.
Visually:
I removed some annoying lines from the Quick Selection access. They came from inherited CSS properties from my WordPress, long time customized, and I created new styles for this section.
I adjusted the line-height to avoid separation between lines being too much.
I added a link in the section of Other Engineering Blogs that I like, to the great https://github.com/lesterchan site, author of many super cool WordPress plugins.
As you can see I use wp-config.php file to get the Database Settings (username, password, database) but I don’t use the WordPress Engine, it is just a stand alone PHP. So I wrote my own function to get the slug based on the category name. I believe the slug for it is in the Database and I could have added this as a SubQuery with JOINs, which would be better, but I wanted to keep the Database workload lightweight and especially, I did not want to invest more time investigating how the get the slug.
As I tested my function I didn’t find any Category failing but I saw that I had the Category Storage repeated in two different structure tree in Categories, and I will only always link to just the first one (So I was not linkin to the slug storage-2). I fixed that Category that I found repeated but to be honest if this script was a commercial solution or an Open Source solution properly maintained rather than just a sample, I would update it to have Categories and Tags’ slugs coming from the Database.
I would probably make it work with a Cron that would generate a cached page, updated every hour or every ten minutes. I did this in other projects I worked or in my PHP Framework Catalonia Framerwork.
But honestly, the load of the page does not justify a major effort in optimizing here, in this case.
<!DOCTYPE html>
<html>
<head>
    <style>
        .first {

            background-color: blue;
            padding: 12px;
        }
        .second {
            background-color: rgba(254, 253, 252, 0.7);
            text-align: center;
            padding:20px 0;
            font-size: 20px;
        }

        .centered {
            text-align: center;
        }

        /* unvisited link */
        a:link {
            color: blue;
            text-decoration: none;
        }

        /* visited link */
        a:visited {
            color: blue;
            text-decoration: none;
        }

        /* mouse over link */
        a:hover {
            color: #00A8EF;
            text-decoration: underline;
        }

        /* selected link */
        a:active {
            color: blue;
        }
    </style>
<body>
<?php

include "wp-config.php";

$s_site_name = "Carles Mateo's blog";
$s_site_link = "https://blog.carlesmateo.com";

function get_category_slug($s_text) {
    $s_output_text = strtolower($s_text);
    $s_output_text = str_replace(" ", "-", $s_output_text);

    return $s_output_text;
}

?>
<h1><a href="<?php print $s_site_link; ?>"><?php print($s_site_name); ?></a></h1>
<?php


$s_sort = "views DESC, post_date, post_title DESC";

if (array_key_exists("sort", $_GET)) {
    if ($_GET["sort"] == "date") {
        $s_sort = "post_date, views, post_title";
    }
}

$s_servername = "localhost";
$s_database = DB_NAME;
$s_username = DB_USER;
$s_password = DB_PASSWORD;


// Create connection
$o_conn = new mysqli($s_servername, $s_username, $s_password, $s_database);

// Check connection
if ($o_conn->connect_error) {
    die("Connection failed: " . $o_conn->connect_error);
}

/*
mysql> DESCRIBE wp_posts;
+-----------------------+-----------------+------+-----+---------------------+----------------+
| Field                 | Type            | Null | Key | Default             | Extra          |
+-----------------------+-----------------+------+-----+---------------------+----------------+
| ID                    | bigint unsigned | NO   | PRI | NULL                | auto_increment |
| post_author           | bigint unsigned | NO   | MUL | 0                   |                |
| post_date             | datetime        | NO   |     | 0000-00-00 00:00:00 |                |
| post_date_gmt         | datetime        | NO   |     | 0000-00-00 00:00:00 |                |
| post_content          | longtext        | NO   |     | NULL                |                |
| post_title            | text            | NO   |     | NULL                |                |
| post_excerpt          | text            | NO   |     | NULL                |                |
| post_status           | varchar(20)     | NO   |     | publish             |                |
| comment_status        | varchar(20)     | NO   |     | open                |                |
| ping_status           | varchar(20)     | NO   |     | open                |                |
| post_password         | varchar(255)    | NO   |     |                     |                |
| post_name             | varchar(200)    | NO   | MUL |                     |                |
| to_ping               | text            | NO   |     | NULL                |                |
| pinged                | text            | NO   |     | NULL                |                |
| post_modified         | datetime        | NO   |     | 0000-00-00 00:00:00 |                |
| post_modified_gmt     | datetime        | NO   |     | 0000-00-00 00:00:00 |                |
| post_content_filtered | longtext        | NO   |     | NULL                |                |
| post_parent           | bigint unsigned | NO   | MUL | 0                   |                |
| guid                  | varchar(255)    | NO   |     |                     |                |
| menu_order            | int             | NO   |     | 0                   |                |
| post_type             | varchar(20)     | NO   | MUL | post                |                |
| post_mime_type        | varchar(100)    | NO   |     |                     |                |
| comment_count         | bigint          | NO   |     | 0                   |                |
+-----------------------+-----------------+------+-----+---------------------+----------------+
 */

/*
mysql> describe wp_postmeta;
+------------+-----------------+------+-----+---------+----------------+
| Field      | Type            | Null | Key | Default | Extra          |
+------------+-----------------+------+-----+---------+----------------+
| meta_id    | bigint unsigned | NO   | PRI | NULL    | auto_increment |
| post_id    | bigint unsigned | NO   | MUL | 0       |                |
| meta_key   | varchar(255)    | YES  | MUL | NULL    |                |
| meta_value | longtext        | YES  |     | NULL    |                |
+------------+-----------------+------+-----+---------+----------------+
 */

$s_sql = "SELECT DISTINCT post_title, post_content,
                 (SELECT CAST(meta_value AS SIGNED) FROM wp_postmeta WHERE wp_postmeta.meta_key = 'views' AND wp_postmeta.post_id = wp_posts.ID) AS 'views',
                 (SELECT group_concat(wp_terms.name separator ',')
                         FROM wp_terms
                  INNER JOIN wp_term_taxonomy
                          ON wp_terms.term_id = wp_term_taxonomy.term_id
                  INNER JOIN wp_term_relationships wpr
                          ON wpr.term_taxonomy_id = wp_term_taxonomy.term_taxonomy_id
                  WHERE
                         taxonomy= 'category' AND wp_posts.ID = wpr.object_id
                ) AS 'Categories',
                (SELECT group_concat(wp_terms.name separator ', ')
                        FROM wp_terms
                 INNER JOIN wp_term_taxonomy
                         ON wp_terms.term_id = wp_term_taxonomy.term_id
                 INNER JOIN wp_term_relationships wpr
                         ON wpr.term_taxonomy_id = wp_term_taxonomy.term_taxonomy_id
                 WHERE
                        taxonomy= 'post_tag' AND wp_posts.ID = wpr.object_id
                ) AS 'Tags',
               ID, post_name, post_date, post_modified, post_type
          FROM wp_posts
          WHERE
                post_type = 'post' AND post_status = 'publish'
          ORDER BY
                $s_sort";

$o_result = $o_conn->query($s_sql);

if ($o_result->num_rows > 0) {
    ?><table style="border:1px solid">
    <tr class="first"><th>Title</th><th style="min-width:100px">Views</th><th style="min-width:150px">Creation Date</th><th>Categories</th><th>Tags</th></tr>

    <?php
    $i_total_views = 0;
    $i_articles = 0;

    // output data of each row
    while($row = $o_result->fetch_assoc()) {
        $s_style='style="border:1px solid"';
        $s_style='';
        $s_url = $row['post_name'];
        print('<tr>');
        print("<td $s_style>");
        print('<a href="'.$s_url.'" target="_blank">');
        print($row["post_title"]);
        print('</a>');
        print("</td>");
        print('<td class="centered" '.$s_style.'>');
        print(number_format($row["views"]));
        print("</td>");
        print("<td $s_style>");
        print("<small>");
        print($row["post_date"]);
        print("</small>");
        print("</td>");
        print("<td $s_style>");
        $s_categories = $row["Categories"];
        $a_categories = explode (",", $s_categories);
        $s_categories_content = "";
        foreach($a_categories as $s_category) {
            $s_category_slug = "/category/".get_category_slug($s_category)."/";
            $s_categories_content = $s_categories_content .'<a href="'.$s_category_slug.'" target="_blank">';
            $s_categories_content = $s_categories_content .$s_category;
            $s_categories_content = $s_categories_content ."</a>, ";
        }

        if (strlen($s_categories_content) > 0) {
            $s_categories_content = substr($s_categories_content, 0, -2);
        }

        print($s_categories_content);
        print("</td>");
        print("<td $s_style>");
        print($row["Tags"]);
        print("</td>");
        // $row["post_content"];
        $i_total_views = $i_total_views + intval($row["views"]);
        $i_articles++;
        echo "</tr>";
    } ?></table><?php
    print("<strong>Total articles:</strong> ".number_format($i_articles)." <strong>Total Views:</strong> ".number_format($i_total_views));
    print("<br>");
} else {
    echo "<p>0 results</p>";
}
$o_conn->close();

?>
</body>
</html>
My dump takes 88MB, not much, but I compress it with gzip.
gzip wp_mysiteZ.sql
It takes only 15MB compressed.
Do not forget the parameter –databases even if only one database is exported, otherwise the CREATE DATABASE and USE `wp_mysiteZ`; will not be added to your dump.
I will need to take some data form the mysql database, referring to the user used for accessing the blog’s database.
I always keep the CREATE USER and the GRANT permissions, if you don’t check the wp-config.php file. Note that the SQL format to create users and grant permissions may be different from a SQL version to another.
I create a file named mysql.sql with this part and I compress with gzip.
Checking PHP version
php -v
PHP 7.3.23 (cli) (built: Oct 21 2020 20:24:49) ( NTS )
Copyright (c) 1997-2018 The PHP Group
Zend Engine v3.3.23, Copyright (c) 1998-2018 Zend Technologies
WordPress is updated, and PHP is not that old.
The new Ubuntu 20.04 LTS comes with PHP 7.4. It will work:
php -v
PHP 7.4.3 (cli) (built: Jul  5 2021 15:13:35) ( NTS )
Copyright (c) The PHP Group
Zend Engine v3.4.0, Copyright (c) Zend Technologies
    with Zend OPcache v7.4.3, Copyright (c), by Zend Technologies
The Dockerfile
FROM ubuntu:20.04

MAINTAINER Carles Mateo

ARG DEBIAN_FRONTEND=noninteractive

# RUN echo "nameserver 8.8.8.8" > /etc/resolv.conf

RUN echo "Europe/Ireland" | tee /etc/timezone

# Note: You should install everything in a single line concatenated with
#       && and finalizing with
# apt autoremove && apt clean

#       In order to use the less space possible, as every command
#       is a layer

RUN apt update && apt install -y apache2 ntpdate libapache2-mod-php7.4 mysql-server php7.4-mysql php-dev libmcrypt-dev php-pear git mysql-server less zip vim mc && apt autoremove && apt clean

RUN a2enmod rewrite

RUN mkdir -p /www

# If you want to activate Debug
# RUN sed -i "s/display_errors = Off/display_errors = On/" /etc/php/7.2/apache2/php.ini
# RUN sed -i "s/error_reporting = E_ALL & ~E_DEPRECATED & ~E_STRICT/error_reporting = E_ALL/" /etc/php/7.2/apache2/php.ini
# RUN sed -i "s/display_startup_errors = Off/display_startup_errors = On/" /etc/php/7.2/apache2/php.ini
# To Debug remember to change:
# config/{production.php|preproduction.php|devel.php|docker.php}
# in order to avoid Error Reporting being set to 0.

ENV PATH_WP_MYSITEZ /var/www/wordpress/wp_mysitez/
ENV PATH_WORDPRESS_SITES /var/www/wordpress/

ENV APACHE_RUN_USER  www-data
ENV APACHE_RUN_GROUP www-data
ENV APACHE_LOG_DIR   /var/log/apache2
ENV APACHE_PID_FILE  /var/run/apache2/apache2.pid
ENV APACHE_RUN_DIR   /var/run/apache2
ENV APACHE_LOCK_DIR  /var/lock/apache2
ENV APACHE_LOG_DIR   /var/log/apache2

RUN mkdir -p $APACHE_RUN_DIR
RUN mkdir -p $APACHE_LOCK_DIR
RUN mkdir -p $APACHE_LOG_DIR
RUN mkdir -p $PATH_WP_MYSITEZ

# Remove the default Server
RUN sed -i '/<Directory \/var\/www\/>/,/<\/Directory>/{/<\/Directory>/ s/.*/# var-www commented/; t; d}' /etc/apache2/apache2.conf

RUN rm /etc/apache2/sites-enabled/000-default.conf

COPY wp_mysitez.conf /etc/apache2/sites-available/

RUN chown --recursive $APACHE_RUN_USER.$APACHE_RUN_GROUP $PATH_WP_MYSITEZ

RUN ln -s /etc/apache2/sites-available/wp_mysitez.conf /etc/apache2/sites-enabled/

# Please note: It would be better to git clone from another location and
# gunzip and delete temporary files in the same line,
# to save space in the layer.
COPY *.sql.gz /tmp/

RUN gunzip /tmp/*.sql.gz; echo "Starting MySQL"; service mysql start && mysql -u root < /tmp/wp_mysitez.sql && mysql -u root < /tmp/mysql.sql; rm -f /tmp/*.sql; rm -f /tmp/*.gz
# After this root will have password assigned

COPY *.zip /tmp/

COPY services_up.sh $PATH_WORDPRESS_SITES

RUN echo "Unzipping..."; cd /var/www/wordpress/; unzip /tmp/*.zip; rm /tmp/*.zip

RUN chown --recursive $APACHE_RUN_USER.$APACHE_RUN_GROUP $PATH_WP_MYSITEZ

EXPOSE 80

CMD ["/var/www/wordpress/services_up.sh"]
Services up
For starting MySQL and Apache I relay in services_up.sh script.
#!/bin/bash
echo "Starting MySql"
service mysql start

echo "Starting Apache"
service apache2 start
# /usr/sbin/apache2 -D FOREGROUND

while [ true ];
do
    ps ax | grep mysql | grep -v "grep "
    if [ $? -gt 0 ];
    then
        service mysql start
    fi
    sleep 10
done
You see that instead of launching apache2 as FOREGROUND, what keeps the loop, not exiting from my Container is a while [ true ]; that will keep looping and checking if MySQL is up, and restarting otherwise.
MySQL shutting down
Some of my sites receive DoS attacks. More than trying to shutdown my sites, are spammers trying to publish comment announcing fake glasses, or medicines for impotence, etc… also some try to hack into the Server to gain control of it with dictionary attacks or trying to explode vulnerabilities.
The downside of those attacks is that some times the Database is under pressure, and uses more and more memory until it crashes.
More memory alleviate the problem and buys time, but I decided not to invest more than $6 USD per month on this old site. I’m just keeping the contents alive and even this site still receives many visits. A restart of the MySQL if it dies is enough for me.
As you have seen in my Dockerfile I only have one Docker Container that runs both Apache and MySQL. One of the advantages of doing like that is that if MySQL dies, the container does not exit. However I could have had two containers with both scripts with the while [ true ];
When planning I decided to have just one single Container, all-in-one, as when I export the image for a Backup, I’ll be dealing only with a single image, not two.
Building and Running the Container
I created a Bash script named build_docker.sh that does the build for me, stopping and cleaning previous Containers:
#!/bin/bash

# Execute with sudo

s_DOCKER_IMAGE_NAME="wp_sitez"

printf "Stopping old image %s\n" "${s_DOCKER_IMAGE_NAME}"
sudo docker stop "${s_DOCKER_IMAGE_NAME}"

printf "Removing old image %s\n" "${s_DOCKER_IMAGE_NAME}"
sudo docker rm "${s_DOCKER_IMAGE_NAME}"

printf "Creating Docker Image %s\n" "${s_DOCKER_IMAGE_NAME}"
# sudo docker build -t ${s_DOCKER_IMAGE_NAME} . --no-cache
sudo docker build -t ${s_DOCKER_IMAGE_NAME} .

i_EXIT_CODE=$?
if [ $i_EXIT_CODE -ne 0 ]; then
    printf "Error. Exit code %s\n" ${i_EXIT_CODE}
    exit
fi

echo "Ready to run ${s_DOCKER_IMAGE_NAME} Docker Container"
echo "To run type: sudo docker run -d -p 80:80 --name ${s_DOCKER_IMAGE_NAME} ${s_DOCKER_IMAGE_NAME}"
echo "or just use run_in_docker.sh"
echo
echo "Debug running Docker:"
echo "docker exec -it ${s_DOCKER_IMAGE_NAME} /bin/bash"
echo
I assign to the image and the Running Container the same name.
Running in Production
Once it works in local, I set the Firewall rules and I deploy the Droplet (VM) with Digital Ocean, I upload the files via SFTP, and then I just run my script build_docker.sh
And assuming everything went well, I run it:
sudo docker run -d -p 80:80 --name wp_mysitez wp_mysitez
I check that the page works, and here we go.
Some improvements
This could also have been put in a private Git repository. You only have to care about not storing the passwords in it. (Like the MySQL grants)
It may be interesting for you to disable directory browsing.
The build from the Git repository can be validated with a Jenkins. Here you have an article about setup a Jenkins for yourself.
After Docker Image flask_app is built, you can run a Docker Container based on it with:
sudo docker run -d -p 5000:5000 --name flask_app flask_app
After you’re done, in order to stop the Container type:
sudo docker stop flask_app
Here is the source code of the Python file flask_app.py:
#
# flask_app.py
#
# Author: Carles Mateo
# Creation Date: 2020-05-10 20:50 GMT+1
# Description: A simple Flask Web Application
#              Part of the samples of https://leanpub.com/pythoncombatguide
#              More source code for the book at https://gitlab.com/carles.mateo/python_combat_guide
#

from flask import Flask
import datetime


def get_datetime(b_milliseconds=False):
    """
    Return the datetime with miliseconds in format YYYY-MM-DD HH:MM:SS.xxxxx
    or without milliseconds as YYYY-MM-DD HH:MM:SS
    """
    if b_milliseconds is True:
        s_now = str(datetime.datetime.now())
    else:
        s_now = str(datetime.datetime.now().strftime("%Y-%m-%d %H:%M:%S"))

    return s_now


app = Flask(__name__)

# Those variables will keep their value as long as Flask is running
i_votes_r2d2 = 0
i_votes_bb8 = 0


@app.route('/')
def page_root():
    s_page = "<html>"
    s_page += "<title>My Web Page!</title>"
    s_page += "<body>"
    s_page += "<h1>Time now is: " + get_datetime() + "</h1>"
    s_page += """<h2>Who is more sexy?</h2>
<a href="r2d2"><img src="static/r2d2.png"></a> <a href="bb8"><img width="250" src="static/bb8.jpg"></a>"""
    s_page += "</body>"
    s_page += "</html>"

    return s_page


@app.route('/bb8')
def page_bb8():
    global i_votes_bb8

    i_votes_bb8 = i_votes_bb8 + 1

    s_page = "<html>"
    s_page += "<title>My Web Page!</title>"
    s_page += "<body>"
    s_page += "<h1>Time now is: " + get_datetime() + "</h1>"
    s_page += """<h2>BB8 Is more sexy!</h2>
                <img width="250" src="static/bb8.jpg">"""
    s_page += "<p>I have: " + str(i_votes_bb8) + "</p>"
    s_page += "</body>"
    s_page += "</html>"

    return s_page


@app.route('/r2d2')
def page_r2d2():
    global i_votes_r2d2

    i_votes_r2d2 = i_votes_r2d2 + 1

    s_page = "<html>"
    s_page += "<title>My Web Page!</title>"
    s_page += "<body>"
    s_page += "<h1>Time now is: " + get_datetime() + "</h1>"
    s_page += """<h2>R2D2 Is more sexy!</h2>
                <img src="static/r2d2.png">"""
    s_page += "<p>I have: " + str(i_votes_r2d2) + "</p>"
    s_page += "</body>"
    s_page += "</html>"

    return s_page


if __name__ == "__main__":
    app.run(host="0.0.0.0", port=5000, debug=True)
As always, the naming of the variables is based on MT Notation.
The Dockerfile is very straightforward:
FROM ubuntu:20.04

MAINTAINER Carles Mateo

ARG DEBIAN_FRONTEND=noninteractive

RUN apt update && \
    apt install -y vim python3-pip &&  pip3 install pytest && \
    apt-get clean

ENV PYTHON_COMBAT_GUIDE /var/python_combat_guide

RUN mkdir -p $PYTHON_COMBAT_GUIDE

COPY ./ $PYTHON_COMBAT_GUIDE

ENV PYTHONPATH "${PYTHONPATH}:$PYTHON_COMBAT_GUIDE/src/:$PYTHON_COMBAT_GUIDE/src/lib"

RUN pip3 install -r $PYTHON_COMBAT_GUIDE/requirements.txt

# This is important so when executing python3 -m current directory will be added to Syspath
# Is not necessary, as we added to PYTHONPATH
#WORKDIR $PYTHON_COMBAT_GUIDE/src/lib

EXPOSE 5000

# Launch our Flask Application
CMD ["/usr/bin/python3", "/var/python_combat_guide/src/flask_app.py"]
I’ve released v. 0.99 of carleslibs package This package includes utilities for:
Files and Directories handling
Date/Time retrieval
Python version detection
You can install it with:
pip install carleslibs
The minimum requirement declared is Python 3.6, although they work with Python 3.5 and Python 2.7, as I want to drop support for no longer supported versions.
If you are enrolled with Linux Academy, I recommend you this Python course: Python 3 Scripting for System Administrators https://linuxacademy.com/cp/modules/view/id/168 Does not cover OOP, but it does a bit of Unit Testing, and talks a lot about PIP and Virtual Environments.
However we are going to run everything from a Docker Container so the only thing you need is to have installed Docker.
If you prefer to install MySql in your computer (or Virtual Box instance) directly, skip the Docker steps.
Dockerfile
The Dockerfile is the file that Docker uses to build the Docker Container.
Ours is like that:
FROM ubuntu:20.04

MAINTAINER Carles Mateo

ARG DEBIAN_FRONTEND=noninteractive

RUN apt update && apt install -y python3 pip mysql-server vim mc wget curl && apt-get clean

RUN pip install mysql-connector-python

EXPOSE 3306

ENV FOLDER_PROJECT /var/mysql_carles

RUN mkdir -p $FOLDER_PROJECT

COPY docker_run_mysql.sh $FOLDER_PROJECT
COPY start.sql $FOLDER_PROJECT
COPY src $FOLDER_PROJECT

RUN chmod +x /var/mysql_carles/docker_run_mysql.sh

CMD ["/var/mysql_carles/docker_run_mysql.sh"]
The first line defines that we are going to use Ubuntu 20.04 (it’s a LTS version).
We install all the apt packages in a single line, as Docker works in layers, and what is used as disk space in the previous layer is not deleted even if we delete the files, so we want to run apt update, install all the packages, and clean the temporal files in one single step.
I also install some useful tools like: vim, mc, less, wget and curl.
We expose to outside the port 3306, in case you want to run the Python code from your computer, but having the MySql in the Container.
The last line executes a script that starts the MySql service, creates the table, the user, and add two rows and runs an infinite loop so the Docker does not finish.
build_docker.sh
build_docker.sh is a Bash script that builds the Docker Image for you very easily.
It stops the container and removes the previous image, so your hard drive does not fill with Docker images if you do modifications.
It checks for errors building and it also remembers you how to run and debug the Docker Container.
#!/bin/bash

# Execute with sudo

s_DOCKER_IMAGE_NAME="blog_carlesmateo_com_mysql"

printf "Stopping old image %s\n" "${s_DOCKER_IMAGE_NAME}"
sudo docker stop "${s_DOCKER_IMAGE_NAME}"

printf "Removing old image %s\n" "${s_DOCKER_IMAGE_NAME}"
sudo docker rm "${s_DOCKER_IMAGE_NAME}"

printf "Creating Docker Image %s\n" "${s_DOCKER_IMAGE_NAME}"
sudo docker build -t ${s_DOCKER_IMAGE_NAME} . --no-cache

i_EXIT_CODE=$?
if [ $i_EXIT_CODE -ne 0 ]; then
    printf "Error. Exit code %s\n" ${i_EXIT_CODE}
    exit
fi

echo "Ready to run ${s_DOCKER_IMAGE_NAME} Docker Container"
echo "To run type: sudo docker run -d -p 3306:3306 --name ${s_DOCKER_IMAGE_NAME} ${s_DOCKER_IMAGE_NAME}"
echo "or just use run_in_docker.sh"
echo
echo "Debug running Docker:"
echo "docker exec -it ${s_DOCKER_IMAGE_NAME} /bin/bash"
echo
docker_run.sh
I also provide a script named docker_run.sh that runs your Container easily, exposing the MySql port.
#!/bin/bash

# Execute with sudo

s_DOCKER_IMAGE_NAME="blog_carlesmateo_com_mysql"

docker run -d -p 3306:3306 --name ${s_DOCKER_IMAGE_NAME} ${s_DOCKER_IMAGE_NAME}

echo "Showing running Instances"
docker ps
As you saw before I named the image after blog_carlesmateo_com_mysql.
I did that so basically I wanted to make sure that the name was unique, as the build_docker.sh deletes an image named like the name I choose, I didn’t want to use a generic name like “mysql” that may lead to you to delete the Docker Image inadvertently.
docker_run_mysql.sh
This script will run when the Docker Container is launched for the first time:
#!/bin/bash

# Allow to be queried from outside
sed -i '31 s/bind-address/#bind-address/' /etc/mysql/mysql.conf.d/mysqld.cnf

service mysql start

# Create a Database, a user with password, and permissions
cd /var/mysql_carles
mysql -u root < start.sql

while [ true ]; do sleep 60; done
With sed command we modify the line 31 of the the MySQL config file so we can connect from Outside the Docker Instance (bind-address: 127.0.0.1)
As you can see it executes the SQL contained in the file start.sql as root and we start MySql.
Please note: Our MySql installation has not set a password for root. It is only for Development purposes.
start.sql
The SQL file that will be ran inside our Docker Container.
CREATE DATABASE carles_database;

CREATE USER 'python'@'localhost' IDENTIFIED BY 'blog.carlesmateo.com-db-password';
CREATE USER 'python'@'%' IDENTIFIED BY 'blog.carlesmateo.com-db-password';
GRANT ALL PRIVILEGES ON carles_database.* TO 'python'@'localhost';
GRANT ALL PRIVILEGES ON carles_database.* TO 'python'@'%';

USE carles_database;

CREATE TABLE car_queue (
    i_id_car int,
    s_model_code varchar(25),
    s_color_code varchar(25),
    s_extras varchar(100),
    i_right_side int,
    s_city_to_ship varchar(25)
);

INSERT INTO car_queue (i_id_car, s_model_code, s_color_code, s_extras, i_right_side, s_city_to_ship) VALUES (1, "GOLF2021", "BLUE7", "COND_AIR, GPS, MULTIMEDIA_V3", 0, "Barcelona");
INSERT INTO car_queue (i_id_car, s_model_code, s_color_code, s_extras, i_right_side, s_city_to_ship) VALUES (2, "GOLF2021_PLUGIN_HYBRID", "BLUEMETAL_5", "COND_AIR, GPS, MULTIMEDIA_V3, SECURITY_V5", 1, "Cork");
As you can see it creates the user “python” with the password ‘blog.carlesmateo.com-db-password’ for access local and remote (%).
It also creates a Database named carles_database and grants all the permissions to the user “python”, for local and remote.
This is the user we will use to authenticate from out Python code.
Then we switch to use the carles_database and we create the car_queue table.
We insert two rows, as an example.
select_values_example.py
Finally the Python code that will query the Database.
import mysql.connector

if __name__ == "__main__":
    o_conn = mysql.connector.connect(user='python', password='blog.carlesmateo.com-db-password', database='carles_database')
    o_cursor = o_conn.cursor()

    s_query = "SELECT * FROM car_queue"

    o_cursor.execute(s_query)

    for a_row in o_cursor:
        print(a_row)

    o_cursor.close()
    o_conn.close()
Nothing special, we open a connection to the MySql and perform a query, and parse the cursor as rows/lists.
Please note: Error control is disabled so you may see any exception.
Executing the Container
First step is to build the Container.
From the directory where you cloned the project, execute:
sudo ./build_docker.sh
Then run the Docker Container:
sudo ./docker_run.sh
The script also performs a docker ps command, so you can see that it’s running.
Then change to the directory where I installed the sample files:
cd /var/mysql_carles
And execute the Python 3 example:
python3 select_values_example.py
Tying together MySql and a Python Menu with Object Oriented Programming
In order to tie all together, and specially to give a consistent view to my students, to avoid showing only pieces but a complete program, and to show a bit of Objects Oriented in action I developed a small program which simulates the handling of a production queue for Volkswagen.
MySQL Library
First I created a library to handle MySQL operations.
lib/mysqllib.py
import mysql.connector


class MySql():

    def __init__(self, s_user, s_password, s_database, s_host="127.0.0.1", i_port=3306):
        self.s_user = s_user
        self.s_password = s_password
        self.s_database = s_database
        self.s_host = s_host
        self.i_port = i_port

        o_conn = mysql.connector.connect(host=s_host, port=i_port, user=s_user, password=s_password, database=s_database)
        self.o_conn = o_conn

    def query(self, s_query):
        a_rows = []

        o_cursor = self.o_conn.cursor()

        o_cursor.execute(s_query)

        for a_row in o_cursor:
            a_rows.append(a_row)

        o_cursor.close()

        return a_rows

    def insert(self, s_query):

        o_cursor = self.o_conn.cursor()

        o_cursor.execute(s_query)
        i_inserted_row_count = o_cursor.rowcount

        # Make sure data is committed to the database
        self.o_conn.commit()

        return i_inserted_row_count

    def delete(self, s_query):

        o_cursor = self.o_conn.cursor()

        o_cursor.execute(s_query)
        i_deleted_row_count = o_cursor.rowcount

        # Make sure data is committed to the database
        self.o_conn.commit()

        return i_deleted_row_count


    def close(self):

        self.o_conn.close()
Basically when this class is instantiated, a new connection to the MySQL specified in the Constructor is established.
We have a method query() to send SELECT queries.
We have a insert method, to send INSERT, UPDATE queries that returns the number of rows affected.
This method ensures to perform a commit to make sure changes persist.
We have a delete method, to send DELETE Sql queries that returns the number of rows deleted.
We have a close method which closes the MySql connection.
A Data Object: CarDO
Then I’ve defined a class, to deal with Data and interactions of the cars.
Initially I was going to have a CarDO Object without any logic. Only with Data.
In OOP the variables of the Instance are called Properties, and the functions Methods.
Then I decided to add some logic, so I can show what’s the typical use of the objects.
So I will use CarDO as Data Object, but also to do few functions like printing the info of a Car.
Queue Manager
Finally the main program.
We also use Object Oriented Programming, and we use Dependency Injection to inject the MySQL Instance. That’s very practical to do Unit Testing.
from lib.mysqllib import MySql
from do.cardo import CarDO


class QueueManager():

    def __init__(self, o_mysql):
        self.o_mysql = o_mysql

    def exit(self):
        exit(0)

    def main_menu(self):
        while True:
            print("Main Menu")
            print("=========")
            print("")
            print("1. Add new car to queue")
            print("2. List all cars to queue")
            print("3. View car by Id")
            print("4. Delete car from queue by Id")
            print("")
            print("0. Exit")
            print("")

            s_option = input("Choose your option:")
            if s_option == "1":
                self.add_new_car()
            if s_option == "2":
                self.see_all_cars()
            if s_option == "3":
                self.see_car_by_id()
            if s_option == "4":
                self.delete_by_id()

            if s_option == "0":
                self.exit()

    def get_all_cars(self):
        s_query = "SELECT * FROM car_queue"

        a_rows = self.o_mysql.query(s_query)
        a_o_cars = []

        for a_row in a_rows:
            i_id_car = a_row[0]
            s_model_code = a_row[1]
            s_color_code = a_row[2]
            s_extras = a_row[3]
            i_right_side = a_row[4]
            s_city_to_ship = a_row[5]

            o_car = CarDO(i_id_car=i_id_car, s_model_code=s_model_code, s_color_code=s_color_code, s_extras=s_extras, i_right_side=i_right_side, s_city_to_ship=s_city_to_ship)
            a_o_cars.append(o_car)

        return a_o_cars

    def get_car_by_id(self, i_id_car):
        b_success = False
        o_car = None

        s_query = "SELECT * FROM car_queue WHERE i_id_car=" + str(i_id_car)

        a_rows = self.o_mysql.query(s_query)

        if len(a_rows) == 0:
            # False, None
            return b_success, o_car

        i_id_car = a_rows[0][0]
        s_model_code = a_rows[0][1]
        s_color_code = a_rows[0][2]
        s_extras = a_rows[0][3]
        i_right_side = a_rows[0][4]
        s_city_to_ship = a_rows[0][5]

        o_car = CarDO(i_id_car=i_id_car, s_model_code=s_model_code, s_color_code=s_color_code, s_extras=s_extras, i_right_side=i_right_side, s_city_to_ship=s_city_to_ship)
        b_success = True

        return b_success, o_car

    def replace_apostrophe(self, s_text):
        return s_text.replace("'", "´")

    def insert_car(self, o_car):

        s_sql = """INSERT INTO car_queue
                                (i_id_car, s_model_code, s_color_code, s_extras, i_right_side, s_city_to_ship)
                         VALUES
                                (""" + str(o_car.get_i_id_car()) + ", '" + o_car.get_s_model_code() + "', '" + o_car.get_s_color_code() + "', '" + o_car.get_s_extras() + "', " + str(o_car.get_i_right_side()) + ", '" + o_car.get_s_city_to_ship() + "');"

        i_inserted_row_count = self.o_mysql.insert(s_sql)

        if i_inserted_row_count > 0:
            print("Inserted", i_inserted_row_count, " row/s")
            b_success = True
        else:
            print("It was impossible to insert the row")
            b_success = False

        return b_success

    def add_new_car(self):
        print("Add new car")
        print("===========")

        while True:
            s_id_car = input("Enter new ID: ")
            if s_id_car == "":
                print("A numeric Id is needed")
                continue

            i_id_car = int(s_id_car)

            if i_id_car < 1:
                continue

            # Check if that id existed already
            b_success, o_car = self.get_car_by_id(i_id_car=i_id_car)
            if b_success is False:
                # Does not exist
                break

            print("Sorry, this Id already exists")

        s_model_code = input("Enter Model Code:")
        s_color_code = input("Enter Color Code:")
        s_extras = input("Enter extras comma separated:")
        s_right_side = input("Enter R for Right side driven:")
        if s_right_side.upper() == "R":
            i_right_side = 1
        else:
            i_right_side = 0
        s_city_to_ship = input("Enter the city to ship the car:")

        # Sanitize SQL replacing apostrophe
        s_model_code = self.replace_apostrophe(s_model_code)
        s_color_code = self.replace_apostrophe(s_color_code)
        s_extras = self.replace_apostrophe(s_extras)
        s_city_to_ship = self.replace_apostrophe(s_city_to_ship)

        o_car = CarDO(i_id_car=i_id_car, s_model_code=s_model_code, s_color_code=s_color_code, s_extras=s_extras, i_right_side=i_right_side, s_city_to_ship=s_city_to_ship)
        b_success = self.insert_car(o_car)

    def see_all_cars(self):
        print("")

        a_o_cars = self.get_all_cars()

        if len(a_o_cars) > 0:
            print(a_o_cars[0].get_car_header_for_list())
        else:
            print("No cars in queue")
            print("")
            return

        for o_car in a_o_cars:
            print(o_car.get_car_info_for_list())

        print("")

    def see_car_by_id(self, i_id_car=0):
        if i_id_car == 0:
            s_id = input("Car Id:")
            i_id_car = int(s_id)

        s_id_car = str(i_id_car)

        b_success, o_car = self.get_car_by_id(i_id_car=i_id_car)
        if b_success is False:
            print("Error, car id: " + s_id_car + " not located.")
            return False

        print("")
        o_car.print_car_info()
        print("")

        return True

    def delete_by_id(self):

        s_id = input("Enter Id of car to delete:")
        i_id_car = int(s_id)

        if i_id_car == 0:
            print("Invalid Id")
            return

        # reuse see_car_by_id
        b_found = self.see_car_by_id(i_id_car=i_id_car)
        if b_found is False:
            return

        s_delete = input("Are you sure you want to DELETE. Type Y to delete: ")
        if s_delete.upper() == "Y":
            s_sql = "DELETE FROM car_queue WHERE i_id_car=" + str(i_id_car)
            i_num = self.o_mysql.delete(s_sql)

            print(i_num, " Rows deleted")

            # if b_success is True:
            #     print("Car deleted successfully from the queue")


if __name__ == "__main__":

    try:

        o_mysql = MySql(s_user="python", s_password="blog.carlesmateo.com-db-password", s_database="carles_database", s_host="127.0.0.1", i_port=3306)

        o_queue_manager = QueueManager(o_mysql=o_mysql)
        o_queue_manager.main_menu()
    except KeyboardInterrupt:
        print("Detected CTRL + C. Exiting")
This program talks to MySQL, that we have started in a Docker previously.
We have access from inside the Docker Container, or from outside.
The idea of this simple program is to use a library for dealing with MySql, and objects for dealing with the Cars. The class CarDO contributes to the render of its data in the screen.
To enter inside the Docker once you have generated it and is running, do: