Tag Archives: gzip

Backup and Restore your Ubuntu Linux Workstations

This is a mechanism I invented and I’ve been using for decades, to migrate or clone my Linux Desktops to other physical servers.

This script is focused on doing the job for Ubuntu but I was doing this already 30 years ago, for X Window as I was responsible of the Linux platform of a ISP (Internet Service Provider). So, it is compatible with any Linux Desktop or Server.

It has the advantage that is a very lightweight backup. You don’t need to backup /etc or /var as long as you install a new OS and restore the folders that you did backup. You can backup and restore Wine (Windows Emulator) programs completely and to/from VMs and Instances as well.

It’s based on user/s rather than machine.

And it does backup using the Timestamp, so you keep all the different version, modified over time. You can fusion the backups in the same folder if you prefer avoiding time versions and keep only the latest backup. If that’s your case, then replace s_PATH_BACKUP_NOW=”${s_PATH_BACKUP}${s_DATETIME}/” by s_PATH_BACKUP_NOW=”${s_PATH_BACKUP}” for instance. You can also add a folder for machine if you prefer it, for example if you use the same userid across several Desktops/Servers.

I offer you a much simplified version of my scripts, but they can highly serve your needs.

#!/usr/bin/env bash

# Author: Carles Mateo
# Last Update: 2022-10-23 10:48 Irish Time

# User we want to backup data for
s_USER="carles"
# Target PATH for the Backups
s_PATH_BACKUP="/home/${s_USER}/Desktop/Bck/"

s_DATE=$(date +"%Y-%m-%d")
s_DATETIME=$(date +"%Y-%m-%d-%H-%M-%S")

s_PATH_BACKUP_NOW="${s_PATH_BACKUP}${s_DATETIME}/"

echo "Creating path $s_PATH_BACKUP and $s_PATH_BACKUP_NOW"
mkdir $s_PATH_BACKUP
mkdir $s_PATH_BACKUP_NOW

s_PATH_KEY="/home/${s_USER}/Desktop/keys/2007-01-07-cloud23.pem"
s_DOCKER_IMG_JENKINS_EXPORT=${s_DATE}-jenkins-base.tar
s_DOCKER_IMG_JENKINS_BLUEOCEAN2_EXPORT=${s_DATE}-jenkins-blueocean2.tar
s_PGP_FILE=${s_DATETIME}-pgp.zip

# Version the PGP files
echo "Compressing the PGP files as ${s_PGP_FILE}"
zip -r ${s_PATH_BACKUP_NOW}${s_PGP_FILE} /home/${s_USER}/Desktop/PGP/*

# Copy to BCK folder, or ZFS or to an external drive Locally as defined in: s_PATH_BACKUP_NOW
echo "Copying Data to ${s_PATH_BACKUP_NOW}/Data"
rsync -a --exclude={} --acls --xattrs --owner --group --times --stats --human-readable --progress -z "/home/${s_USER}/Desktop/data/" "${s_PATH_BACKUP_NOW}data/"
rsync -a --exclude={'Desktop','Downloads','.local/share/Trash/','.local/lib/python2.7/','.local/lib/python3.6/','.local/lib/python3.8/','.local/lib/python3.10/','.cache/JetBrains/'} --acls --xattrs --owner --group --times --stats --human-readable --progress -z "/home/${s_USER}/" "${s_PATH_BACKUP_NOW}home/${s_USER}/"
rsync -a --exclude={} --acls --xattrs --owner --group --times --stats --human-readable --progress -z "/home/${s_USER}/Desktop/code/" "${s_PATH_BACKUP_NOW}code/"


echo "Showing backup dir ${s_PATH_BACKUP_NOW}"
ls -hal ${s_PATH_BACKUP_NOW}

df -h /

See how I exclude certain folders like the Desktop or Downloads with –exclude.

It relies on the very useful rsync program. It also relies on zip to compress entire folders (PGP Keys on the example).

If you use the second part, to compress Docker Images (Jenkins in this example), you will run it as sudo and you will need also gzip.

# continuation... sudo running required.

# Save Docker Images
echo "Saving Docker Jenkins /home/${s_USER}/Desktop/Docker_Images/${s_DOCKER_IMG_JENKINS_EXPORT}"
sudo docker save jenkins:base --output /home/${s_USER}/Desktop/Docker_Images/${s_DOCKER_IMG_JENKINS_EXPORT}
echo "Saving Docker Jenkins /home/${s_USER}/Desktop/Docker_Images/${s_DOCKER_IMG_JENKINS_BLUEOCEAN2_EXPORT}"
sudo docker save jenkins:base --output /home/${s_USER}/Desktop/Docker_Images/${s_DOCKER_IMG_JENKINS_BLUEOCEAN2_EXPORT}
echo "Setting permissions"
sudo chown ${s_USER}.${s_USER} /home/${s_USER}/Desktop/Docker_Images/${s_DOCKER_IMG_JENKINS_EXPORT}
sudo chown ${s_USER}.${s_USER} /home/${s_USER}/Desktop/Docker_Images/${s_DOCKER_IMG_JENKINS_BLUEOCEAN2_EXPORT}
echo "Compressing /home/${s_USER}/Desktop/Docker_Images/${s_DOCKER_IMG_JENKINS_EXPORT}"
gzip /home/${s_USER}/Desktop/Docker_Images/${s_DOCKER_IMG_JENKINS_EXPORT}
gzip /home/${s_USER}/Desktop/Docker_Images/${s_DOCKER_IMG_JENKINS_BLUEOCEAN2_EXPORT}

rsync -a --exclude={} --acls --xattrs --owner --group --times --stats --human-readable --progress -z "/home/${s_USER}/Desktop/Docker_Images/" "${s_PATH_BACKUP_NOW}Docker_Images/"

There is a final part, if you want to backup to a remote Server/s using ssh:

# continuation... to copy to a remote Server.

s_PATH_REMOTE="bck7@cloubbck11.carlesmateo.com:/Bck/Desktop/${s_USER}/data/"

# Copy to the other Server
rsync -e "ssh -i $s_PATH_KEY" -a --exclude={} --acls --xattrs --owner --group --times --stats --human-readable --progress -z "/home/${s_USER}/Desktop/data/" ${s_PATH_REMOTE}

I recommend you to use the same methodology in all your Desktops, like for example, having a data/ folder in the Desktop for each user.

You can use Erasure Code to split the Backups in blocks and store a piece in different Cloud Providers.

Also you can store your Backups long-term, with services like Amazon Glacier.

Other ideas are storing certain files in git and in Hadoop HDFS.

If you want you can CRC your files before copying to another device or server.

You will use tools like: sha512sum or md5sum.
Migrating some Services from Amazon to Digital Ocean

Analyzing the needs

I start with a VM, to learn about the providers and the migration project as I go.

My VM has been running in Amazon AWS for years.

It has 3.5GB of RAM and 1 Core. However is uses only 580MB of RAM. I’m paying around $85/month for this with Amazon.

I need to migrate:

  • DNS Server
  • Email
  • Web
  • Database

For the DNS Server I don’t need it anymore, each Domain provider has included DNS Service for free, so I do not longer to have my two DNS.

For the email I find myself in the same scenario, most providers offer 3 email accounts for your domain, and some alias, for free.

I’ll start the Service as Docker in the new CSP, so I will make it work in my computer first, locally, and so I can move easily in the future.

Note: exporting big images is not the idea I have to make backups.

I locate a Digital Ocean droplet with 1GB of RAM and 1 core and SSD disks for $5, for $6 I can have a NVMe version. That I choose.

Disk Space for the Statics

The first thing I do is to analyze the disk space needs of the service.

In this old AWS CentOS based image I have:

[root@ip-10-xxx-yyy-zzz ec2-user]# df -h
Filesystem      Size  Used Avail Use% Mounted on
/dev/xvda1       79G   11G   69G  14% /
devtmpfs        1.8G   12K  1.8G   1% /dev
tmpfs           1.8G     0  1.8G   0% /dev/shm

Ok, so if I keep the same I have I need 11GB.

I have plenty of space on this server so I do a zip of all the contents of the blog:

cd /var/www/wordpress
zip -r /home/ec2-user/wp_sizeZ.zip wp_siteZ

Database dump

I need a dump of the databases I want to migrate.

I check what databases are in this Server.

mysql -u root -p

mysql> show databases;

I do a dump of the databases that I want:

sudo mysqldump --password='XXXXXXXX' --databases wp_mysiteZ > wp_mysiteZ.sql

I get an error, meaning MySQL needs repair:

mysqldump: Got error: 145: Table './wp_mysiteZ/wp_visitor_maps_wo' is marked as crashed and should be repaired when using LOCK TABLES

So I launch a repair:

sudo mysqlcheck --password='XXXXXXXX' --repair --all-databases

And after the dump works.

My dump takes 88MB, not much, but I compress it with gzip.

gzip wp_mysiteZ.sql

It takes only 15MB compressed.

Do not forget the parameter –databases even if only one database is exported, otherwise the CREATE DATABASE and USE `wp_mysiteZ`; will not be added to your dump.

I will need to take some data form the mysql database, referring to the user used for accessing the blog’s database.

I always keep the CREATE USER and the GRANT permissions, if you don’t check the wp-config.php file. Note that the SQL format to create users and grant permissions may be different from a SQL version to another.

I create a file named mysql.sql with this part and I compress with gzip.

Checking PHP version

php -v
PHP 7.3.23 (cli) (built: Oct 21 2020 20:24:49) ( NTS )
Copyright (c) 1997-2018 The PHP Group
Zend Engine v3.3.23, Copyright (c) 1998-2018 Zend Technologies

WordPress is updated, and PHP is not that old.

The new Ubuntu 20.04 LTS comes with PHP 7.4. It will work:

php -v
PHP 7.4.3 (cli) (built: Jul  5 2021 15:13:35) ( NTS )
Copyright (c) The PHP Group
Zend Engine v3.4.0, Copyright (c) Zend Technologies
    with Zend OPcache v7.4.3, Copyright (c), by Zend Technologies

The Dockerfile

FROM ubuntu:20.04

MAINTAINER Carles Mateo

ARG DEBIAN_FRONTEND=noninteractive

# RUN echo "nameserver 8.8.8.8" > /etc/resolv.conf

RUN echo "Europe/Ireland" | tee /etc/timezone

# Note: You should install everything in a single line concatenated with
#       && and finalizing with 
# apt autoremove && apt clean

#       In order to use the less space possible, as every command 
#       is a layer

RUN apt update && apt install -y apache2 ntpdate libapache2-mod-php7.4 mysql-server php7.4-mysql php-dev libmcrypt-dev php-pear git mysql-server less zip vim mc && apt autoremove && apt clean

RUN a2enmod rewrite

RUN mkdir -p /www

# If you want to activate Debug
# RUN sed -i "s/display_errors = Off/display_errors = On/" /etc/php/7.2/apache2/php.ini 
# RUN sed -i "s/error_reporting = E_ALL & ~E_DEPRECATED & ~E_STRICT/error_reporting = E_ALL/" /etc/php/7.2/apache2/php.ini 
# RUN sed -i "s/display_startup_errors = Off/display_startup_errors = On/" /etc/php/7.2/apache2/php.ini 
# To Debug remember to change:
# config/{production.php|preproduction.php|devel.php|docker.php} 
# in order to avoid Error Reporting being set to 0.

ENV PATH_WP_MYSITEZ /var/www/wordpress/wp_mysitez/
ENV PATH_WORDPRESS_SITES /var/www/wordpress/

ENV APACHE_RUN_USER  www-data
ENV APACHE_RUN_GROUP www-data
ENV APACHE_LOG_DIR   /var/log/apache2
ENV APACHE_PID_FILE  /var/run/apache2/apache2.pid
ENV APACHE_RUN_DIR   /var/run/apache2
ENV APACHE_LOCK_DIR  /var/lock/apache2
ENV APACHE_LOG_DIR   /var/log/apache2

RUN mkdir -p $APACHE_RUN_DIR
RUN mkdir -p $APACHE_LOCK_DIR
RUN mkdir -p $APACHE_LOG_DIR
RUN mkdir -p $PATH_WP_MYSITEZ

# Remove the default Server
RUN sed -i '/<Directory \/var\/www\/>/,/<\/Directory>/{/<\/Directory>/ s/.*/# var-www commented/; t; d}' /etc/apache2/apache2.conf 

RUN rm /etc/apache2/sites-enabled/000-default.conf

COPY wp_mysitez.conf /etc/apache2/sites-available/

RUN chown --recursive $APACHE_RUN_USER.$APACHE_RUN_GROUP $PATH_WP_MYSITEZ

RUN ln -s /etc/apache2/sites-available/wp_mysitez.conf /etc/apache2/sites-enabled/

# Please note: It would be better to git clone from another location and
# gunzip and delete temporary files in the same line, 
# to save space in the layer.
COPY *.sql.gz /tmp/

RUN gunzip /tmp/*.sql.gz; echo "Starting MySQL"; service mysql start && mysql -u root < /tmp/wp_mysitez.sql && mysql -u root < /tmp/mysql.sql; rm -f /tmp/*.sql; rm -f /tmp/*.gz
# After this root will have password assigned

COPY *.zip /tmp/

COPY services_up.sh $PATH_WORDPRESS_SITES

RUN echo "Unzipping..."; cd /var/www/wordpress/; unzip /tmp/*.zip; rm /tmp/*.zip

RUN chown --recursive $APACHE_RUN_USER.$APACHE_RUN_GROUP $PATH_WP_MYSITEZ

EXPOSE 80

CMD ["/var/www/wordpress/services_up.sh"]

Services up

For starting MySQL and Apache I relay in services_up.sh script.

#!/bin/bash
echo "Starting MySql"
service mysql start

echo "Starting Apache"
service apache2 start
# /usr/sbin/apache2 -D FOREGROUND

while [ true ];
do
    ps ax | grep mysql | grep -v "grep "
    if [ $? -gt 0 ];
    then
        service mysql start
    fi
    sleep 10
done

You see that instead of launching apache2 as FOREGROUND, what keeps the loop, not exiting from my Container is a while [ true ]; that will keep looping and checking if MySQL is up, and restarting otherwise.

MySQL shutting down

Some of my sites receive DoS attacks. More than trying to shutdown my sites, are spammers trying to publish comment announcing fake glasses, or medicines for impotence, etc… also some try to hack into the Server to gain control of it with dictionary attacks or trying to explode vulnerabilities.

The downside of those attacks is that some times the Database is under pressure, and uses more and more memory until it crashes.

More memory alleviate the problem and buys time, but I decided not to invest more than $6 USD per month on this old site. I’m just keeping the contents alive and even this site still receives many visits. A restart of the MySQL if it dies is enough for me.

As you have seen in my Dockerfile I only have one Docker Container that runs both Apache and MySQL. One of the advantages of doing like that is that if MySQL dies, the container does not exit. However I could have had two containers with both scripts with the while [ true ];

When planning I decided to have just one single Container, all-in-one, as when I export the image for a Backup, I’ll be dealing only with a single image, not two.

Building and Running the Container

I created a Bash script named build_docker.sh that does the build for me, stopping and cleaning previous Containers:

#!/bin/bash

# Execute with sudo

s_DOCKER_IMAGE_NAME="wp_sitez"

printf "Stopping old image %s\n" "${s_DOCKER_IMAGE_NAME}"
sudo docker stop "${s_DOCKER_IMAGE_NAME}"

printf "Removing old image %s\n" "${s_DOCKER_IMAGE_NAME}"
sudo docker rm "${s_DOCKER_IMAGE_NAME}"

printf "Creating Docker Image %s\n" "${s_DOCKER_IMAGE_NAME}"
# sudo docker build -t ${s_DOCKER_IMAGE_NAME} . --no-cache
sudo docker build -t ${s_DOCKER_IMAGE_NAME} .

i_EXIT_CODE=$?
if [ $i_EXIT_CODE -ne 0 ]; then
    printf "Error. Exit code %s\n" ${i_EXIT_CODE}
    exit
fi

echo "Ready to run ${s_DOCKER_IMAGE_NAME} Docker Container"
echo "To run type: sudo docker run -d -p 80:80 --name ${s_DOCKER_IMAGE_NAME} ${s_DOCKER_IMAGE_NAME}"
echo "or just use run_in_docker.sh"
echo
echo "Debug running Docker:"
echo "docker exec -it ${s_DOCKER_IMAGE_NAME} /bin/bash"
echo

I assign to the image and the Running Container the same name.

Running in Production

Once it works in local, I set the Firewall rules and I deploy the Droplet (VM) with Digital Ocean, I upload the files via SFTP, and then I just run my script build_docker.sh

And assuming everything went well, I run it:

sudo docker run -d -p 80:80 --name wp_mysitez wp_mysitez

I check that the page works, and here we go.

Some improvements

This could also have been put in a private Git repository. You only have to care about not storing the passwords in it. (Like the MySQL grants)

It may be interesting for you to disable directory browsing.

The build from the Git repository can be validated with a Jenkins. Here you have an article about setup a Jenkins for yourself.

compress_old.sh A simple Bash script to compress files in a directory, older than n days

I use this script for my needs, to compress logs and core dumps older than some days, in order to Cron that and save disk space.

You can also download it from here:

https://gitlab.com/carles.mateo/blog.carlesmateo.com-source-code/-/blob/master/compress_old.sh

#!/bin/bash

# By Carles Mateo - https://blog.carlesmateo.com
# Compress older than two days files.
# I use for logs and core dumps. Normally at /var/core/

# =======================================================0
# FUNCTIONS
# =======================================================0


function quit {
    # Quits with message in param1 and error code in param2
    s_MESSAGE=$1
    i_EXIT_CODE=$2

    echo $s_MESSAGE
    exit $i_EXIT_CODE
}

function add_ending_slash {
    # Check if Path has ending /
    s_LAST_CHAR_PATH=$(echo $s_PATH | tail -c 2)

    if [ "$s_LAST_CHAR_PATH" != "/" ];
    then
        s_PATH="$s_PATH/"
    fi
}

function get_list_files {
    # Never follow symbolic links
    # Show only files
    # Do not enter into subdirs
    # Show file modified more than X days ago
    # Find will return the path already
    s_LIST_FILES=$(find -P $s_PATH -maxdepth 1 -type f -mtime +$i_DAYS | tr " " "|")
}

function check_dir_exists {
    s_DIRECTORY="$1"
    if [ ! -d "$s_DIRECTORY" ];
    then
        quit "Directory $s_DIRECTORY does not exist." 1
    fi
}

function compress_files {
    echo "Compressing files from $s_PATH modified more than $i_DAYS ago..."
    for s_FILENAME in $s_LIST_FILES
    do
        s_FILENAME_SANITIZED=$(echo $s_FILENAME | tr "|" " ")
        s_FILEPATH="$s_PATH$s_FILENAME_SANITIZED"
        echo "Compressing $s_FILENAME_SANITIZED..."
        # Double quotes around $s_FILENAME_SANITIZED avoid files with spaces failing
        gzip "$s_FILENAME_SANITIZED"
        i_ERROR=$?
        if [ $i_ERROR -ne 0 ];
        then
            echo "Error $i_ERROR happened"
        fi
    done

}


# =======================================================0
# MAIN PROGRAM
# =======================================================0

# Check Number of parameters
if [ "$#" -lt 1 ] || [ "$#" -gt 2 ];
then
    quit "Illegal number of parameters. Pass a directory and optionally the number of days to exclude from mtime. Like: compress_old.sh /var/log 2" 1
fi

s_PATH=$1

if [ "$#" -eq 2 ];
then
    i_DAYS=$2
else
    i_DAYS=2
fi

add_ending_slash

check_dir_exists $s_PATH

get_list_files

compress_files
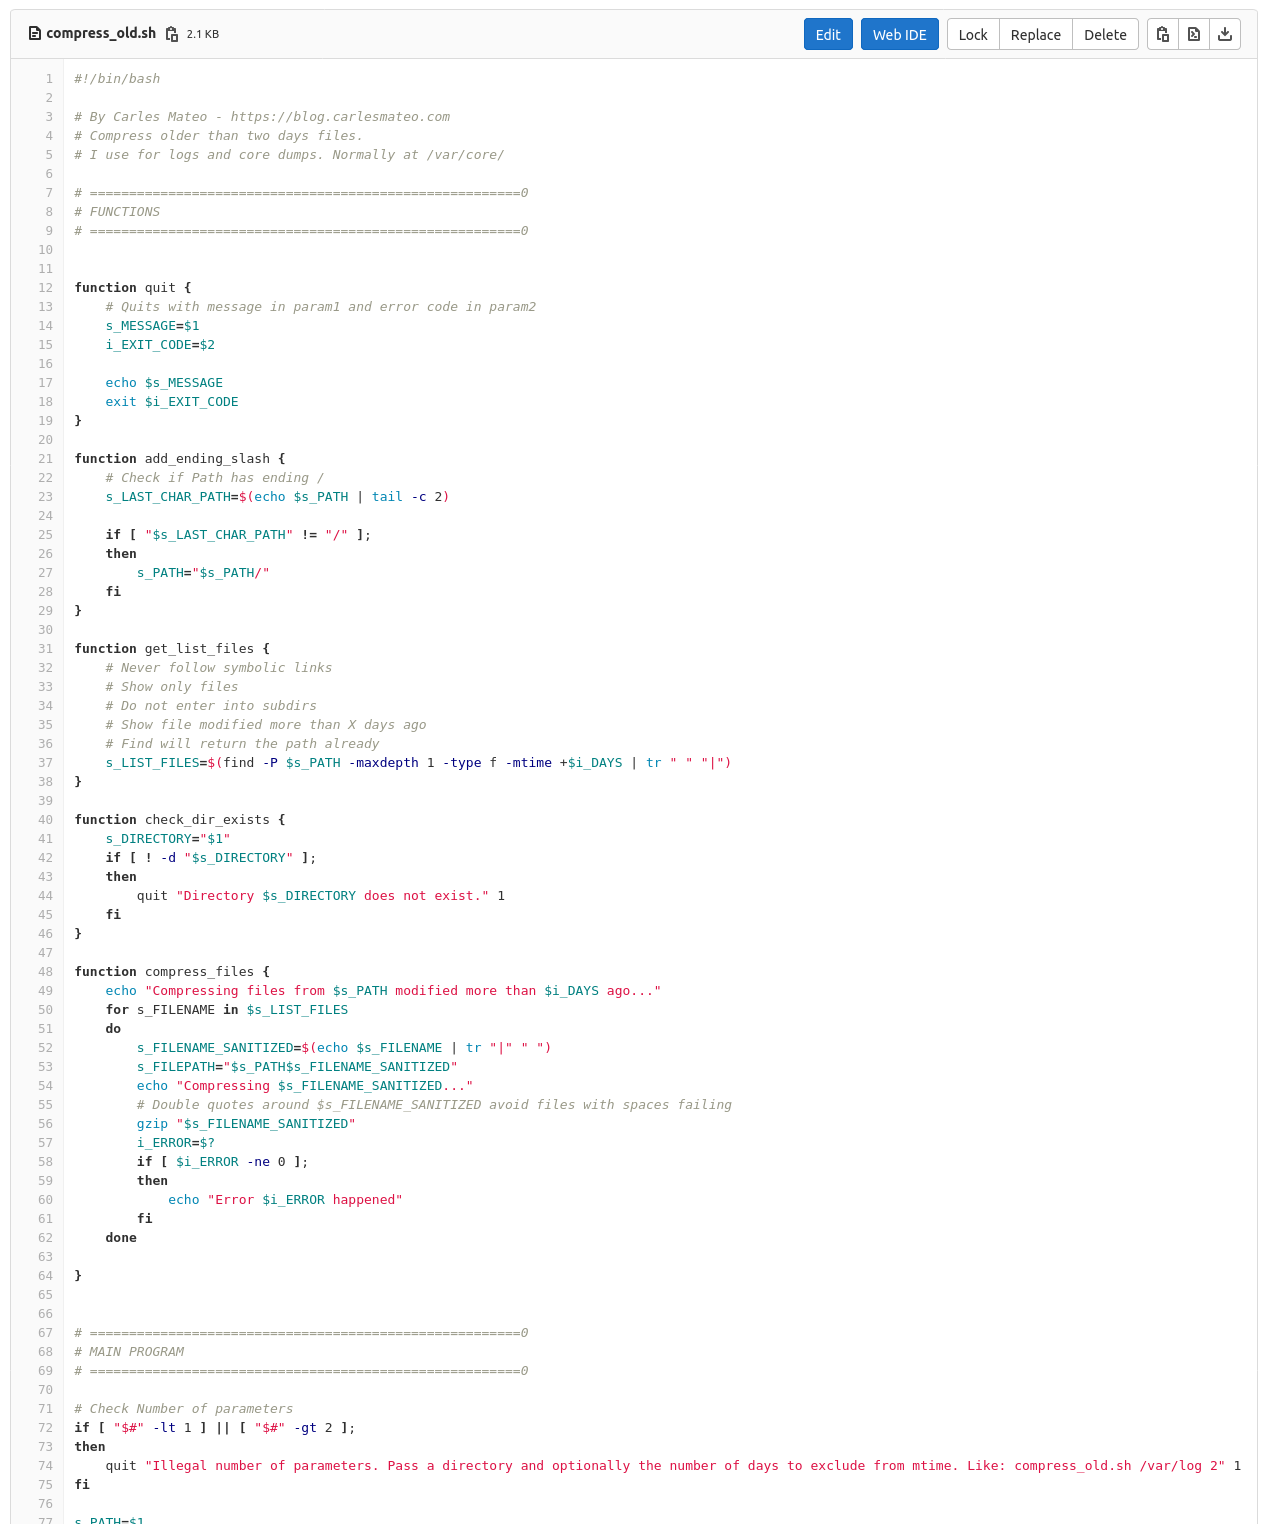
Fragment of the code in gitlab

If you want to compress everything in the current directory, event files modified today run with:

./compress_old.sh ./ 0

cmemgzip Python tool to compress files in memory when there is no free space on the disk

Rationale

All the Operation Engineers and SREs that work with systems have found the situation of having a Server with the disk full of logs and needing to keep those logs, and at the same time needing the system to keep running.

This is an uncomfortable situation.

I remember when I was being interviewed in Facebook, in Menlo Park, for a SDM position in the SRE (Software Development Manager) back in 2013-2014. They asked me about a situation where they have the Server disk full, and they deleted a big log file from Apache, but the space didn’t come back. They told me that nobody ever was able to solve this.

I explained that what happened is that Apache still had the fd (file descriptor), and that he will try to write to end of that file, even if they removed the huge log file with rm command, from the system they will not get back any free space. I explained that the easiest solution was to stop apache. They agreed and asked me how we could do the same without restarting the Webserver and I said that manipulating the file descriptors under /proc. They told me what I was the first person to solve this.

How it works

Basically cmemgzip will read a file, as binary, and will load it completely in to Memory.

Then it will compress it also in Memory. Then it will release the memory used to keep the original, will validate write permissions on the folder, will check that the compressed file is smaller than the original, and will delete the original and, using the new space now available in disk, write the compressed and smaller version of the file in gzip format.

Since version 0.3 you can specify an amount of memory that you will use for the blocks of data read from the file, so you can limit greatly the memory usage and compress files much more bigger than the amount of memory.

If for whatever reason the gz version cannot be written to disk, you’ll be asked for another route.

I mentioned before about File Descriptors, and programs that may keep those files open.

So my advice here, is that if you have to compress Apache logs or logs from a multi-thread program, and disk is full, and several instances may be trying to write to the log file: to stop Apache service if you can, and then run cmemgzip. I want to add it the future to auto-release open fd, but this is delicate and requires a lot of time to make sure it will be reliable in all the circumstances and will obey the exact desires of the SRE realizing the operation, without unexpected undesired side effects. It can be implemented with a new parameter, so the SysAdmin will know what is requesting.

Get the source code

You can decompress it later with gzip/gunzip.

So about cmemgzip you can git clone the project from here:

https://gitlab.com/carles.mateo/cmemgzip

git clone https://gitlab.com/carles.mateo/cmemgzip

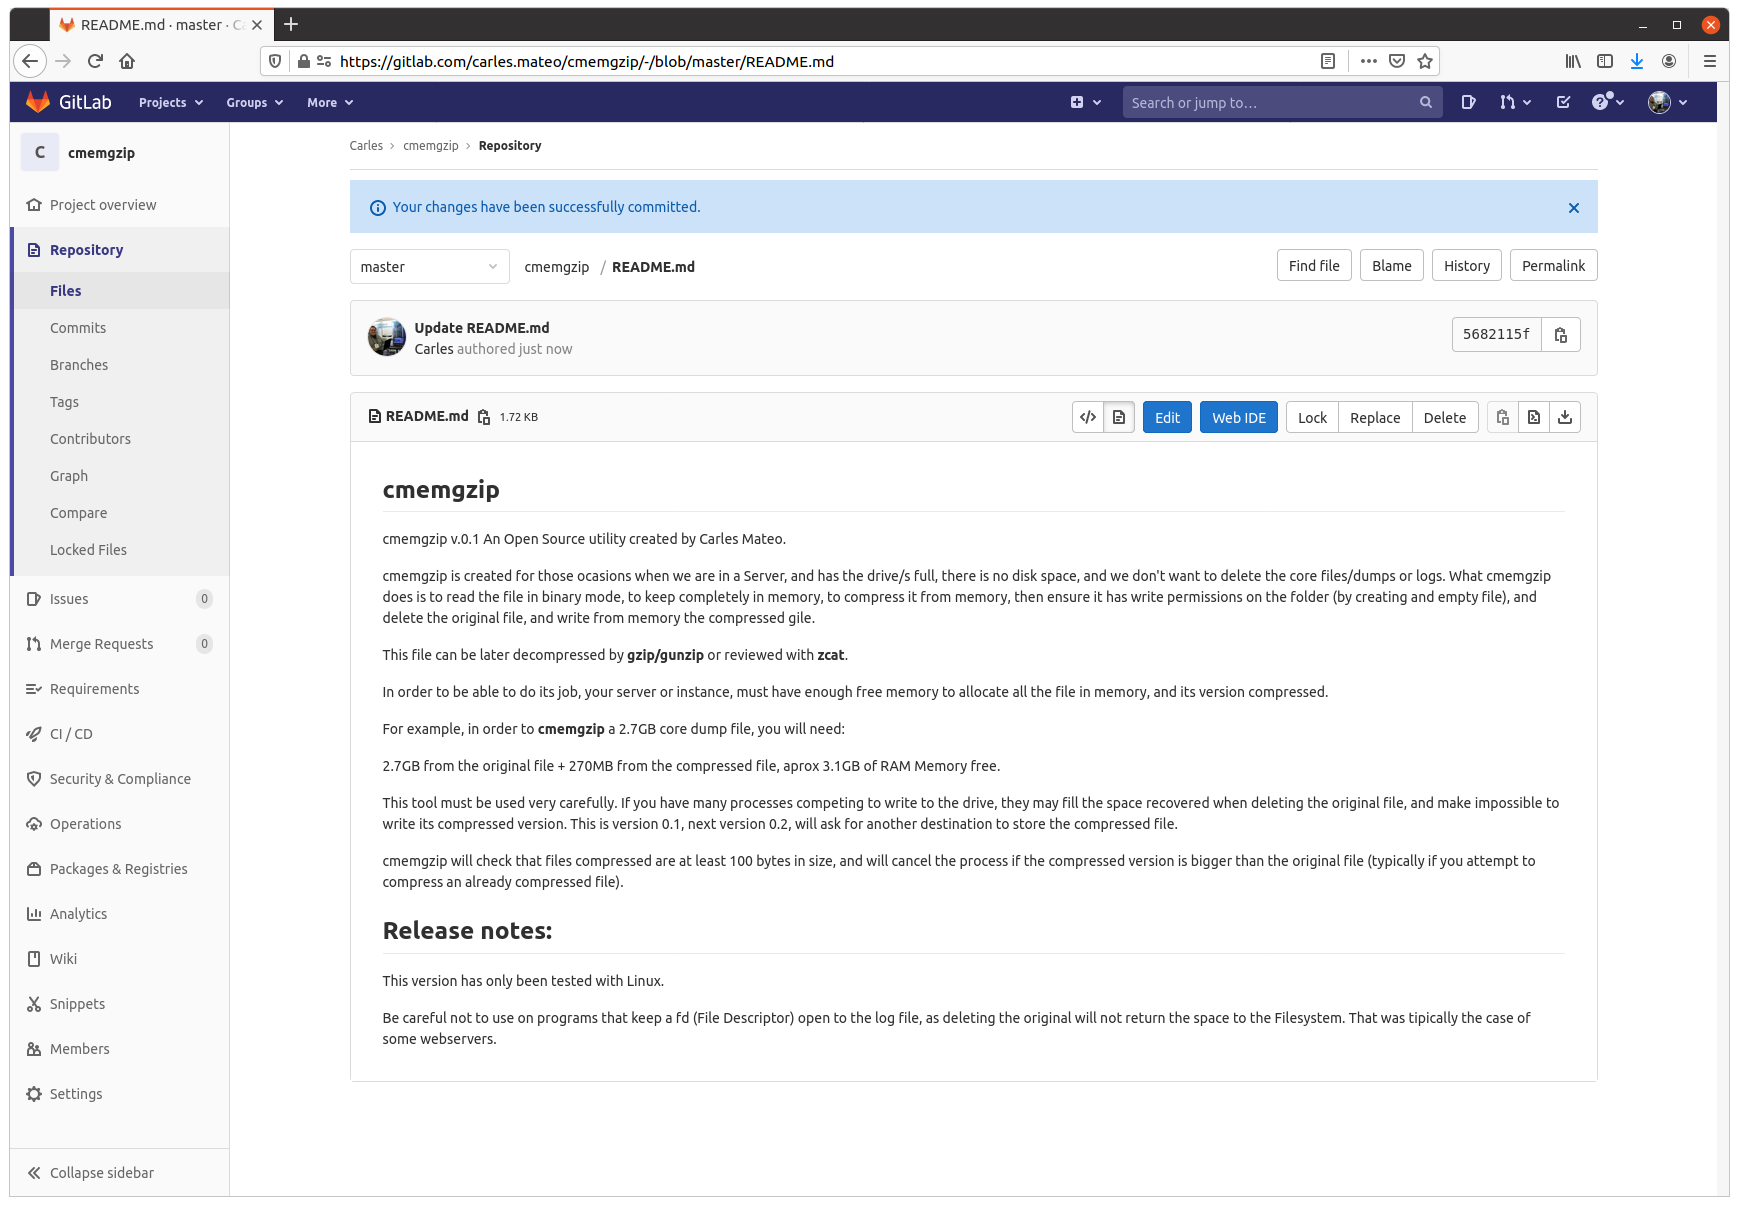
The README.md is very clear:

https://gitlab.com/carles.mateo/cmemgzip/-/blob/master/README.md

The program is written in Python 3, and I gave it License MIT, so you can use it and the Open Source really with Freedom.

Do you want to test in other platforms?

This is a version 0.3.

I have only tested it in:

  • Ubuntu 20.04 LTS Linux for x64
  • Ubuntu 20.04 LTS 64 bits under Raspberry Pi 4 (ARM Processors)
  • Windows 10 Professional x64
  • Mac OS X
  • CentOS

It should work in all the platforms supporting Python, but if you want to contribute testing for other platforms, like Windows 32 bit, Solaris or BSD, let me know.

Alternative solutions

You can create a ramdisk and compress it to there. Then delete the original and move the compressed file from ramdisk to the hard drive, and unload the ramdrive Kernel Module. However we find very often with this problems in Docker containers or in instances that don’t have the Kernel module installed. Is much more easier to run cmemgzip.

Another strategy you can do for the future is to have a folder based on ZFS and compression. Again, ZFS should be installed on the system, and this doesn’t happen with Docker containers.

cmemgzip is designed to work when there is no free space, if there is free space, you should use gzip command.

In a real emergency when you don’t have enough RAM, neither disk space, neither the possibility to send the log files to another server to be compressed there, you could stop using the swap, and fdisk the swap partition to be a ext4 Linux format, format it, mount is, and use the space to compress the files. And after moving the files compressed to the original folder, fdisk the old swap partition to change type to Swap again, and enable swap again (swapon).

Memory requirements

As you can imagine, the weak point of cmemgzip, is that, if the file is completely loaded into memory and then compressed, the requirements of free memory on the Server/Instance/VM are at least the sum of the size of the file plus the sum of the size of the file compressed. You guess right. That’s true.

If there is not enough memory for loading the file in memory, the program is interrupted gracefully.

I decided to keep it simple, but this can be an option for the future.

So if your VM has 2GB of Available Memory, you will be able to use cmemgzip in uncompressed log files around 1.7GB.

In version 0.3 I implemented the ability to load chunks of the original file, and compress into memory, so I would be able use less memory. But then the compression is less efficient and initial tests point that I’ll have to keep a separate file for each compressed chunk. So I will need to created a uncompress tool as well, when now is completely compatible with gzip/gunzip, zcat, the file extractor from Ubuntu, etc…

For a big Server with a logfile of 40TB, around 300GB of RAM should be sufficient (the Servers I use have 768 GB of RAM normally).

Honestly, nowadays we find ourselves more frequently with VMs or Instances in the Cloud with small drives (10 to 15GB) and enough Available RAM, rather than Servers with huge mount points. This kind of instances, which means scaling horizontally, makes more difficult to have NFS Servers were we can move those logs, for security.

So cmemgzip covers very well some specific cases, while is not useful for all the scenarios.

I think it’s safe to say it covers 95% of the scenarios I’ve found in the past 7 years.

cmemgzip will not help you if you run out inodes.

Usage

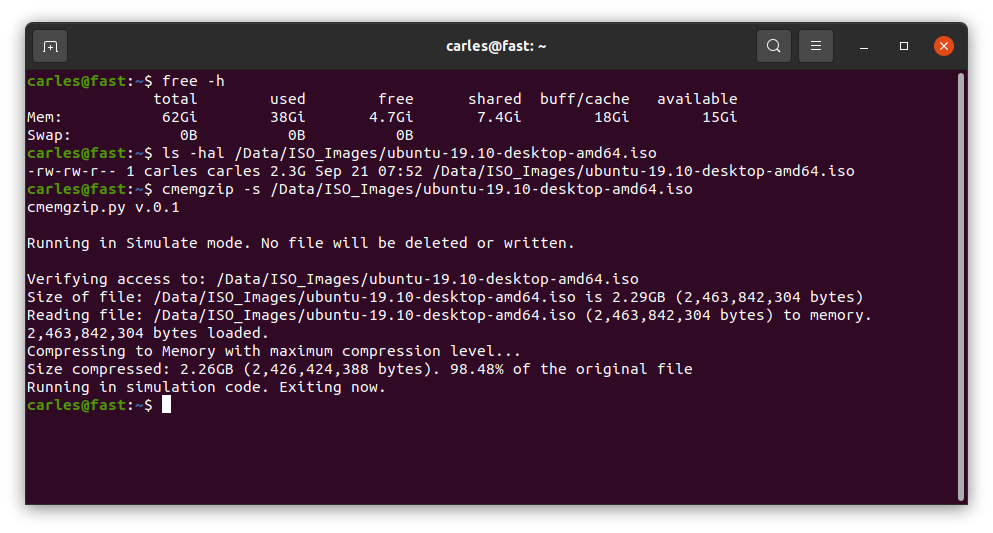
Usage is very simple, and I kept it very verbose as the nature of the work is Operations, Engineers need to know what is going on.

I return error level/exit code 0 if everything goes well or 1 on errors.

./cmemgzip.py /home/carles/test_extract/SherlockHolmes.txt
 
 cmemgzip.py v.0.1

 Verifying access to: /home/carles/test_extract/SherlockHolmes.txt
 Size of file: /home/carles/test_extract/SherlockHolmes.txt is 553KB (567,291 bytes)
 Reading file: /home/carles/test_extract/SherlockHolmes.txt (567,291 bytes) to memory.
 567,291 bytes loaded.
 Compressing to Memory with maximum compression level…
 Size compressed: 204KB (209,733 bytes). 36.97% of the original file
 Attempting to create the gzip file empty to ensure write permissions
 Deleting the original file to get free space
 Writing compressed file /home/carles/test_extract/SherlockHolmes.txt.gz
 Verifying space written match size of compressed file in Memory
 Write verification completed.

You can also simulate, without actually delete or write to disk, just in order to know what will be the

Installation

There are no third party libraries to install. I only use the standard ones: os, sys, gzip

So clone it with git in your preferred folder and just create a symbolic link with your favorite name:

sudo ln --symbolic /home/carles/code/cmemgzip/cmemgzip.py /usr/bin/cmemgzip

I like to create the link without the .py extension.

This way you can invoke the program from anywhere by just typing: cmemgzip

A script to backup your partition compressed and a game to learn about dd and pipes

This article is more an exercise, like a game, so you get to know certain things about Linux, and follow my mental process to uncover this. Is nothing mysterious for the Senior Engineers but Junior Sys Admins may enjoy this reading. :)

Ok, so the first thing is I wrote an script in order to completely backup my NVMe hard drive to a gziped file and then I will use this, as a motivation to go deep into investigations to understand.

Ok, so the first script would be like this:

#!/bin/bash
SOURCE_DRIVE="/dev/nvme0n1"
TARGET_PATH="/media/carles/Seagate\ Backup\ Plus\ Drive/BCK/"
TARGET_FILE="nvme.img"
sudo bash -c "dd if=${SOURCE_DRIVE} | gzip > ${TARGET_PATH}${TARGET_FILE}.gz"

So basically, we are going to restart the computer, boot with Linux Live USB Key, mount the Seagate Hard Drive, and run the script.

We are booting with a Live Linux Cd in order to have our partition unmounted and unmodified while we do the backup. This is in order to avoid corruption or data loss as a live Filesystem is getting modifications as we read it.

The problem with this first script is that it will generate a big gzip file.

By big I mean much more bigger than 2GB. Not all physical supports support files bigger than 2GB or 4GB, but even if they do, it’s a pain to transfer this over the Network, or in USB files, so we are going to do a slight modification.

#!/bin/bash
SOURCE_DRIVE="/dev/nvme0n1"
TARGET_PATH="/media/carles/Seagate\ Backup\ Plus\ Drive/BCK/"
TARGET_FILE="nvme.img"
sudo bash -c "dd if=${SOURCE_DRIVE} | gzip | split -b 1024MiB - ${TARGET_PATH}${TARGET_FILE}-split.gz_"

Ok, so we will use pipes and split in order to generate many files as big as 1GB.

If we ls we will get:

-rwxrwxrwx 1 carles carles 1073741824 May 24 14:57 nvme.img-split.gz_aa
-rwxrwxrwx 1 carles carles 1073741824 May 24 14:58 nvme.img-split.gz_ab
-rwxrwxrwx 1 carles carles 1073741824 May 24 14:59 nvme.img-split.gz_ac

Then one may say, Ok, this is working, but how I know the progress?.

For old versions of dd you can use pv which stands for Pipe Viewer and allows you to know the transference between processes using pipes.

For more recent versions of dd you can use status=progress.

So the script updated with status=progress is:

#!/bin/bash
SOURCE_DRIVE="/dev/nvme0n1"
TARGET_PATH="/media/carles/Seagate\ Backup\ Plus\ Drive/BCK/"
TARGET_FILE="nvme.img"
sudo bash -c "dd if=${SOURCE_DRIVE} status=progress | gzip | split -b 1024MiB - ${TARGET_PATH}${TARGET_FILE}-split.gz_"

You can also download the code from:

https://gitlab.com/carles.mateo/blog.carlesmateo.com-source-code/-/blob/master/backup_partition_in_files.sh

Then one may ask himself, wait, if pipes use STDOUT and STDIN and dd is displaying into the screen, then will our gz file get corrupted?.

I like when people question things, and investigate, so let’s answer this question.

If it was a young member of my Team I would ask:

  • Ok, try,it. Check the output file to see if is corrupted.

So they can do zcat or zless to inspect the file, see if it has errors, and to make sure:

gzip -v -t nvme.img.gz
nvme.img.gz:        OK

Ok, so what happened?, because we were seeing output in the screen.

Assuming the young Engineer does not know the answer I would had told:

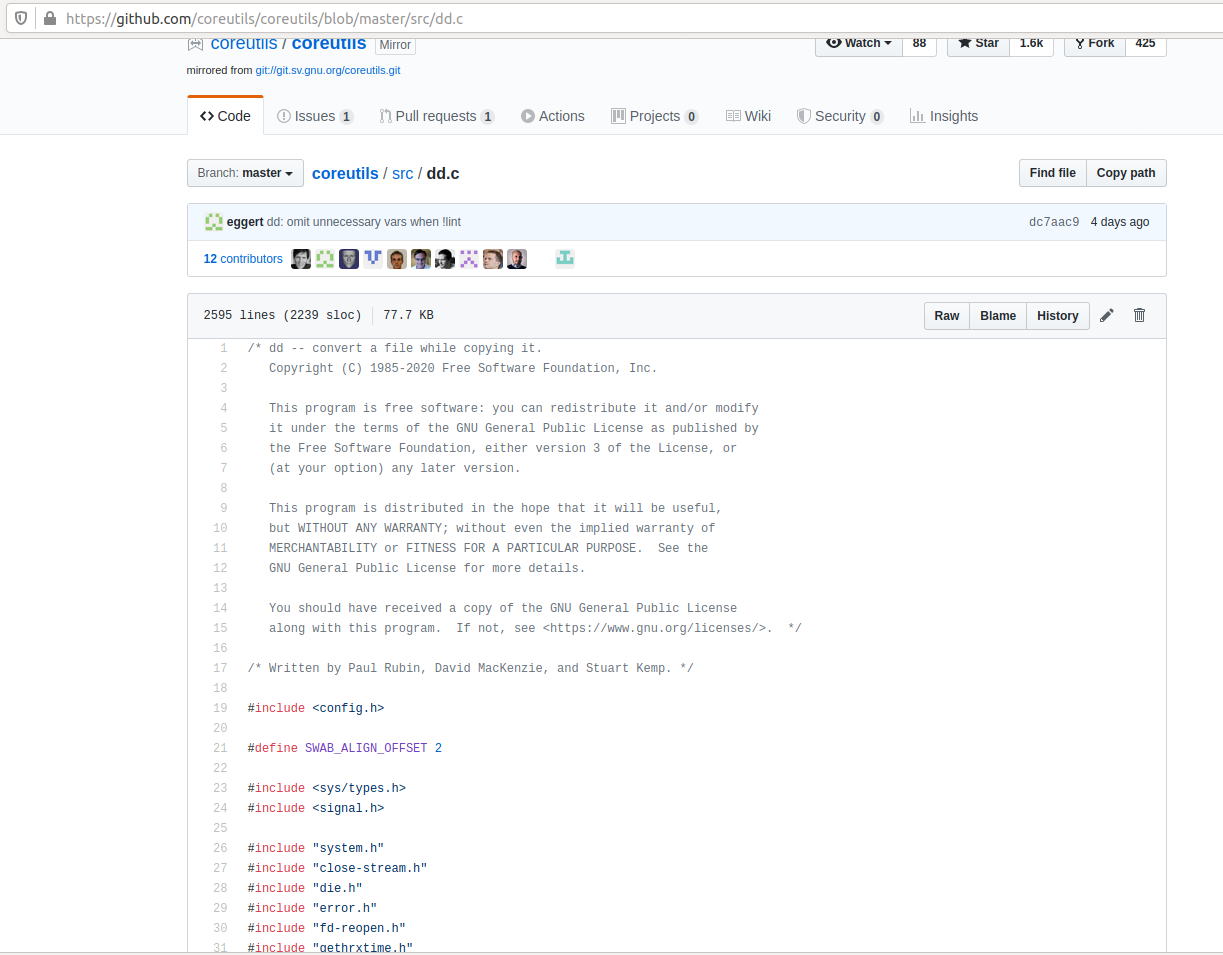
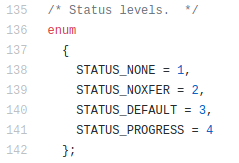
  • Ok, so you know that if dd would print to STDOUT, then you won’t see it, cause it would be sent to the pipe, so there is something more you’re missing. Let’s check the source code of dd to see what status=progress does

And then look for “progress”.

Soon you’ll find things like everywhere:

  if (progress_time)
    fputc ('\r', stderr);

Ok, pay attention to where is the data written: stderr. So basically the answer is: dd status=progress does not corrupt STDOUT and prints into the screen because it uses STDERR.

Other funny ways to get the progress would be to use:

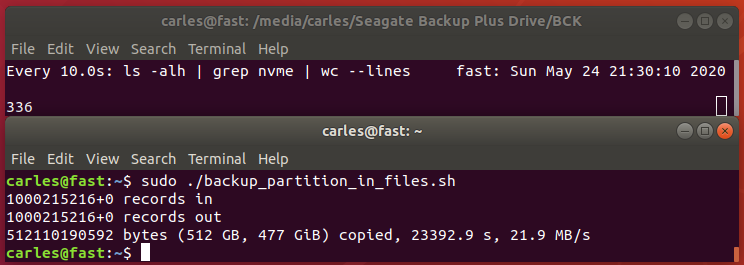
watch -n10 "ls -alh /BCK/ | grep nvme | wc --lines"
So you would see in real time what was the advance and finally 512GB where compressed to around 336GB in 336 files of 1 GB each (except the last one)

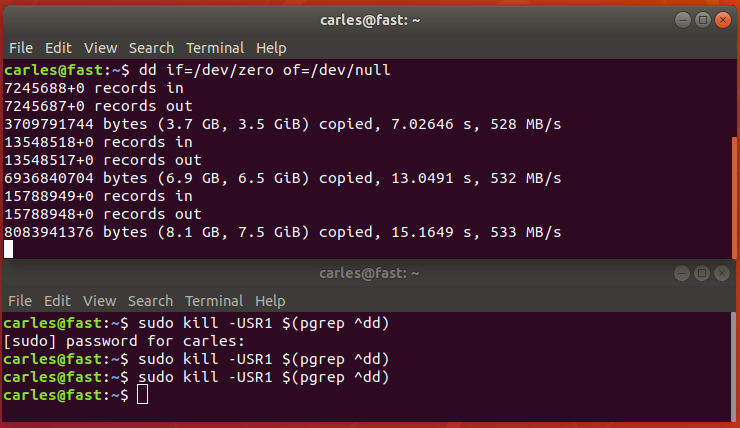
Another funny way would had been sending USR1 signal to the dd process:

Hope you enjoyed this little exercise about the importance of going deep, to the end, to understand what’s going on on the system. :)

Instead of gzip you can use bzip2 or pixz. pixz is very handy if you want to just compress a file, as it uses multiple processors in parallel for the tasks.

xz or lrzip are other compressors. lrzip aims to compress very large files, specially source code.