Monthly Archives: March 2021

A base Dockerfile for my Jenkins deployments

Update: I’ve created a video and article about how to install jenkins in Docker with docker CLI and Blue Ocean plugins following the official Documentation. You may prefer to follow that one.

Update: Second part of this article: Creating Jenkins configurations for your projects

So I share with you my base Jenkins Dockerfile, so you can spawn a new Jenkins for your projects.

The Dockerfile installs Ubuntu 20.04 LTS as base image and add the required packages to run jenkins but also Development and Testing tools to use inside the Container to run Unit Testing on your code, for example. So you don’t need external Servers, for instance.

You will need 3 files:

  • Dockerfile
  • docker_run_jenkins.sh
  • requirements.txt

The requirements.txt file contains your PIP3 dependencies. In my case I only have pytest version 4.6.9 which is the default installed with Ubuntu 20.04, however, this way, I enforce that this and not any posterior version will be installed.

File requirements.txt:

pytest==4.6.9

The file docker_run_jenkins.txt start Jenkins when the Container is run and it will wait until the initial Admin password is generated and then it will display it.

File docker_run_jenkins.sh:

#!/bin/bash

echo "Starting Jenkins..."

service jenkins start

echo "Configure jenkins in http://127.0.0.1:8080"

s_JENKINS_PASSWORD_FILE="/var/lib/jenkins/secrets/initialAdminPassword"

i_PASSWORD_PRINTED=0

while [ true ];
do
    sleep 1
    if [ $i_PASSWORD_PRINTED -eq 1 ];
    then
        # We are nice with multitasking
        sleep 60
        continue
    fi

    if [ ! -f "$s_JENKINS_PASSWORD_FILE" ];
    then
        echo "File $s_FILE_ORIGIN does not exist"
    else
        echo "Password for Admin is:"
        cat $s_JENKINS_PASSWORD_FILE
        i_PASSWORD_PRINTED=1
    fi
done

That file has the objective to show you the default admin password, but you don’t need to do that, you can just start a shell into the Container and check manually by yourself.

However I added it to make it easier for you.

And finally you have the Dockerfile:

FROM ubuntu:20.04

LABEL Author="Carles Mateo" \
      Email="jenkins@carlesmateo.com" \
      MAINTAINER="Carles Mateo"

# Build this file with:
# sudo docker build -f Dockerfile -t jenkins:base .
# Run detached:
# sudo docker run --name jenkins_base -d -p 8080:8080 jenkins:base
# Run seeing the password:
# sudo docker run --name jenkins_base -p 8080:8080 -i -t jenkins:base
# After you CTRL + C you will continue with:
# sudo docker start
# To debug:
# sudo docker run --name jenkins_base -p 8080:8080 -i -t jenkins:base /bin/bash

ARG DEBIAN_FRONTEND=noninteractive

ENV SERVICE jenkins

RUN set -ex

RUN echo "Creating directories and copying code" \
    && mkdir -p /opt/${SERVICE}

COPY requirements.txt \
    docker_run_jenkins.sh \
    /opt/${SERVICE}/

# Java with Ubuntu 20.04 LST is 11, which is compatible with Jenkins.
RUN apt update \
    && apt install -y default-jdk \
    && apt install -y wget curl gnupg2 \
    && apt install -y git \
    && apt install -y python3 python3.8-venv python3-pip \
    && apt install -y python3-dev libsasl2-dev libldap2-dev libssl-dev \
    && apt install -y python3-venv \
    && apt install -y python3-pytest \
    && apt install -y sshpass \
    && wget -qO - https://pkg.jenkins.io/debian-stable/jenkins.io.key | apt-key add - \
    && echo "deb http://pkg.jenkins.io/debian-stable binary/" > /etc/apt/sources.list.d/jenkins.list \
    && apt update \
    && apt -y install jenkins \
    && apt-get clean

RUN echo "Setting work directory and listening port"
WORKDIR /opt/${SERVICE}

RUN chmod +x docker_run_jenkins.sh

RUN pip3 install --upgrade pip \
    && pip3 install -r requirements.txt


EXPOSE 8080


ENTRYPOINT ["./docker_run_jenkins.sh"]

Build the Container

docker build -f Dockerfile -t jenkins:base .

Run the Container displaying the password

sudo docker run --name jenkins_base -p 8080:8080 -i -t jenkins:base

You need this password for starting the configuration process through the web.

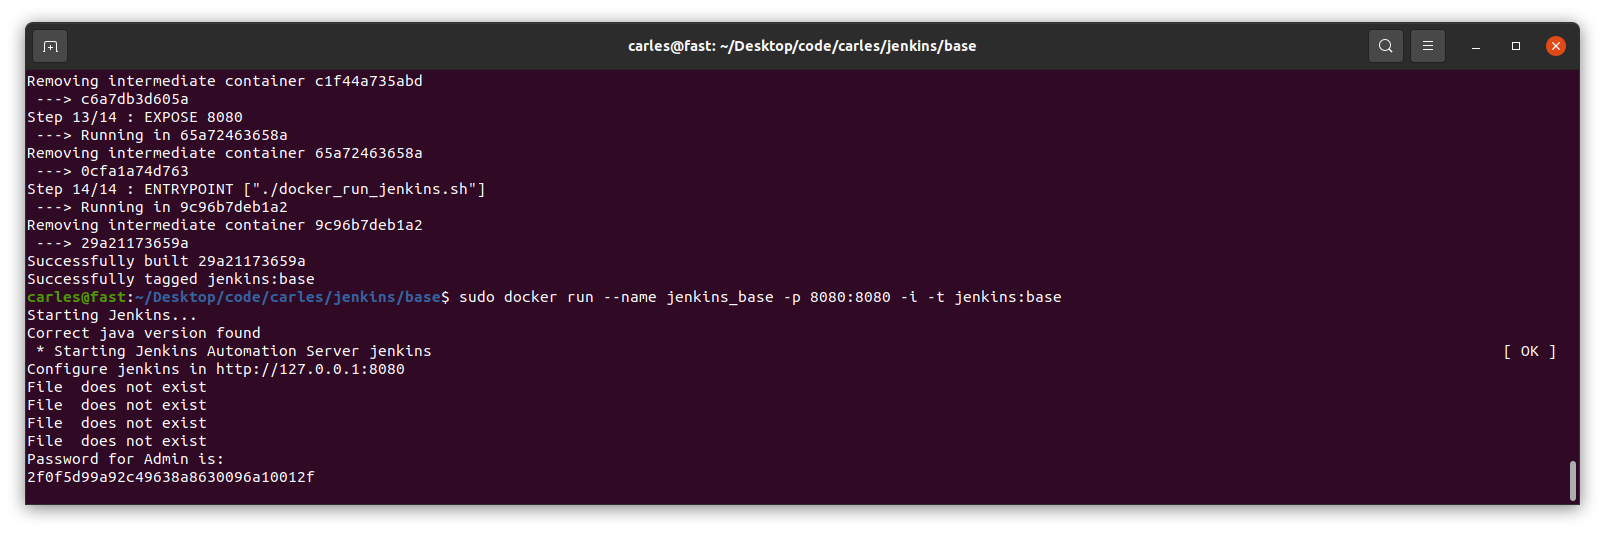
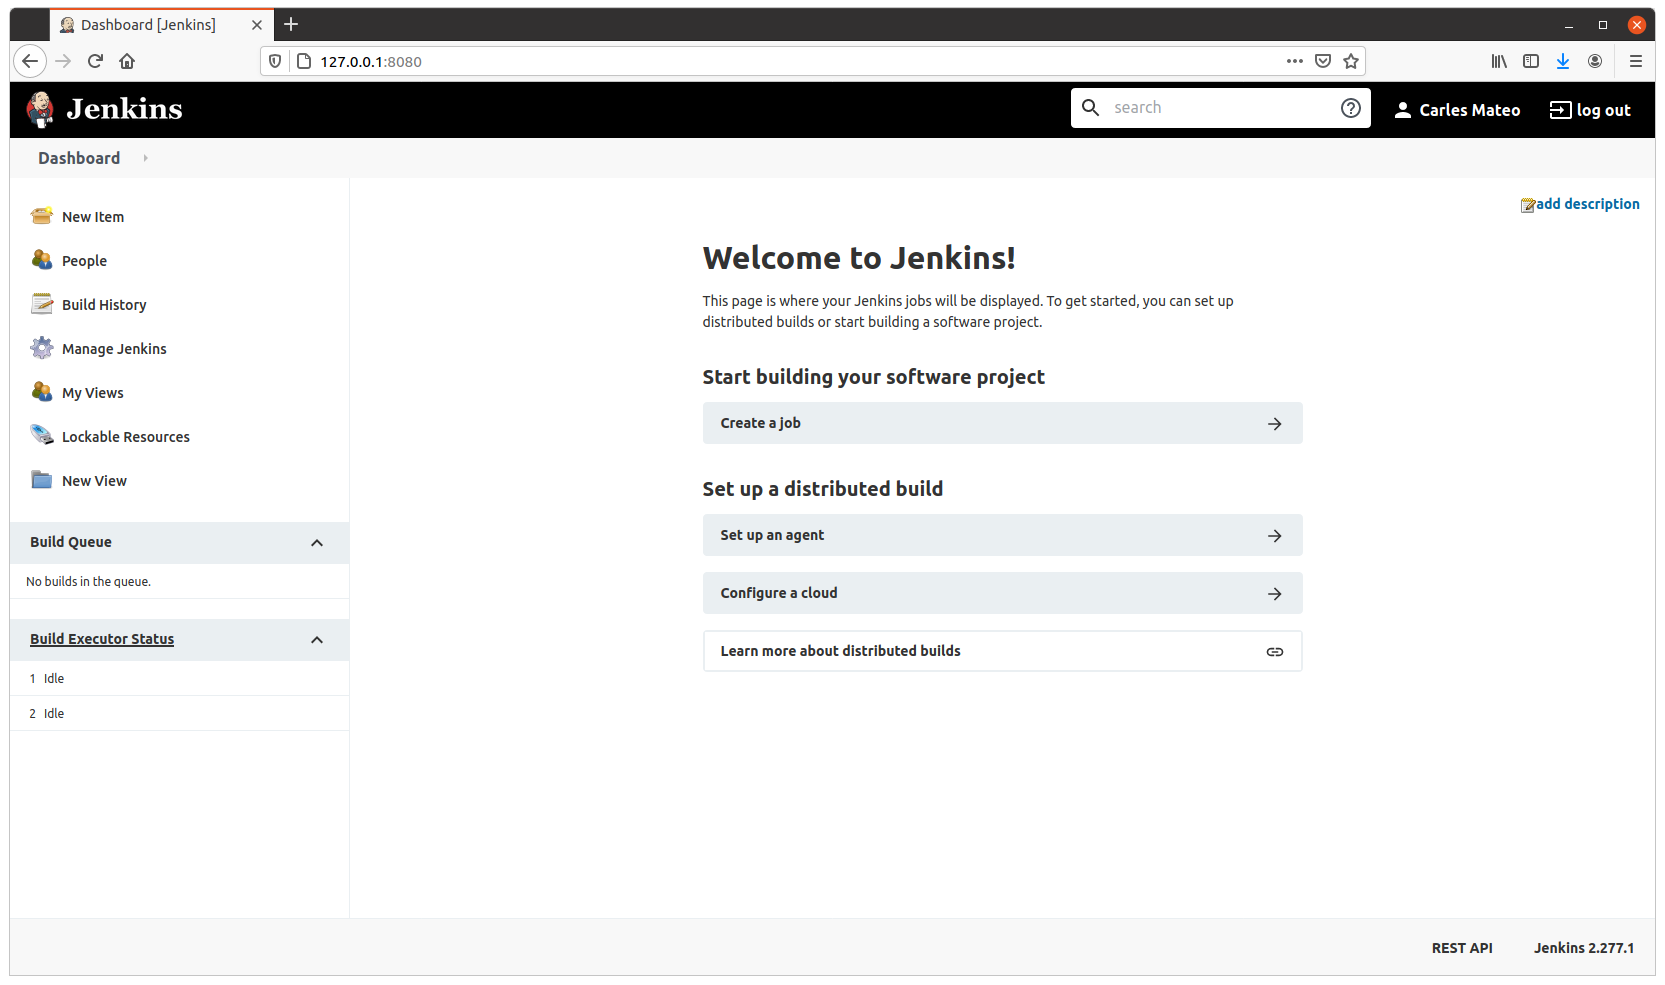
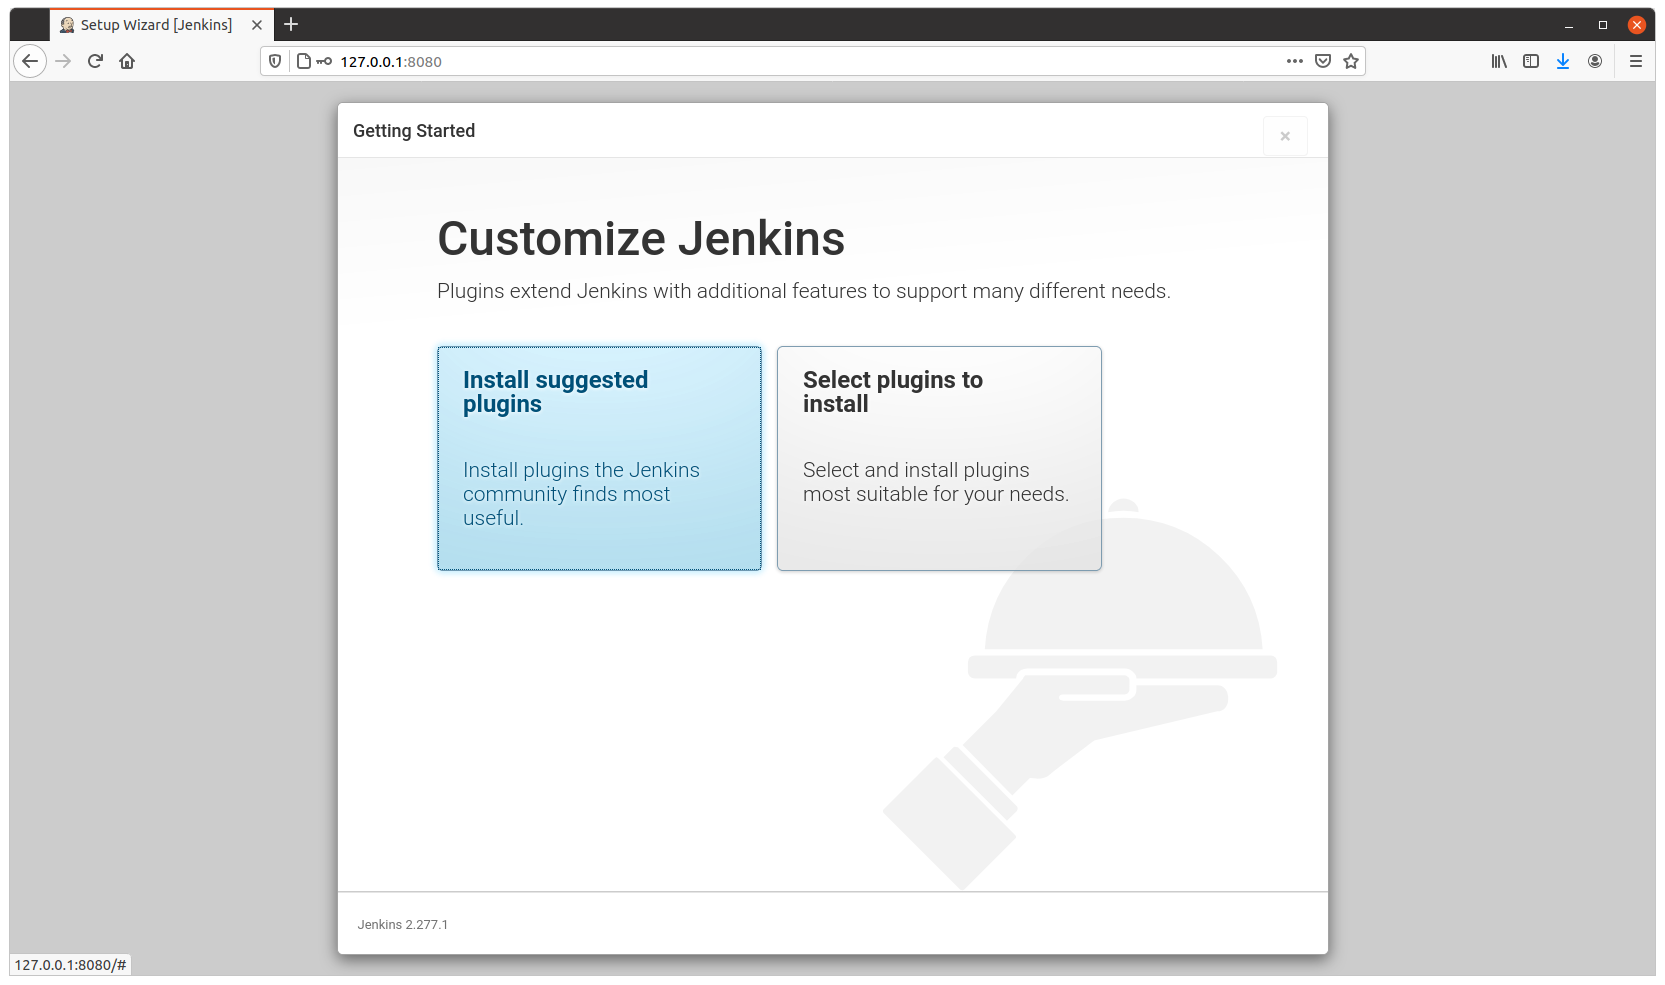
Visit http://127.0.0.1:8080 to configure Jenkins.
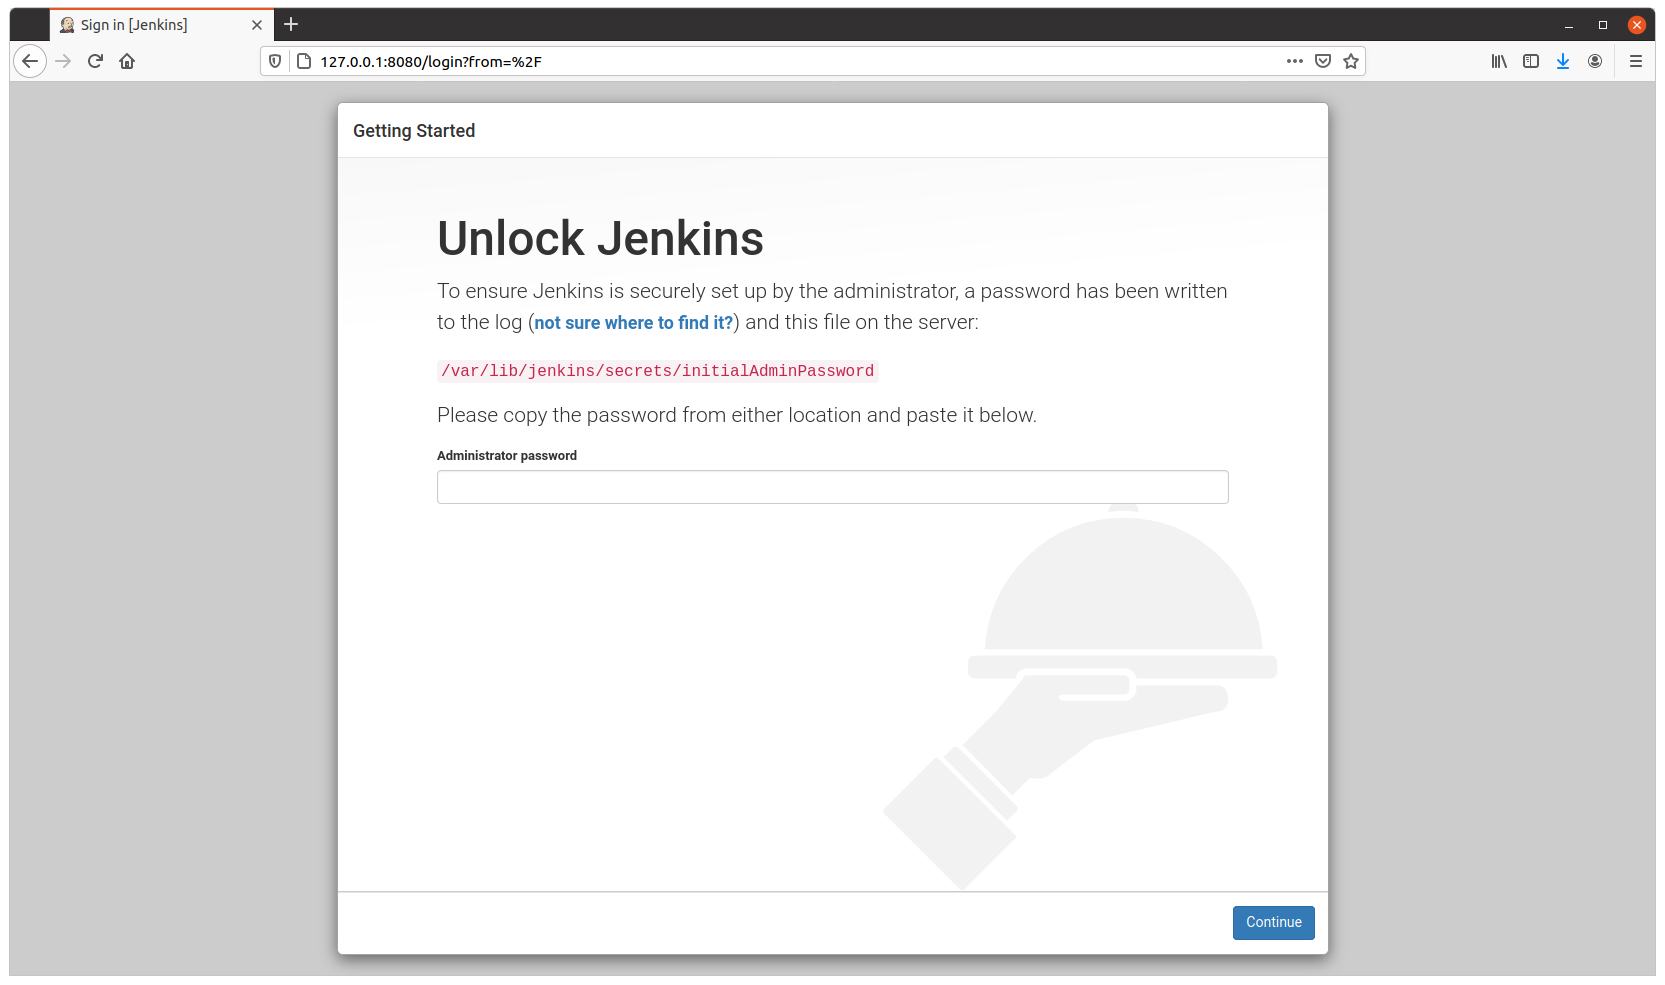
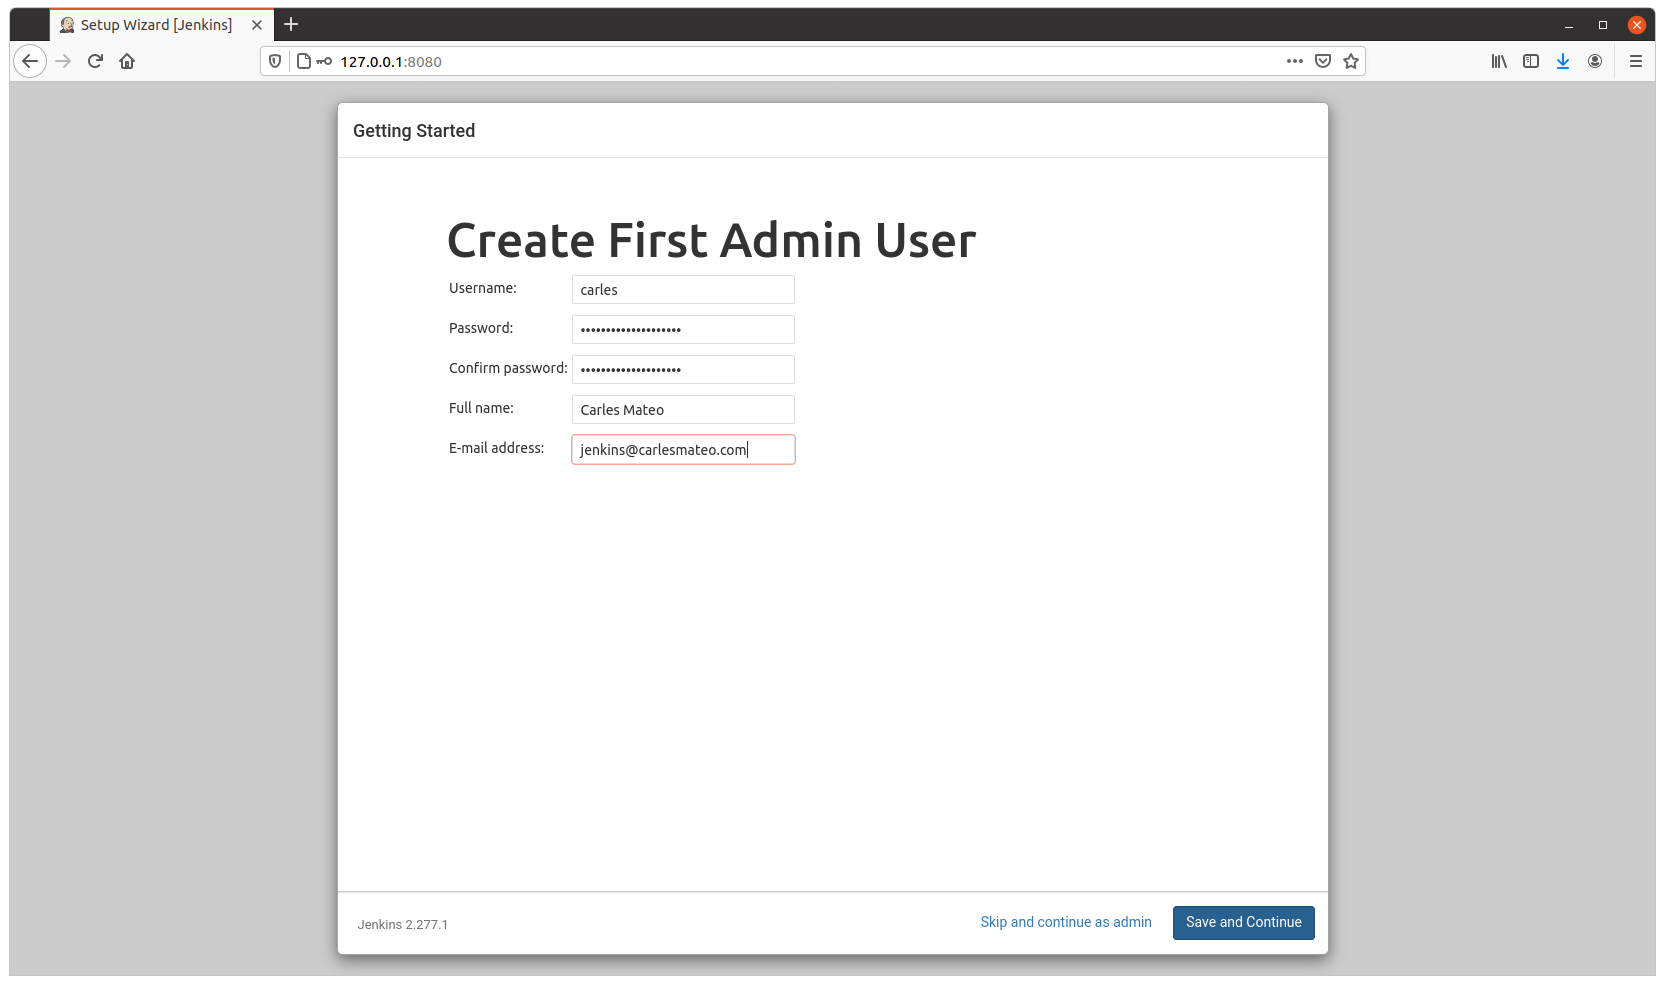
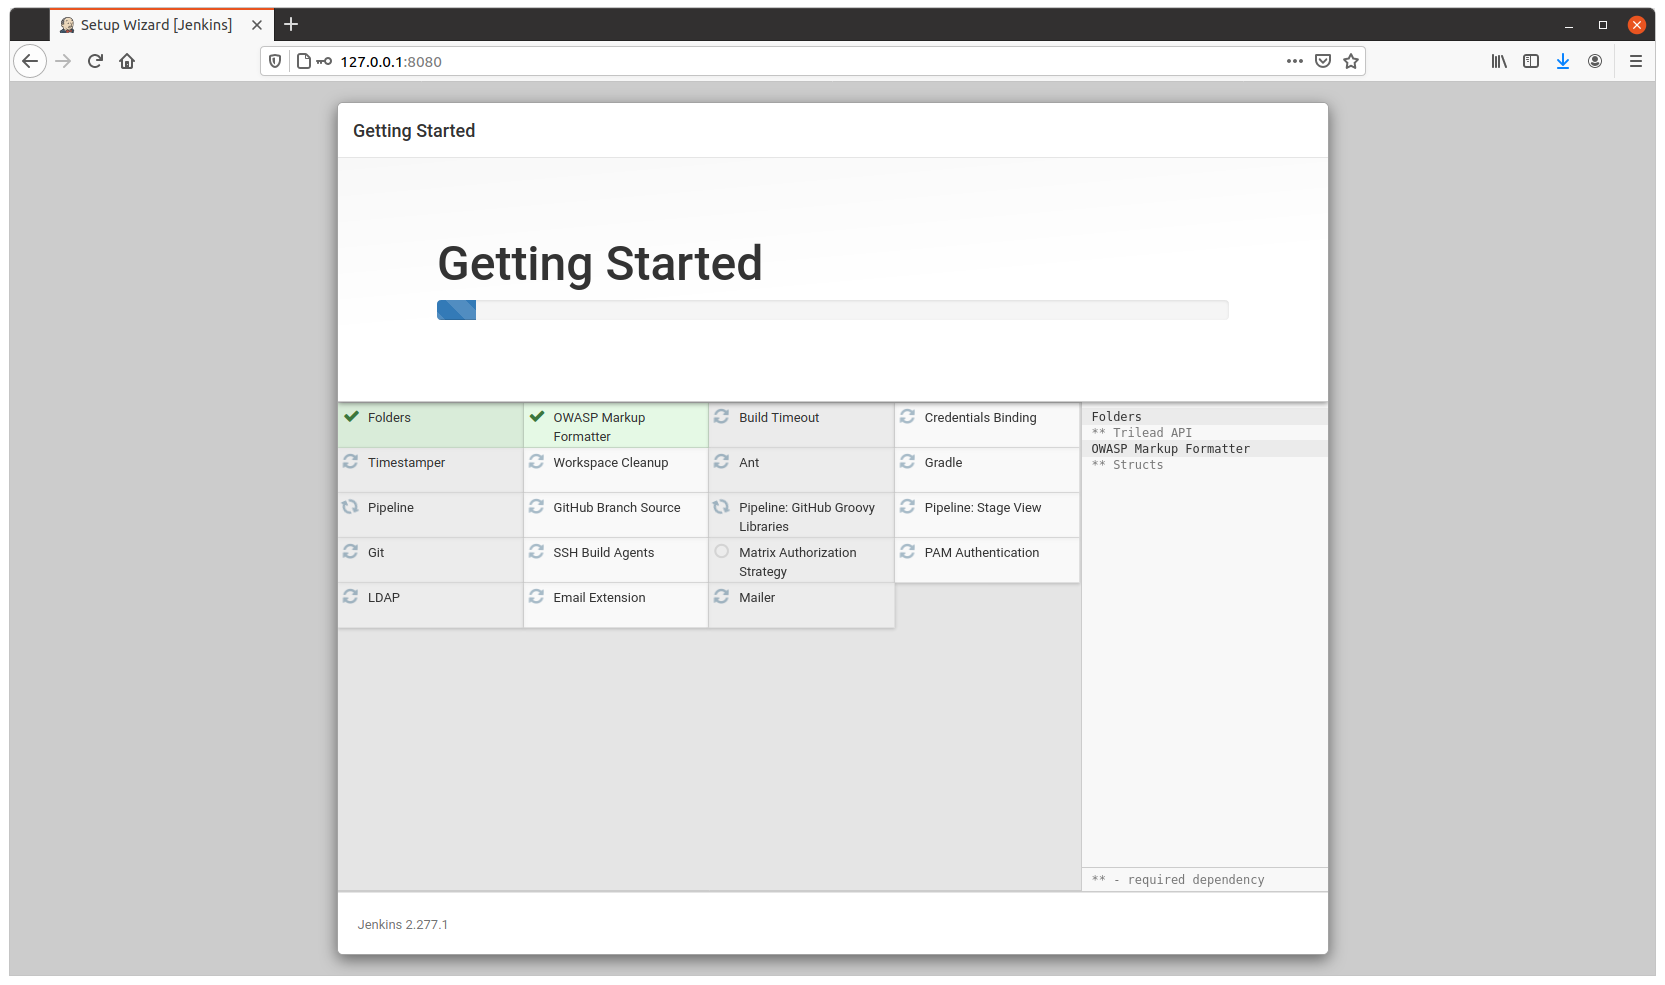
Configure as usual

Resuming after CTRL + C

After you configured it, on the terminal, press CTRL + C.

And continue, detached, by running:

sudo docker start jenkins_base

The image is 1.2GB in size, and will allow you to run Python3, Virtual Environments, Unit Testing with pytest and has Java 11 (not all versions of Java are compatible with Jenkins), use sshpass to access other Servers via SSH with Username and Password…

Solving the problem when running a Docker Container: standard_init_linux.go:190: exec user process caused “no such file or directory”

When you see this error for the first time it can be pretty ugly to detect why it happens.

At personal level I use only Linux for my computers, with an exception of a windows laptop that I keep for specific tasks. But my employers often provide me laptops with windows.

I suffered this error for first time when I inherited a project, in a company I joined time ago. And I suffered some time later, by the same reason, so I decided to explain it easily.

In the project I inherited the build process was broken, so I had to fix it, and when this was done I got the mentioned error when trying to run the Container:

standard_init_linux.go:190: exec user process caused "no such file or directory"

The Dockerfile was something like this:

FROM docker-io.battle.net/alpine:3.10.0

LABEL Author="Carles Mateo" \
      Email="docker@carlesmateo.com" \
      MAINTAINER="Carles Mateo"

ENV SERVICE cservice

RUN set -ex

RUN echo "Creating directories and copying code" \
    && mkdir -p /opt/${SERVICE}
    
COPY config.prod \
    config.dev \
    config.st \
    requirements.txt \
    utils.py \
    cservice.py \
    tests/test_cservice.py \
    run_cservice.sh \
    /opt/${SERVICE}/

RUN echo "Setting work directory and listening port"
WORKDIR /opt/${SERVICE}
EXPOSE 7000

RUN echo "Installing dependencies" \
    && apk add build-base openldap-dev python3-dev py-pip \
    && pip3 install --upgrade pip \
    && pip3 install -r requirements.txt \
    && pip3 install pytest

ENTRYPOINT ["./run_cservice.sh"]

So the project was executing a Bash script run_cservice.sh, via Dockerfile ENTRYPOINT.

That script would do the necessary amends depending if the Container is launched with prod, dev, or staging parameter.

I debugged until I saw that the Container never executed this in the expected way.

A echo “Debug” on top of the Bash Script would be enough to know that very basic call was never executed. The error was first.

After much troubleshooting the Container I found that the problem was that the Bash script, that was copied to the container with COPY in the Dockerfile, from a Windows Machines, contained CRLF Windows carriage return. While for Linux and Mac OS X carriage return is just a character, LF.

In that company we all use Windows. And trying to build the Container worked after removing the CRLF, but the Bash script with CRLF was causing that problem.

When I replace the CRLF by Unix type LF, and rebuild the image, and ran the container, it worked lovely.

A very easy, manual way, to do this in Windows, is opening your file with Notepad++ and setting LF as carriage return. Save the file, rebuild, and you’ll see your Container working.

Please note that in the Dockerfile provided I install pytest Framework and a file calles tests/test_cservice.py. That was not in the original Dockerfile, but I wanted to share with you that I provide Unit Testing that can be ran from a Linux Container, for all my projects. What normally I do is to have two Dockerfiles. One for the Production version to be deployed, another for running Unit Testing, and some time functional testing as well, from inside the Docker Container. So strictly speaking for the production version, I would not copy the tests/test_cservice.py and install pytest. A different question are internal Automation Tools, where it may be interested providing a All-in-One image, that can run the Unit Testing before start the service. It is interesting to provide some debugging tools in out Internal Automation Tools, so we can troubleshoot what’s going on in case of problems. Take a look at my previous article about Python version for Docker and Automation tools, for more considerations.

Why I propose you to use Python 3.8, at least, for your Internal Automation Tools in Docker Containers

This article is written at 2021-03-22 so this conclusion will evolve as time passes.

Some of my articles are checked after 7 years, so be advised this choice will not be valid in a year. Although the reasoning and considerations to take in count will be the same.

I answer to the question: Why Carles, do you suggest to adopt Python 3.8, and not 3.9 or 3.7 for our Internal Automation Tools?.

Reliability and Maturity

If you look at page https://devguide.python.org/#status-of-python-branches you will see the next table:

So you can see that:

  • Python 3.6 was released on 2016-12-23 and will get EOL on 2021-12-23.
    • That’s EOL in 9 months. We don’t want to recommend that.
  • Python 3.7 was released on 2018-06-27 and will get EOL 2023-06-27.
    • That’s 2 years and 3 months from now. The Status of development is focus in Security bugfixes.
  • Python 3.9 was released 2020-10-05 that’s 5 months approx from now.
    • Honestly, I don’t recommend for Production a version of Software that has not been in the market for a year.
      • Most of the bugs and security bugs appears before the first year.
      • New features released, often are not widely fully tested , and bugs found and fixed, once a year has passed.
  • Python 3.8 was released on 2019-10-14.
    • That means that the new features have been tested for a year and five months approximately.
    • This is enough time to make appear most bugs.
    • EOL is 2024-10, that is 3 years and 7 months from now. A good balance of EOL for the effort to standardize.
    • Finally Python 3.8 is the Python mainline for Ubuntu 20.04 LTS.
      • If our deploy strategy is synchronized, we want to use Long Time Support versions, of course.

So my recommendation would be, at least for your internal tools, to use containers based in Ubuntu 20.04 LTS with Python 3.8.

We know Docker images will be bigger using Ubuntu 20.04 LTS than using other images, but that disk space is really a small difference, and we get the advantage of being able to install additional packages in the Containers if we need to debug.

An Ubuntu 20.04 Image with Pyhton 3.8 and pytest, uses 540 MB.

This is a small amount of space nowadays. Even if very basic Alpine images can use 25MB only, when you install Python they start to grow close to Ubuntu, to 360MB. The difference is not much, and if you used Alpine and you have suffered from Community packages being updated and becoming incompatible with wheel and you lost hours fixing the dependencies, you’ll really appreciate using my Ubuntu LTS packages approach.

News for the blog 2021-03-21

  • I’ve released cmemgzip v. 0.4.1, with colors, and is now a package available to install download from PIP.
pip3 install cmemgzip
  • I keep teaching to learn to program in Python, to become a Junior BackEnd Developer. To groups and individuals.
    It is so beautiful and wonderful seeing people transform their minds, their lives and their confidence with the coding skills and being able to chase after better jobs, and so funny and beautiful when this happens in a group dynamic, with friendship, that I’m thinking about assembling a new Group of Students.
    Those classes are in English but I got some suggestions to do group classes in Spanish. Even if Catalan is speak by around 11 Million people in the world if I have enough requests I’ll gladly do it.
    if you’re interested reach me in LinkedIn.
  • This new is hilarious:

https://www.engadget.com/icloud-true-last-name-lock-out-192224309.html

One person named True as surname gets locked in iCloud due to a bug in their coding, confusing the surname by a boolean property.

  • Bugs everywhere.

I always smile when I find bugs. Bugs are everywhere, but always make me smile when important companies with tons of resources make them.

Today I show this bug received in my email from Glassdoor. :)

You can see how in the email they assume that key will exist, and doesn’t, so a KEY NOT FOUND error is displayed. :)

It is funny, but remembers us the importance of doing our best trying to avoid bugs, working seriously with Methodology, implementing Unit Testing, Functional Testing, having also QA.. all the mechanisms we can, as they can be the last line of defense to avoid releasing bugs to Production.

  • In the past I taught Java and PHP, and I still help my mates with their Assembler Practices in their Masters, so I could not stop laughing with this:

compress_old.sh A simple Bash script to compress files in a directory, older than n days

I use this script for my needs, to compress logs and core dumps older than some days, in order to Cron that and save disk space.

You can also download it from here:

https://gitlab.com/carles.mateo/blog.carlesmateo.com-source-code/-/blob/master/compress_old.sh

#!/bin/bash

# By Carles Mateo - https://blog.carlesmateo.com
# Compress older than two days files.
# I use for logs and core dumps. Normally at /var/core/

# =======================================================0
# FUNCTIONS
# =======================================================0


function quit {
    # Quits with message in param1 and error code in param2
    s_MESSAGE=$1
    i_EXIT_CODE=$2

    echo $s_MESSAGE
    exit $i_EXIT_CODE
}

function add_ending_slash {
    # Check if Path has ending /
    s_LAST_CHAR_PATH=$(echo $s_PATH | tail -c 2)

    if [ "$s_LAST_CHAR_PATH" != "/" ];
    then
        s_PATH="$s_PATH/"
    fi
}

function get_list_files {
    # Never follow symbolic links
    # Show only files
    # Do not enter into subdirs
    # Show file modified more than X days ago
    # Find will return the path already
    s_LIST_FILES=$(find -P $s_PATH -maxdepth 1 -type f -mtime +$i_DAYS | tr " " "|")
}

function check_dir_exists {
    s_DIRECTORY="$1"
    if [ ! -d "$s_DIRECTORY" ];
    then
        quit "Directory $s_DIRECTORY does not exist." 1
    fi
}

function compress_files {
    echo "Compressing files from $s_PATH modified more than $i_DAYS ago..."
    for s_FILENAME in $s_LIST_FILES
    do
        s_FILENAME_SANITIZED=$(echo $s_FILENAME | tr "|" " ")
        s_FILEPATH="$s_PATH$s_FILENAME_SANITIZED"
        echo "Compressing $s_FILENAME_SANITIZED..."
        # Double quotes around $s_FILENAME_SANITIZED avoid files with spaces failing
        gzip "$s_FILENAME_SANITIZED"
        i_ERROR=$?
        if [ $i_ERROR -ne 0 ];
        then
            echo "Error $i_ERROR happened"
        fi
    done

}


# =======================================================0
# MAIN PROGRAM
# =======================================================0

# Check Number of parameters
if [ "$#" -lt 1 ] || [ "$#" -gt 2 ];
then
    quit "Illegal number of parameters. Pass a directory and optionally the number of days to exclude from mtime. Like: compress_old.sh /var/log 2" 1
fi

s_PATH=$1

if [ "$#" -eq 2 ];
then
    i_DAYS=$2
else
    i_DAYS=2
fi

add_ending_slash

check_dir_exists $s_PATH

get_list_files

compress_files
Fragment of the code in gitlab

If you want to compress everything in the current directory, event files modified today run with:

./compress_old.sh ./ 0

A simple script to upload a PIP package

If you want to create a package and distribute it like through pip in record time, you can customize my script from cmemgzip for Ubuntu 20.04.

Here is the official documentation if you want to do everything manually:

https://packaging.python.org/tutorials/packaging-projects

Here is the script customized for Test Environment.

You’ll need to create a Test account in test.pypi.org

#!/bin/bash

PACKAGE="cmemgzip-test"
mkdir $PACKAGE
mkdir $PACKAGE/src
mkdir $PACKAGE/src/$PACKAGE
mkdir $PACKAGE/tests

cp LICENSE $PACKAGE/

echo "[build-system]" > $PACKAGE/pyproject.toml
echo "requires = [" >> $PACKAGE/pyproject.toml
echo '    "setuptools>=42",' >> $PACKAGE/pyproject.toml
echo '    "wheel"' >> $PACKAGE/pyproject.toml
echo "]" >> $PACKAGE/pyproject.toml
echo 'build-backend = "setuptools.build_meta"' >> $PACKAGE/pyproject.toml

cat <<EOF > $PACKAGE/setup.cfg
[metadata]
name = cmemgzip
version = 0.4.1
author = Carles Mateo
author_email = cmemgzip@carlesmateo.com
description = Compresses files in memory and replaces the original by a .gz file when there is no space on drive.
long_description = file: README.md
long_description_content_type = text/markdown
url = https://gitlab.com/carles.mateo/cmemgzip
project_urls =
    Bug Tracker = https://gitlab.com/carles.mateo/cmemgzip/issues
classifiers =
    Programming Language :: Python :: 3
    License :: OSI Approved :: MIT License
    Operating System :: OS Independent

[options]
package_dir =
    = src
packages = find:
python_requires = >=3.6

[options.packages.find]
where = src
EOF

cp README.md $PACKAGE/
cp manual-cmemgzip.pdf $PACKAGE/
cp cmemgzip.py $PACKAGE/src/$PACKAGE/
touch $PACKAGE/src/$PACKAGE/__init__.py
cp test_*.py $PACKAGE/tests/


python3 -m pip install --upgrade build

# Install dependencies
sudo apt-get install python3.8-venv

python3 -m pip install --user --upgrade twine


echo
echo "Entering into directory $PACKAGE"
cd $PACKAGE

echo
echo "Generating distribution binaries"
python3 -m build

# Create account in: https://test.pypi.org/manage/account/

# Create API Token
# https://test.pypi.org/manage/account/

echo
echo "Going to upload the packages. Use your username and password"
echo
python3 -m twine upload --repository testpypi dist/cmemgzip*

The changes for the script to production are just a different package name, and last line:

python3 -m twine upload --repository pypi dist/cmemgzip*

Obviously you’ll need to use credentials for Production.

News from the Blog 2021-03-04

  • I’ve recorded two live sessions of Refactoring and Unit Testing working on the project cmemgzip v.0.4.
    It is basically the exercise of Refactoring a code that is too big, and extracting sections to small methods, and then adding pytest Unit Testing code coverage.
    I explain the arrays I use for testing a battery of cases instead of few of them.
    Is an exercise of talking loud what I do normally, so you can understand many small details so subtle as the order of parameters or consistency.
    I use this material so my students, colleagues learning Unit Testing, and other people can learn and make their code more resilient and high quality.
  • I’ve implemented a plugin for my Open Source Software CTOP that allows to interact with LED through the Raspberry Pi GPIO.

Plugins architecture in CTOP is something I really like. I had a lot of fun creating it, and is super powerful. Basically I load Python plugins on demand, that are able to register the methods to be called, using hooks. The plugins receives an instance of CTOP itself, injected as dependency, so they have completely visibility over all the status of the machines.

  • I’ve been developed a new version of CTOP compatible with Python 2.7.
    I will be adding to master branch and releasing as part of tag 0.8 soon.
  • I’ve released cmemgzip v.0.3 (stable) and v.0.4 (ongoing) which is a Python 3 Open Source utility like gzip, with the difference that the files are loaded into memory, then compressed in memory, then the original file is deleted and the compressed data is written to a .gz file.

That means that you can use it on systems that have no space left on the disk, as long as you have memory.

Please note, is possible to compress files much bigger than actual size of the memory as the Block size to be compressed can be indicated with parameter -m. Resulting gz file are completely compatible with gzip/gunzip, zcat, etc…

  • I’ve made a donation to vokoScreen author €25 (around $30 USD).

This is the Software that I’ve been using recently in Linux, and is very useful, specially having several monitors, so I’m thanking the author with a donation.

I’ve been using this Software to record the classes for my students, so I find nice to share the love.

For windows time ago I bought a commercial Software and it doesn’t do more than vokoScreen, which is available for Windows too.

During covid I lowered the price of my books to the minimum allowed by LeanPub, to $5 USD, and I find it so nice when people donate more, that I’m happy to contribute to brilliant authors. I support authors since I started to get my first salary several decades ago.

I’m an author. I create Software and Books. So I think is normal, common sense and healthy that we, developers, value our work and support other authors. :)

  • Long time ago I wrote an article about zoning and NDS-4600. A colleague asked me for help, as he bought a second hand unit and it was doing tests. I wrote and explained everything, and added this information to my ZFS in Ubuntu book.
  • I was very happy to see that you keep buying my books. :)

A live session refactoring and adding Unit Testing to my Python3 project cmemgzip

I refactor and add unit testing to my actual project cmemgzip while I comment every step so you can learn the whys and the reasoning.

Open video in full screen with max 1080 quality, in order to see the code clearly.

Update 2021-03-03: I added a third part. I’m tired but still is worth watching.