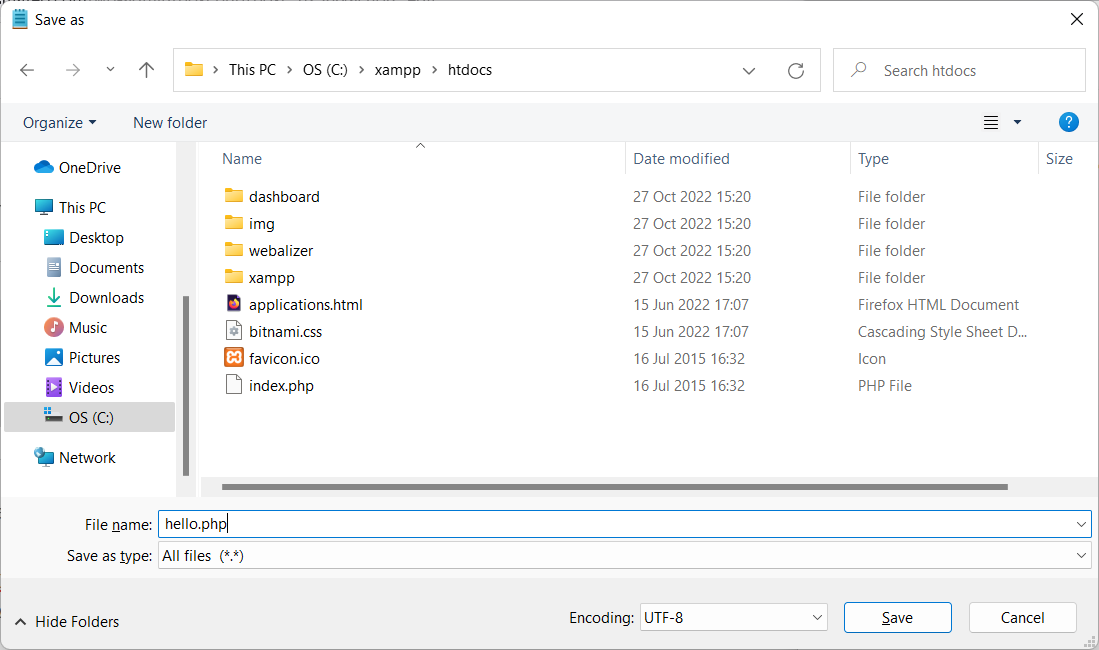
You have installed eZ Launchpad, and you can execute the binary ez from your home folder or other paths, however when you execute it from a project folder you cloned with git (with its .platform.app.yaml file) ez returns to prompt without any error message.
The exit code is 255, but even if you strace the process you don’t find the exact problem.
Inside your project you run ez without any argument in a clean install of Ubuntu 24.04 LTS with PHP 8.3, or with PHP 8.4, without xDebug, without opcache, without memory limit… nothing works with no visible error message in the logs or in the error output. However if you run it outside the project folder, it works, and it displays the typical help messages.
I reproduced this behavior on several Ubuntu computers. The fix I found is to execute ez with PHP 8.1
You can install PHP8.1 from ondrej repository, then you can update alternates to execute PHP 8.1 by default in your system, or you create the project by invoking ez with PHP 8.1 explicitly with:
php8.1 ~/ez create
This will kickstart the creation of your ez project based on Docker containers.
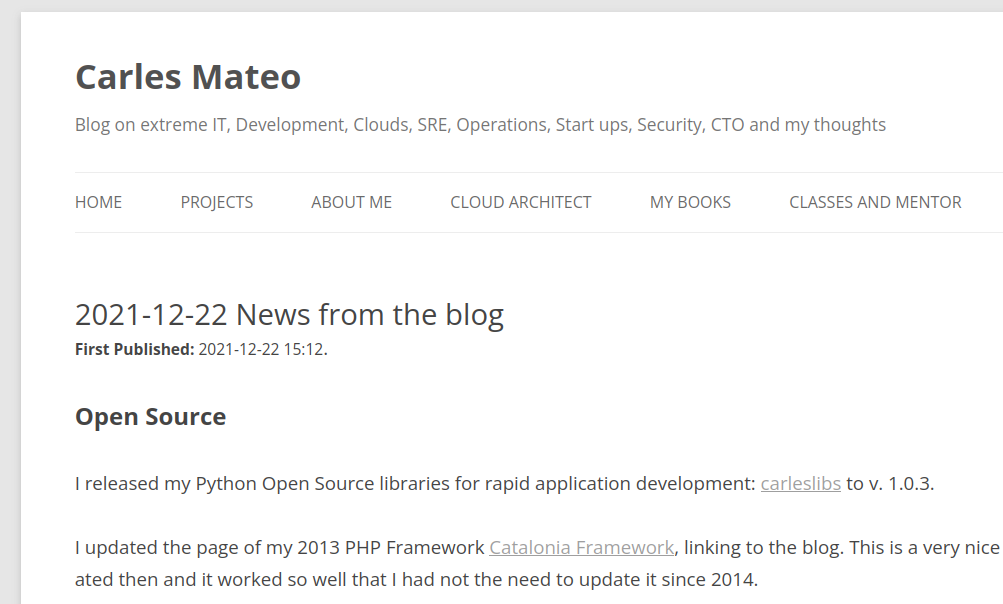
It has been 9 years since I created the blog, and some articles have old content that still get many visitors. To make sure they get the clear picture and not obsolete information, all the articles of the taxonomy POST, will include the Date and Time when the article was first published.
I also removed the annoying link “Leave a comment” on top. I think it influences some people to leave comments before actually having read the article.
It is still possible to add comments, but they are on the bottom of the page. I believe it makes more sense this way. This is the way.
Technically that involved modifying the files of my template:
functions.php
content.php
My Books
Automating and Provisioning to Amazon AWS using boto3 Amazon’s SDK for Python 3
It’s 128 pages in Full size DIN-A4 DRM-Free, and comes with a link to code samples of a real project CLI Menu based.
Docker Combat Guide
I have updated my book Docker Combat Guide and I added a completely new section, including source code, to work with Docker’s Python SDK.
I show the Docker SDK by showing the code of an actual CLI program I wrote in Python 3.
Here you can see a video that demonstrates how I launched a project with three Docker Containers via Docker compose. The Containers have Python, Flask webserver, and redis as bridge between the two Python Containers.
All the source code are downloadable with the book.
Watch at 1080p at Full Screen for better experience
My Classes
In January I resumed the coding classes. I have new students, and few spots free in my agenda, as some of my students graduated and others have been hired as Software Developers. I can not be more proud. :)
Free Training
Symfony is one of the most popular PHP Frameworks.
Before leaving 2021, I registered WinRAR for Windows.
WinRAR is a compressing Software that has been with us for 19 years.
I’m pretty sure I registered it in the past, but these holidays I was out only with two Window laptops and I had to do some work for the university and WinRAR came it handy, so I decided to register it again.
I create Software and Books, and I earn my life with this, so it makes a lot of sense to pay others for their good work crafting Software.
Books I Purchased
I bought this book and by the moment is really good. I wanted to buy some updated books as all my Linux books have some years already. Also I keep my skills sharp by reading reading reading.
Hardware I purchased
So I bought a cheap car power inverter.
The ones I saw in Amazon were €120+ and they were not very good rated, so I opted to buy a cheap one in the supermarket and keep it on the car just in case one day I need it. (My new Asus Zenbook laptop has 18 hours of autonomy and I don’t charge it for days, but you never know)
For those that don’t know, a power inverter allows you to get a 220V (120V in US) plug, from the connection of the lighter from your car. Also you can get the energy from an external car battery. This comes in really handy to charge the laptop, cameras, your drone… if you are in the nature and you don’t have any plug near.
I bought one years ago to power up Raspberry Pi’s when I was doing Research for a project I was studying to launch.
Fun
Many friends are using Starlink as a substitute of fiber for their rural homes, and they are super happy with it.
One of them send me a very fun article.
It is in Italian, but you can google translate it.
Anyways you can get the idea of what’s going on in the picture :)
So tell me… so your speed with Starlink drops 80% in winter uh… aha…
Random news about Software
I tried the voice recognition in Slack huddle, and it works pretty well. Also Zoom has this feature and they are great. Specially when you are in a group call, or in a class.
My health
I was experimenting some problems, so I scheduled an appointment to get blood analysis and to be checked. Just in case.
TL;TR I could have died.
The doctors saw my analysis and sent me to the hospital urgently, where they found something that was going to be lethal. For hours they were checking me and doing several more analysis and tests to discard false positives, etc… and they precisely found the issue and provided urgent treatment and confirmed that I could have died at any moment.
Basically I dodged a bullet.
I was doing certain healthy things that helped me in a situation that could have been deadly or extremely dangerous to my health.
With the treatment and my strict discipline, I reverted the situation really quick and now I have more health and more energy than before. I feel rejuvenated.
I’m feeling lucky that with my work, the classes, the books I wrote, etc… I didn’t have to worry about the expensive medicines, the transport, etc… It was a bad moment, during Christmas, with so many people on holidays, pharmacies and GPs closed, so I had to spend more time looking for, traveling, and to pay more than it would had been strictly necessary. Despite all the time I used to my health, I managed to finish my university duties on time, and I didn’t miss my duties at work after the hospital, neither I had to cancel any programming classes or mentoring sessions. Nobody out of my closest circle knew what was going on, with the exception of my boss, which I kept informed in real time, just in case there was any problem, as I didn’t want to let down the company and have my duties at work to be unattended if something major happened.
I was not afraid to die. Unfortunately I’ve lost very significant people since I was a child. Relatives, very appreciated bosses and colleagues which I considered my friends, and great friends of different circles. Illnesses, accidents, and a friend of mine committed suicide years ago, and some of my partners attempted it (before we know each other). When you see people that are so good leaving, this brings a sadness that cannot be explained with words. I have had a tough life.
We have a limited time, and he have freedom to make choices. Some people choose to be miserable, to mistreat others, to lie, to cheat, to be unfaithful, to lack ethic and integrity. Those are their choices. Their wasted time will not come back.
Some of my friends are doctors. I admire them. They save lives and improve the quality of life of people with health problems.
I like being an Engineer cause I can create things, I can build instead of destroy, I can help to improve the world, and I can help users to have a good time and to avoid the frustration of services being down. I chose to do a positive work. So many times I’ve been offered much bigger salaries to do something I didn’t like, or by companies that I don’t admire, and I refused. Cause I wanted to make a better world. I know many people don’t think like that, and they only take take take. They are even unable to understand my choices, even to believe that I’m like that. But it’s enough that I know what I’m doing, and that it makes sense for me, and that I know that I’m doing well. And then, one day, you realize, that doing well, being fair and nice even if other people stabbed you in the back, you got to know fantastic people like you, and people that adore you and love to have you in their life, in their companies… So I’m really fortunate. To all the good-hearted people around, that give without expect anything in return, that try to make the world a better place, thank you.
I completed my ZFS on Ubuntu 20.04 LTS book. I had an error in an actual hard drive so I added a Troubleshooting section explaining how I fixed it.
I paused for a while the advance of my book Python: basic exercises for beginners, as my colleague Michela is translating it to Italian. She is a great Engineer and I cannot be more happy of having her help.
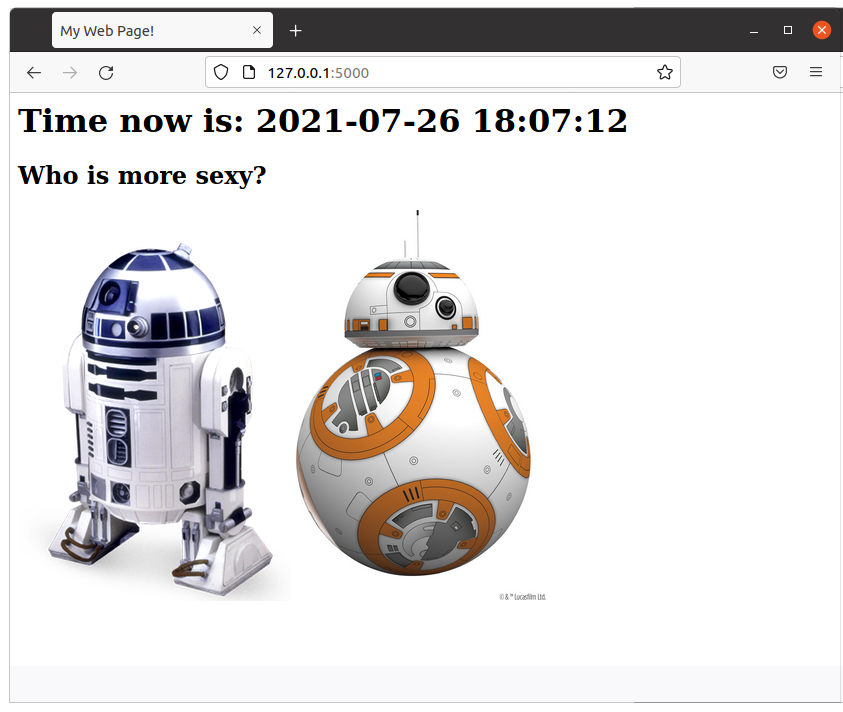
I added a new article about how to create a simple web Star Wars game using Flask. As always, I use Docker and a Dockerfile to automate the deployment, so you can test it without messing with your local system. The code is very simple and easy to understand.
This way I set an entry in /etc/hosts and I can do all the tests I want.
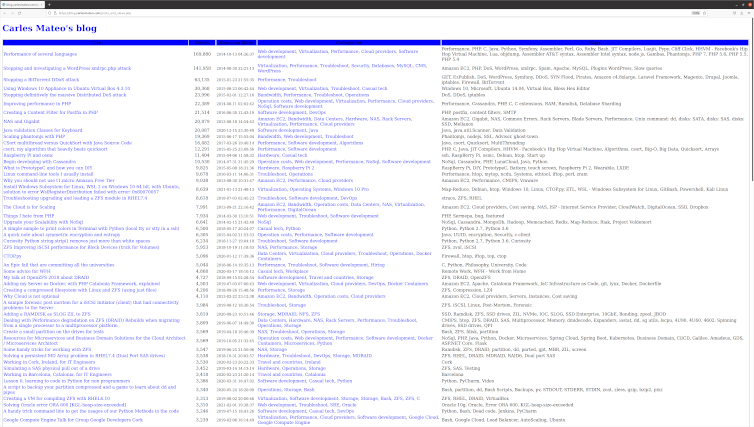
I added a new section to the blog, is a link where you can see all the articles published, ordered by number of views. /posts_and_views.php
Is in the main page, just after the recommended articles. Here you can see the source code.
I removed the Categories:
Storage
ZFS
In favor of:
Hardware
Storage
ZFS
So the articles with Categories in the group deleted were reassigned the Categories in the second group.
Visually:
I removed some annoying lines from the Quick Selection access. They came from inherited CSS properties from my WordPress, long time customized, and I created new styles for this section.
I adjusted the line-height to avoid separation between lines being too much.
I added a link in the section of Other Engineering Blogs that I like, to the great https://github.com/lesterchan site, author of many super cool WordPress plugins.
As you can see I use wp-config.php file to get the Database Settings (username, password, database) but I don’t use the WordPress Engine, it is just a stand alone PHP. So I wrote my own function to get the slug based on the category name. I believe the slug for it is in the Database and I could have added this as a SubQuery with JOINs, which would be better, but I wanted to keep the Database workload lightweight and especially, I did not want to invest more time investigating how the get the slug.
As I tested my function I didn’t find any Category failing but I saw that I had the Category Storage repeated in two different structure tree in Categories, and I will only always link to just the first one (So I was not linkin to the slug storage-2). I fixed that Category that I found repeated but to be honest if this script was a commercial solution or an Open Source solution properly maintained rather than just a sample, I would update it to have Categories and Tags’ slugs coming from the Database.
I would probably make it work with a Cron that would generate a cached page, updated every hour or every ten minutes. I did this in other projects I worked or in my PHP Framework Catalonia Framerwork.
But honestly, the load of the page does not justify a major effort in optimizing here, in this case.
<!DOCTYPE html>
<html>
<head>
    <style>
        .first {

            background-color: blue;
            padding: 12px;
        }
        .second {
            background-color: rgba(254, 253, 252, 0.7);
            text-align: center;
            padding:20px 0;
            font-size: 20px;
        }

        .centered {
            text-align: center;
        }

        /* unvisited link */
        a:link {
            color: blue;
            text-decoration: none;
        }

        /* visited link */
        a:visited {
            color: blue;
            text-decoration: none;
        }

        /* mouse over link */
        a:hover {
            color: #00A8EF;
            text-decoration: underline;
        }

        /* selected link */
        a:active {
            color: blue;
        }
    </style>
<body>
<?php

include "wp-config.php";

$s_site_name = "Carles Mateo's blog";
$s_site_link = "https://blog.carlesmateo.com";

function get_category_slug($s_text) {
    $s_output_text = strtolower($s_text);
    $s_output_text = str_replace(" ", "-", $s_output_text);

    return $s_output_text;
}

?>
<h1><a href="<?php print $s_site_link; ?>"><?php print($s_site_name); ?></a></h1>
<?php


$s_sort = "views DESC, post_date, post_title DESC";

if (array_key_exists("sort", $_GET)) {
    if ($_GET["sort"] == "date") {
        $s_sort = "post_date, views, post_title";
    }
}

$s_servername = "localhost";
$s_database = DB_NAME;
$s_username = DB_USER;
$s_password = DB_PASSWORD;


// Create connection
$o_conn = new mysqli($s_servername, $s_username, $s_password, $s_database);

// Check connection
if ($o_conn->connect_error) {
    die("Connection failed: " . $o_conn->connect_error);
}

/*
mysql> DESCRIBE wp_posts;
+-----------------------+-----------------+------+-----+---------------------+----------------+
| Field                 | Type            | Null | Key | Default             | Extra          |
+-----------------------+-----------------+------+-----+---------------------+----------------+
| ID                    | bigint unsigned | NO   | PRI | NULL                | auto_increment |
| post_author           | bigint unsigned | NO   | MUL | 0                   |                |
| post_date             | datetime        | NO   |     | 0000-00-00 00:00:00 |                |
| post_date_gmt         | datetime        | NO   |     | 0000-00-00 00:00:00 |                |
| post_content          | longtext        | NO   |     | NULL                |                |
| post_title            | text            | NO   |     | NULL                |                |
| post_excerpt          | text            | NO   |     | NULL                |                |
| post_status           | varchar(20)     | NO   |     | publish             |                |
| comment_status        | varchar(20)     | NO   |     | open                |                |
| ping_status           | varchar(20)     | NO   |     | open                |                |
| post_password         | varchar(255)    | NO   |     |                     |                |
| post_name             | varchar(200)    | NO   | MUL |                     |                |
| to_ping               | text            | NO   |     | NULL                |                |
| pinged                | text            | NO   |     | NULL                |                |
| post_modified         | datetime        | NO   |     | 0000-00-00 00:00:00 |                |
| post_modified_gmt     | datetime        | NO   |     | 0000-00-00 00:00:00 |                |
| post_content_filtered | longtext        | NO   |     | NULL                |                |
| post_parent           | bigint unsigned | NO   | MUL | 0                   |                |
| guid                  | varchar(255)    | NO   |     |                     |                |
| menu_order            | int             | NO   |     | 0                   |                |
| post_type             | varchar(20)     | NO   | MUL | post                |                |
| post_mime_type        | varchar(100)    | NO   |     |                     |                |
| comment_count         | bigint          | NO   |     | 0                   |                |
+-----------------------+-----------------+------+-----+---------------------+----------------+
 */

/*
mysql> describe wp_postmeta;
+------------+-----------------+------+-----+---------+----------------+
| Field      | Type            | Null | Key | Default | Extra          |
+------------+-----------------+------+-----+---------+----------------+
| meta_id    | bigint unsigned | NO   | PRI | NULL    | auto_increment |
| post_id    | bigint unsigned | NO   | MUL | 0       |                |
| meta_key   | varchar(255)    | YES  | MUL | NULL    |                |
| meta_value | longtext        | YES  |     | NULL    |                |
+------------+-----------------+------+-----+---------+----------------+
 */

$s_sql = "SELECT DISTINCT post_title, post_content,
                 (SELECT CAST(meta_value AS SIGNED) FROM wp_postmeta WHERE wp_postmeta.meta_key = 'views' AND wp_postmeta.post_id = wp_posts.ID) AS 'views',
                 (SELECT group_concat(wp_terms.name separator ',')
                         FROM wp_terms
                  INNER JOIN wp_term_taxonomy
                          ON wp_terms.term_id = wp_term_taxonomy.term_id
                  INNER JOIN wp_term_relationships wpr
                          ON wpr.term_taxonomy_id = wp_term_taxonomy.term_taxonomy_id
                  WHERE
                         taxonomy= 'category' AND wp_posts.ID = wpr.object_id
                ) AS 'Categories',
                (SELECT group_concat(wp_terms.name separator ', ')
                        FROM wp_terms
                 INNER JOIN wp_term_taxonomy
                         ON wp_terms.term_id = wp_term_taxonomy.term_id
                 INNER JOIN wp_term_relationships wpr
                         ON wpr.term_taxonomy_id = wp_term_taxonomy.term_taxonomy_id
                 WHERE
                        taxonomy= 'post_tag' AND wp_posts.ID = wpr.object_id
                ) AS 'Tags',
               ID, post_name, post_date, post_modified, post_type
          FROM wp_posts
          WHERE
                post_type = 'post' AND post_status = 'publish'
          ORDER BY
                $s_sort";

$o_result = $o_conn->query($s_sql);

if ($o_result->num_rows > 0) {
    ?><table style="border:1px solid">
    <tr class="first"><th>Title</th><th style="min-width:100px">Views</th><th style="min-width:150px">Creation Date</th><th>Categories</th><th>Tags</th></tr>

    <?php
    $i_total_views = 0;
    $i_articles = 0;

    // output data of each row
    while($row = $o_result->fetch_assoc()) {
        $s_style='style="border:1px solid"';
        $s_style='';
        $s_url = $row['post_name'];
        print('<tr>');
        print("<td $s_style>");
        print('<a href="'.$s_url.'" target="_blank">');
        print($row["post_title"]);
        print('</a>');
        print("</td>");
        print('<td class="centered" '.$s_style.'>');
        print(number_format($row["views"]));
        print("</td>");
        print("<td $s_style>");
        print("<small>");
        print($row["post_date"]);
        print("</small>");
        print("</td>");
        print("<td $s_style>");
        $s_categories = $row["Categories"];
        $a_categories = explode (",", $s_categories);
        $s_categories_content = "";
        foreach($a_categories as $s_category) {
            $s_category_slug = "/category/".get_category_slug($s_category)."/";
            $s_categories_content = $s_categories_content .'<a href="'.$s_category_slug.'" target="_blank">';
            $s_categories_content = $s_categories_content .$s_category;
            $s_categories_content = $s_categories_content ."</a>, ";
        }

        if (strlen($s_categories_content) > 0) {
            $s_categories_content = substr($s_categories_content, 0, -2);
        }

        print($s_categories_content);
        print("</td>");
        print("<td $s_style>");
        print($row["Tags"]);
        print("</td>");
        // $row["post_content"];
        $i_total_views = $i_total_views + intval($row["views"]);
        $i_articles++;
        echo "</tr>";
    } ?></table><?php
    print("<strong>Total articles:</strong> ".number_format($i_articles)." <strong>Total Views:</strong> ".number_format($i_total_views));
    print("<br>");
} else {
    echo "<p>0 results</p>";
}
$o_conn->close();

?>
</body>
</html>
However we are going to run everything from a Docker Container so the only thing you need is to have installed Docker.
If you prefer to install MySql in your computer (or Virtual Box instance) directly, skip the Docker steps.
Dockerfile
The Dockerfile is the file that Docker uses to build the Docker Container.
Ours is like that:
FROM ubuntu:20.04

MAINTAINER Carles Mateo

ARG DEBIAN_FRONTEND=noninteractive

RUN apt update && apt install -y python3 pip mysql-server vim mc wget curl && apt-get clean

RUN pip install mysql-connector-python

EXPOSE 3306

ENV FOLDER_PROJECT /var/mysql_carles

RUN mkdir -p $FOLDER_PROJECT

COPY docker_run_mysql.sh $FOLDER_PROJECT
COPY start.sql $FOLDER_PROJECT
COPY src $FOLDER_PROJECT

RUN chmod +x /var/mysql_carles/docker_run_mysql.sh

CMD ["/var/mysql_carles/docker_run_mysql.sh"]
The first line defines that we are going to use Ubuntu 20.04 (it’s a LTS version).
We install all the apt packages in a single line, as Docker works in layers, and what is used as disk space in the previous layer is not deleted even if we delete the files, so we want to run apt update, install all the packages, and clean the temporal files in one single step.
I also install some useful tools like: vim, mc, less, wget and curl.
We expose to outside the port 3306, in case you want to run the Python code from your computer, but having the MySql in the Container.
The last line executes a script that starts the MySql service, creates the table, the user, and add two rows and runs an infinite loop so the Docker does not finish.
build_docker.sh
build_docker.sh is a Bash script that builds the Docker Image for you very easily.
It stops the container and removes the previous image, so your hard drive does not fill with Docker images if you do modifications.
It checks for errors building and it also remembers you how to run and debug the Docker Container.
#!/bin/bash

# Execute with sudo

s_DOCKER_IMAGE_NAME="blog_carlesmateo_com_mysql"

printf "Stopping old image %s\n" "${s_DOCKER_IMAGE_NAME}"
sudo docker stop "${s_DOCKER_IMAGE_NAME}"

printf "Removing old image %s\n" "${s_DOCKER_IMAGE_NAME}"
sudo docker rm "${s_DOCKER_IMAGE_NAME}"

printf "Creating Docker Image %s\n" "${s_DOCKER_IMAGE_NAME}"
sudo docker build -t ${s_DOCKER_IMAGE_NAME} . --no-cache

i_EXIT_CODE=$?
if [ $i_EXIT_CODE -ne 0 ]; then
    printf "Error. Exit code %s\n" ${i_EXIT_CODE}
    exit
fi

echo "Ready to run ${s_DOCKER_IMAGE_NAME} Docker Container"
echo "To run type: sudo docker run -d -p 3306:3306 --name ${s_DOCKER_IMAGE_NAME} ${s_DOCKER_IMAGE_NAME}"
echo "or just use run_in_docker.sh"
echo
echo "Debug running Docker:"
echo "docker exec -it ${s_DOCKER_IMAGE_NAME} /bin/bash"
echo
docker_run.sh
I also provide a script named docker_run.sh that runs your Container easily, exposing the MySql port.
#!/bin/bash

# Execute with sudo

s_DOCKER_IMAGE_NAME="blog_carlesmateo_com_mysql"

docker run -d -p 3306:3306 --name ${s_DOCKER_IMAGE_NAME} ${s_DOCKER_IMAGE_NAME}

echo "Showing running Instances"
docker ps
As you saw before I named the image after blog_carlesmateo_com_mysql.
I did that so basically I wanted to make sure that the name was unique, as the build_docker.sh deletes an image named like the name I choose, I didn’t want to use a generic name like “mysql” that may lead to you to delete the Docker Image inadvertently.
docker_run_mysql.sh
This script will run when the Docker Container is launched for the first time:
#!/bin/bash

# Allow to be queried from outside
sed -i '31 s/bind-address/#bind-address/' /etc/mysql/mysql.conf.d/mysqld.cnf

service mysql start

# Create a Database, a user with password, and permissions
cd /var/mysql_carles
mysql -u root < start.sql

while [ true ]; do sleep 60; done
With sed command we modify the line 31 of the the MySQL config file so we can connect from Outside the Docker Instance (bind-address: 127.0.0.1)
As you can see it executes the SQL contained in the file start.sql as root and we start MySql.
Please note: Our MySql installation has not set a password for root. It is only for Development purposes.
start.sql
The SQL file that will be ran inside our Docker Container.
CREATE DATABASE carles_database;

CREATE USER 'python'@'localhost' IDENTIFIED BY 'blog.carlesmateo.com-db-password';
CREATE USER 'python'@'%' IDENTIFIED BY 'blog.carlesmateo.com-db-password';
GRANT ALL PRIVILEGES ON carles_database.* TO 'python'@'localhost';
GRANT ALL PRIVILEGES ON carles_database.* TO 'python'@'%';

USE carles_database;

CREATE TABLE car_queue (
    i_id_car int,
    s_model_code varchar(25),
    s_color_code varchar(25),
    s_extras varchar(100),
    i_right_side int,
    s_city_to_ship varchar(25)
);

INSERT INTO car_queue (i_id_car, s_model_code, s_color_code, s_extras, i_right_side, s_city_to_ship) VALUES (1, "GOLF2021", "BLUE7", "COND_AIR, GPS, MULTIMEDIA_V3", 0, "Barcelona");
INSERT INTO car_queue (i_id_car, s_model_code, s_color_code, s_extras, i_right_side, s_city_to_ship) VALUES (2, "GOLF2021_PLUGIN_HYBRID", "BLUEMETAL_5", "COND_AIR, GPS, MULTIMEDIA_V3, SECURITY_V5", 1, "Cork");
As you can see it creates the user “python” with the password ‘blog.carlesmateo.com-db-password’ for access local and remote (%).
It also creates a Database named carles_database and grants all the permissions to the user “python”, for local and remote.
This is the user we will use to authenticate from out Python code.
Then we switch to use the carles_database and we create the car_queue table.
We insert two rows, as an example.
select_values_example.py
Finally the Python code that will query the Database.
import mysql.connector

if __name__ == "__main__":
    o_conn = mysql.connector.connect(user='python', password='blog.carlesmateo.com-db-password', database='carles_database')
    o_cursor = o_conn.cursor()

    s_query = "SELECT * FROM car_queue"

    o_cursor.execute(s_query)

    for a_row in o_cursor:
        print(a_row)

    o_cursor.close()
    o_conn.close()
Nothing special, we open a connection to the MySql and perform a query, and parse the cursor as rows/lists.
Please note: Error control is disabled so you may see any exception.
Executing the Container
First step is to build the Container.
From the directory where you cloned the project, execute:
sudo ./build_docker.sh
Then run the Docker Container:
sudo ./docker_run.sh
The script also performs a docker ps command, so you can see that it’s running.
Then change to the directory where I installed the sample files:
cd /var/mysql_carles
And execute the Python 3 example:
python3 select_values_example.py
Tying together MySql and a Python Menu with Object Oriented Programming
In order to tie all together, and specially to give a consistent view to my students, to avoid showing only pieces but a complete program, and to show a bit of Objects Oriented in action I developed a small program which simulates the handling of a production queue for Volkswagen.
MySQL Library
First I created a library to handle MySQL operations.
lib/mysqllib.py
import mysql.connector


class MySql():

    def __init__(self, s_user, s_password, s_database, s_host="127.0.0.1", i_port=3306):
        self.s_user = s_user
        self.s_password = s_password
        self.s_database = s_database
        self.s_host = s_host
        self.i_port = i_port

        o_conn = mysql.connector.connect(host=s_host, port=i_port, user=s_user, password=s_password, database=s_database)
        self.o_conn = o_conn

    def query(self, s_query):
        a_rows = []

        o_cursor = self.o_conn.cursor()

        o_cursor.execute(s_query)

        for a_row in o_cursor:
            a_rows.append(a_row)

        o_cursor.close()

        return a_rows

    def insert(self, s_query):

        o_cursor = self.o_conn.cursor()

        o_cursor.execute(s_query)
        i_inserted_row_count = o_cursor.rowcount

        # Make sure data is committed to the database
        self.o_conn.commit()

        return i_inserted_row_count

    def delete(self, s_query):

        o_cursor = self.o_conn.cursor()

        o_cursor.execute(s_query)
        i_deleted_row_count = o_cursor.rowcount

        # Make sure data is committed to the database
        self.o_conn.commit()

        return i_deleted_row_count


    def close(self):

        self.o_conn.close()
Basically when this class is instantiated, a new connection to the MySQL specified in the Constructor is established.
We have a method query() to send SELECT queries.
We have a insert method, to send INSERT, UPDATE queries that returns the number of rows affected.
This method ensures to perform a commit to make sure changes persist.
We have a delete method, to send DELETE Sql queries that returns the number of rows deleted.
We have a close method which closes the MySql connection.
A Data Object: CarDO
Then I’ve defined a class, to deal with Data and interactions of the cars.
Initially I was going to have a CarDO Object without any logic. Only with Data.
In OOP the variables of the Instance are called Properties, and the functions Methods.
Then I decided to add some logic, so I can show what’s the typical use of the objects.
So I will use CarDO as Data Object, but also to do few functions like printing the info of a Car.
Queue Manager
Finally the main program.
We also use Object Oriented Programming, and we use Dependency Injection to inject the MySQL Instance. That’s very practical to do Unit Testing.
from lib.mysqllib import MySql
from do.cardo import CarDO


class QueueManager():

    def __init__(self, o_mysql):
        self.o_mysql = o_mysql

    def exit(self):
        exit(0)

    def main_menu(self):
        while True:
            print("Main Menu")
            print("=========")
            print("")
            print("1. Add new car to queue")
            print("2. List all cars to queue")
            print("3. View car by Id")
            print("4. Delete car from queue by Id")
            print("")
            print("0. Exit")
            print("")

            s_option = input("Choose your option:")
            if s_option == "1":
                self.add_new_car()
            if s_option == "2":
                self.see_all_cars()
            if s_option == "3":
                self.see_car_by_id()
            if s_option == "4":
                self.delete_by_id()

            if s_option == "0":
                self.exit()

    def get_all_cars(self):
        s_query = "SELECT * FROM car_queue"

        a_rows = self.o_mysql.query(s_query)
        a_o_cars = []

        for a_row in a_rows:
            i_id_car = a_row[0]
            s_model_code = a_row[1]
            s_color_code = a_row[2]
            s_extras = a_row[3]
            i_right_side = a_row[4]
            s_city_to_ship = a_row[5]

            o_car = CarDO(i_id_car=i_id_car, s_model_code=s_model_code, s_color_code=s_color_code, s_extras=s_extras, i_right_side=i_right_side, s_city_to_ship=s_city_to_ship)
            a_o_cars.append(o_car)

        return a_o_cars

    def get_car_by_id(self, i_id_car):
        b_success = False
        o_car = None

        s_query = "SELECT * FROM car_queue WHERE i_id_car=" + str(i_id_car)

        a_rows = self.o_mysql.query(s_query)

        if len(a_rows) == 0:
            # False, None
            return b_success, o_car

        i_id_car = a_rows[0][0]
        s_model_code = a_rows[0][1]
        s_color_code = a_rows[0][2]
        s_extras = a_rows[0][3]
        i_right_side = a_rows[0][4]
        s_city_to_ship = a_rows[0][5]

        o_car = CarDO(i_id_car=i_id_car, s_model_code=s_model_code, s_color_code=s_color_code, s_extras=s_extras, i_right_side=i_right_side, s_city_to_ship=s_city_to_ship)
        b_success = True

        return b_success, o_car

    def replace_apostrophe(self, s_text):
        return s_text.replace("'", "´")

    def insert_car(self, o_car):

        s_sql = """INSERT INTO car_queue
                                (i_id_car, s_model_code, s_color_code, s_extras, i_right_side, s_city_to_ship)
                         VALUES
                                (""" + str(o_car.get_i_id_car()) + ", '" + o_car.get_s_model_code() + "', '" + o_car.get_s_color_code() + "', '" + o_car.get_s_extras() + "', " + str(o_car.get_i_right_side()) + ", '" + o_car.get_s_city_to_ship() + "');"

        i_inserted_row_count = self.o_mysql.insert(s_sql)

        if i_inserted_row_count > 0:
            print("Inserted", i_inserted_row_count, " row/s")
            b_success = True
        else:
            print("It was impossible to insert the row")
            b_success = False

        return b_success

    def add_new_car(self):
        print("Add new car")
        print("===========")

        while True:
            s_id_car = input("Enter new ID: ")
            if s_id_car == "":
                print("A numeric Id is needed")
                continue

            i_id_car = int(s_id_car)

            if i_id_car < 1:
                continue

            # Check if that id existed already
            b_success, o_car = self.get_car_by_id(i_id_car=i_id_car)
            if b_success is False:
                # Does not exist
                break

            print("Sorry, this Id already exists")

        s_model_code = input("Enter Model Code:")
        s_color_code = input("Enter Color Code:")
        s_extras = input("Enter extras comma separated:")
        s_right_side = input("Enter R for Right side driven:")
        if s_right_side.upper() == "R":
            i_right_side = 1
        else:
            i_right_side = 0
        s_city_to_ship = input("Enter the city to ship the car:")

        # Sanitize SQL replacing apostrophe
        s_model_code = self.replace_apostrophe(s_model_code)
        s_color_code = self.replace_apostrophe(s_color_code)
        s_extras = self.replace_apostrophe(s_extras)
        s_city_to_ship = self.replace_apostrophe(s_city_to_ship)

        o_car = CarDO(i_id_car=i_id_car, s_model_code=s_model_code, s_color_code=s_color_code, s_extras=s_extras, i_right_side=i_right_side, s_city_to_ship=s_city_to_ship)
        b_success = self.insert_car(o_car)

    def see_all_cars(self):
        print("")

        a_o_cars = self.get_all_cars()

        if len(a_o_cars) > 0:
            print(a_o_cars[0].get_car_header_for_list())
        else:
            print("No cars in queue")
            print("")
            return

        for o_car in a_o_cars:
            print(o_car.get_car_info_for_list())

        print("")

    def see_car_by_id(self, i_id_car=0):
        if i_id_car == 0:
            s_id = input("Car Id:")
            i_id_car = int(s_id)

        s_id_car = str(i_id_car)

        b_success, o_car = self.get_car_by_id(i_id_car=i_id_car)
        if b_success is False:
            print("Error, car id: " + s_id_car + " not located.")
            return False

        print("")
        o_car.print_car_info()
        print("")

        return True

    def delete_by_id(self):

        s_id = input("Enter Id of car to delete:")
        i_id_car = int(s_id)

        if i_id_car == 0:
            print("Invalid Id")
            return

        # reuse see_car_by_id
        b_found = self.see_car_by_id(i_id_car=i_id_car)
        if b_found is False:
            return

        s_delete = input("Are you sure you want to DELETE. Type Y to delete: ")
        if s_delete.upper() == "Y":
            s_sql = "DELETE FROM car_queue WHERE i_id_car=" + str(i_id_car)
            i_num = self.o_mysql.delete(s_sql)

            print(i_num, " Rows deleted")

            # if b_success is True:
            #     print("Car deleted successfully from the queue")


if __name__ == "__main__":

    try:

        o_mysql = MySql(s_user="python", s_password="blog.carlesmateo.com-db-password", s_database="carles_database", s_host="127.0.0.1", i_port=3306)

        o_queue_manager = QueueManager(o_mysql=o_mysql)
        o_queue_manager.main_menu()
    except KeyboardInterrupt:
        print("Detected CTRL + C. Exiting")
This program talks to MySQL, that we have started in a Docker previously.
We have access from inside the Docker Container, or from outside.
The idea of this simple program is to use a library for dealing with MySql, and objects for dealing with the Cars. The class CarDO contributes to the render of its data in the screen.
To enter inside the Docker once you have generated it and is running, do:
Is something very simple, but will help my student friends to validate Input from Keyboard without losing too many hours.
The Input Validation Classes I create in PHP for Privalia or in my PHP Catalonia Framework, are much, much, more powerful, allowing the validation of complete forms, rendering errors, etc… although they were created for Web, and not for Keyboard input.
It recursively goes to all the subdirectories looking for .py files, and then it counts the lines.
I updated the price of my books to be the minimum allowed by LeanPub, to $5 USD, and created a bundle of two of them for $7 USD.
So people can benefit from this during the lock down.
I’ve updated the Python Combat Guide book with a sample of using Paramiko Libraries for SSH, and increased the Object Oriented Programing and Unit Testing, sections. I also added some books to the Bibliography.
I’ve read the postmortem initial analysis from Slack’s incident. It’s really interesting.
I cannot share it, but I guess that at some point they will publish it on their blog:
Me, with 4 more Senior BackEnd Engineers wrote the new e-Commerce for a multinational.
The old legacy Software evolved into a different code for every country, making it impossible to be maintained.
The new Software we created used inheritance to use the same base code for each country and overloaded only the specific different behavior of every country, like for the payment methods, for example Brazil supporting “parcelados” or Germany with specific payment players.
We rewrote the old procedural PHP BackEnd into modern PHP, with OOP and our own Framework but we had to keep the transactional code in existing MySQL Procedures, so the logic was split. There was a Front End Team consuming our JSONs. Basically all the Front End code was cached in Akamai and pages were rendered accordingly to the JSONs served from out BackEnd.
It was a huge success.
This e-Commerce site had Campaigns that started at a certain time, so the amount of traffic that would come at the same time would be challenging.
The project was working very well, and after some time the original Team was split into different projects in the company and a Team for maintenance and evolutives was hired.
At certain point they started to encounter duplicate transactions, and nobody was able to solve the mystery.
I’m specialized into fixing impossible problems. They used to send me to Impossible Missions, and I am famous for solving impossible problems easily.
So I started the task with a SRE approach.
The System had many components and layers. The problem could be in many places.
I had in my arsenal of tools, Software like mysqldebugger with which I found an unnoticed bug in decimals calculation in the past surprising everybody.
Previous Engineers involved believed the problem was in the Database side. They were having difficulties to identify the issue by the random nature of the repetitions.
Some times the order lines were duplicated, and other times were the payments, which means charging twice to the customer.
Redis Cluster could also play a part on this, as storing the session information and the basket.
But I had to follow the logic sequence of steps.
If transactions from customer were duplicated that mean that in first term those requests have arrived to the System. So that was a good point of start.
With a list of duplicated operations, I checked the Webservers logs.
That was a bit tricky as the Webserver was recording the Ip of the Load Balancer, not the ip of the customer. But we were tracking the sessionid so with that I could track and user request history. A good thing was also that we were using cookies to stick the user to the same Webserver node. That has pros and cons, but in this case I didn’t have to worry about the logs combined of all the Webservers, I could just identify a transaction in one node, and stick into that node’s log.
I was working with SSH and Bash, no log aggregators existing today were available at that time.
So when I started to catch web logs and grep a bit an smile was drawn into my face. :)
There were no transactions repeated by a bad behavior on MySQL Masters, or by BackEnd problems. Actually the HTTP requests were performed twice.
And the explanation to that was much more simple.
Many Windows and Mac User are used to double click in the Desktop to open programs, so when they started to use Internet, they did the same. They double clicked on the Submit button on the forms. Causing two JavaScript requests in parallel.
When I explained it they were really surprised, but then they started to worry about how they could fix that.
Well, there are many ways, like using an UUID in each request and do not accepting two concurrents, but I came with something that we could deploy super fast.
I explained how to change the JavaScript code so the buttons will have no default submit action, and they will trigger a JavaScript method instead, that will set a boolean to True, and also would disable the button so it can not be clicked anymore. Only if the variable was False the submit would be performed. It was almost impossible to get a double click as the JavaScript was so fast disabling the button, that the second click will not trigger anything. But even if that could be possible, only one request would be made, as the variable was set to True on the first click event.
That case was very funny for me, because it was not necessary to go crazy inspecting the different layers of the system. The problem was detected simply with HTTP logs. :)
People often forget to follow the logic steps while many problems are much more simple.
As a curious note, I still see people double clicking on links and buttons on the Web, and some Software not handling it. :)
First you have to understand that Python, Java and PHP are worlds completely different.
In Python you’ll probably use Flask, and listen to the port you want, inside Docker Container.
In PHP you’ll use a Frameworks like Laravel, or Symfony, or Catalonia Framework (my Framework) :) and a repo or many (as the idea is that the change in one microservice cannot break another it is recommended to have one git repo per Service) and split the requests with the API Gateway and Filters (so /billing/ goes to the right path in the right Server, is like rewriting URLs). You’ll rely in Software to split your microservices. Usually you’ll use Docker, but you have to add a Web Server and any other tools, as the source code is not packet with a Web Server and other Dependencies like it is in Java Spring Boot.
In Java you’ll use Spring Cloud and Spring Boot, and every Service will be auto-contained in its own JAR file, that includes Apache Tomcat and all other Dependencies and normally running inside a Docker. Tcp/Ip listening port will be set at start via command line, or through environment. You’ll have many git repositories, one per each Service.
Using many repos, one per Service, also allows to deploy only that repository and to have better security, with independent deployment tokens.
It is not unlikely that you’ll use one language for some of your Services and another for other, as well as a Database or another, as each Service is owner of their data.
In any case, you will be using CI/CD and your pipeline will be something like this:
Pull the latest code for the Service from the git repository
Compile the code (if needed)
Run the Unit and Integration Tests
Compile the service to an executable artifact (f.e. Java JAR with Tomcat server and other dependencies)
Generate a Machine image with your JAR deployed (for Java. Look at Spotify Docker Plugin to Docker build from Maven), or with Apache, PHP, other dependencies, and the code. Normally will be a Docker image. This image will be immutable. You will probably use Dockerhub.
Machine image will be started. Platform test are run.
If platform tests pass, the service is promoted to the next environment (for example Dev -> Test -> PreProd -> Prod), the exact same machine is started in the next environment and platform tests are repeated.
Before deploying to Production the new Service, I recommend running special Application Tests / Behavior-driven. By this I mean, to conduct tests that really test the functionality of everything, using a real browser and emulating the acts of a user (for example with BeHat, Cucumber or with JMeter). I recommend this specially because Microservices are end-points, independent of the implementation, but normally they are API that serve to a whole application. In an Application there are several components, often a change in the Front End can break the application. Imagine a change in Javascript Front End, that results in a call a bit different, for example, with an space before a name. Imagine that the Unit Tests for the Service do not test that, and that was not causing a problem in the old version of the Service and so it will crash when the new Service is deployed. Or another example, imagine that our Service for paying with Visa cards generates IDs for the Payment Gateway, and as a result of the new implementation the IDs generated are returned. With the mocked objects everything works, but when we deploy for real is when we are going to use the actual Bank Payment. This is also why is a good idea to have a PreProduction environment, with PreProduction versions of the actual Services we use (all banks or the GDS for flights/hotel reservation like Galileo or Amadeus have a Test, exactly like Production, Gateway)
If you work with Microsoft .NET, you’ll probably use Azure DevOps.
We IT Engineers, CTOs and Architects, serve the Business. We have to develop the most flexible approaches and enabling the business to release as fast as their need.
Take in count that Microservices is a tool, a pattern. We will use it to bring more flexibility and speed developing, resilience of the services, and speed and independence deploying. However this comes at a cost of complexity.
Microservices is more related to giving flexibility to the Business, and developing according to the Business Domains. Normally oriented to suite an API. If you have an API that is consumed by third party you will have things like independence of Services (if one is down the others will still function), gradual degradation, being able to scale the Services that have more load only, being able to deploy a new version of a Service which is independent of the rest of the Services, etc… the complexity in the technical solution comes from all this resilience, and flexibility.
If your Dev Team is up to 10 Developers or you are writing just a CRUD Web Application, a PoC, or you are an Startup with a critical Time to Market you probably you will not want to use Microservices approach. Is like killing flies with laser cannons. You can use typical Web services approach, do everything in one single Https request, have transactions, a single Database, etc…
But if your team is 100 Developer, like a big eCommerce, you’ll have multiple Teams between 5 and 10 Developers per Business Domain, and you need independence of each Service, having less interdependence. Each Service will own their own Data. That is normally around 5 to 7 tables. Each Service will serve a Business Domain. You’ll benefit from having different technologies for the different needs, however be careful to avoid having Teams with different knowledge that can have hardly rotation and difficult to continue projects when the only 2 or 3 Devs that know that technology leave. Typical benefit scenarios can be having MySql for the Billing Services, but having NoSQL Database for the image catalog, or to store logs of account activity. With Microservices, some services will be calling other Services, often asynchronously, using Queues or Streams, you’ll have Callbacks, Databases for reading, you’ll probably want to have gradual and gracefully failure of your applications, client load balancing, caches and read only databases/in-memory databases… This complexity is in order to protect one Service from the failure of others and to bring it the necessary speed under heavy load.
Here you can find a PDF Document of the typical resources I use for Microservice Projects.
In this article I want to explain how I created a content filter for Postfix, in PHP.
The basic idea is to examine all the incoming messages, looking for a Credit Card pattern, and then sending those emails to another Server, that for instance is PCI compliant, and sending an email to the original receiver telling that they received an email with a CC, that is stored in a safe Server.
I choose the pipe mechanism, because is the last one in the chain of content filters, and first I want to pass the antivirus (Amavis), antispam and other content filters.
Then I inject the emails to sendmail, with the params -G -i , granting that the email will not be reprocessed entering an infinite loop.
#!/usr/bin/php
<?php

/*
 * Carles Mateo
 */

date_default_timezone_set('Europe/Andorra');

$s_dest_mail_secure = 'secure@pciserver.carlesmateo.com';

$b_regex_found = false;
$b_emails_rcpt_to = Array();

// All major credit cards regex
// The CC anywhere
$s_cc_regex = '/(?:4[0-9]{12}(?:[0-9]{3})?|5[1-5][0-9]{14}|6011[0-9]{12}|622((12[6-9]|1[3-9][0-9])|([2-8][0-9][0-9])|(9(([0-1][0-9])|(2[0-5]))))[0-9]{10}|64[4-9][0-9]{13}|65[0-9]{14}|3(?:0[0-5]|[68][0-9])[0-9]{11}|3[47][0-9]{13})/';

function log_event($s_message) {
 syslog(LOG_WARNING, $s_message);
}

function save_message_to_file($s_file, $s_message) {
 $o_file = fopen($s_file, "a");
 fwrite($o_file, $s_message);
 fclose($o_file);
}

function read_file($s_file) {
 $s_contents = file_get_contents($s_file);

 if ($s_contents === false) {
 return '';
 }

 return $s_contents;
}

function get_all_rcpt_to($st_emails_input) {
 // First email is pos 5 of the array
 $st_emails = $st_emails_input;

 unset($st_emails[0]);
 unset($st_emails[1]);
 unset($st_emails[2]);
 unset($st_emails[3]);
 unset($st_emails[4]);

 asort($st_emails);

 return $st_emails;
}

/*
 * Returns a @secure. email, from the original email
 */
function get_secure_email($s_email) {
 $i_pos = strpos($s_email, '@');

 $s_email_new = $s_email;

 if ($i_pos > 0) {
 $s_email_new = substr($s_email, 0, $i_pos);
 $s_email_new .= 'secure.';
 $s_email_new .= substr($s_email, $i_pos +1);
 }

 return $s_email_new;
}

function replace_tpl_variables($s_text, $s_sender_original) {

 // TODO: Replace static values

 $s_date_sent = date('r'); // RFC 2822 formatted date

 $s_text = str_replace('#DATE_NOW#', $s_date_sent, $s_text);
 $s_text = str_replace('#FROM_NAME#', 'Carles Mateo', $s_text);
 $s_text = str_replace('#FROM_EMAIL#', 'mateo@blog.carlesmateo.com', $s_text);
 $s_text = str_replace('#EMAIL_SENDER_ORIGINAL#', $s_sender_original, $s_text);

 return $s_text;
}

function delete_file($s_file) {
 unlink($s_file);
}

// Read the RCPT TO: fields ${recipient}
$st_emails_rcpt_to = get_all_rcpt_to($argv);

// Read the email
$email = '';
$fd = fopen("php://stdin", "r");
while (!feof($fd)) {
 $line = fread($fd, 1024);
 $email .= $line;
}
fclose($fd);

// Get the portion of the email without headers (to avoid id's being detected as CC numbers)
$i_pos_subject = strpos($email, 'Subject:');
if ($i_pos_subject > 0) {
 // Found
 $email_sanitized = substr($email, $i_pos_subject);
} else {
 // If we don't locate subject we look for From:
 $i_pos_from = strpos($email, 'From:');
 if ($i_pos_from > 0) {
 $email_sanitized = substr($email, $i_pos_from);
 } else {
 // Impossible email, but continue
 $email_sanitized = $email;
 }
}

// Remove spaces, and points so we find 4111.1111.1111.111 and so
$email_sanitized = str_replace(' ', '', $email_sanitized);
$email_sanitized = str_replace('.', '', $email_sanitized);
$email_sanitized = str_replace('-', '', $email_sanitized);

$s_message = "Script filtercard.php successfully ran\n";

log_event('Arguments: '.serialize($argv));

$i_result = preg_match($s_cc_regex, $email_sanitized, $s_matches);
if ($i_result == 1) {
 $b_regex_found = true;
 $s_message .= 'Card found'."\n";
 log_event($s_message);
} else {
 // No credit card
 $s_message .= 'No credit card found'."\n";
 log_event($s_message);
}

$s_dest_mail_original = $argv[5];
$s_sender_original = $argv[2];

// Generate a unique id
$i_unique_id = time().'-'.rand(0,99999).'-'.rand(0,99999);

$INSPECT_DIR='/var/spool/filter/';
// NEVER NEVER NEVER use "-t" here.
$SENDMAIL="/usr/sbin/sendmail -G -i";

$s_file_unique = $INSPECT_DIR.$i_unique_id;

# Exit codes from <sysexits.h>
$EX_TEMPFAIL=75;
$EX_UNAVAILABLE=69;

// Save the file
save_message_to_file($s_file_unique, $email);

$st_output = Array();

if ($b_regex_found == false) {
 // Send normally

 foreach ($st_emails_rcpt_to as $i_key=>$s_email_rcpt_to) {
 $s_sendmail = $SENDMAIL.' "'.$s_email_rcpt_to.'" <'.$s_file_unique;
 $i_status = exec($s_sendmail, $st_output);

 log_event('Status Sendmail (original mail): '.$i_status.' to: '.$s_email_rcpt_to);
 }

 delete_file($s_file_unique);

 exit();
}

// Send secure email
$s_sendmail = $SENDMAIL.' "'.$s_dest_mail_secure.'" <'.$s_file_unique;
$i_status = exec($s_sendmail, $st_output);

log_event('Status Sendmail (secure email): '.$i_status.' to: '.$s_dest_mail_secure);

$s_email_tpl = read_file('/usr/share/secure/smtpfilter_email.txt');

if ($s_email_tpl == '') {
 // Generic message

 $s_date_sent = date('r'); // RFC 2822 formatted date

 $s_email_tpl = <<<EOT
Date: $s_date_sent
From: secure <noreply@secure.carlesmateo.com>
Subject: Message with a Credit Card from $s_sender_original
You received a message with a Credit Card
EOT;

}

$s_email_tpl = replace_tpl_variables($s_email_tpl, $s_sender_original);

save_message_to_file($s_file_unique.'-tpl', $s_email_tpl);

// Send the replacement email
foreach ($st_emails_rcpt_to as $i_key=>$s_email_rcpt_to) {
 $st_output = Array();
 $s_sendmail = $SENDMAIL.' "'.$s_email_rcpt_to.'" <'.$s_file_unique.'-tpl';

 $i_status = exec($s_sendmail, $st_output);
 log_event('Status Sendmail (TPL): '.$i_status.' to: '.$s_email_rcpt_to);

}

delete_file($s_file_unique);
delete_file($s_file_unique.'-tpl');

/* Headers:

From: Carles Mateo <mateo@carlesmateo.com>
To: "carles2@carlesmateo.com" <carles2@carlesmateo.com>, Secure
 <secure@secure.carlesmateo.com>
CC: "test@carlesmateo.com" <test@carlesmateo.com>
Subject: Test with several emails and CCs
Thread-Topic: Test with several emails and CCs
Thread-Index: AQHRt1tmO/z+TpI64UiniKm7I56onw==
Date: Thu, 25 May 2016 14:32:15 +0000
 */
You can test it connecting by telnet to port 25 and doing (in bold the SMTP commands):
HELO mycomputer.com MAIL FROM: test@carlesmateo.com RCPT TO: just@asample.com RCPT TO: another@different.com DATA
Date: Mon, 30 May 2016 14:07:56 +0000
From: Carles Mateo <mateo@blog.carlesmateo.com>
To: Undisclosed recipients
Subject: Test with CC
This is just a test with a Visa CC 4111 1111 11-11-1111.
You can use the nc command for commodity.
When you’re all set I recommend you to test it by sending real emails from real servers