Category Archives: Operations

Migrating my 11 years Amazon AWS account services (Postmortem Analysis)

I started to explain that I was migrating some services from Amazon and that some of my sites were under Maintenance and that I would provide more information.

Here is the complete history of why I migrated all the services from my 11 years old Amazon account to other CSP.

Some lessons can be learned from my adventure.

I migrated my last services from Amazon to GCP

Amazon sent me an email on October 6th, this year 2021, telling me that they will disable EC2-Classic by August 2022. I thought I would not be able to keep my Static Ip’s as in the past VPC Ip’s and EC2-Classic Ip’s were not transferable, so considering that I would loss my Static Ip’s anyway I started to migrate to some to other providers like Digital Ocean.

Is not cool losing Static Ip (Elastic Ip in AWS) Addresses as this is bad for SEO, so given that I though I would lose my Static Ips that have been with me for years, I started to migrate certain services to providers much more economic.

Amazon is terrible communicating, and I talked with some product managers in the past about that, when they lost one of my Volumes, and the email was so cold and terrible that actually that hurt more than Amazon losing my Data. I believed that it was a poorly made Scam and when I realized it was true I reached one of my friends, that is manager there, as I know they care for doing things right, and he organized a meeting with two PM so I can pass my feedback.

The Cloud providers are changing things very fast, and nobody is able to be up to date with the changes, unless their work position allows plenty of time to get updated. Even if pages of documentation are provided, you have to react to an event that they externally generated forcing you to action. Action to read all the documentation about EC2-Classic migrations, action to prepare to have migrated by August 2022.

So August 2022… I was counting that I had plenty of time but I’m writing a new book about using the Amazon SDK for Python, boto3, and I was doing some API calls and they started to fail in a very unusual way, Exceptions with timeout, but only for the only region where I had EC2-Classic.

urllib3.exceptions.NewConnectionError: <botocore.awsrequest.AWSHTTPSConnection object at 0x7f0347d545e0>: Failed to establish a new connection: [Errno -2] Name or service not known

My config was:

        o_config = Config(
            region_name="us-east-1a",
            signature_version="v4",
            retries={
                'max_attempts': 10,
                'mode': 'standard'
            }
        )

But if I switched to another region name, it would work:

            region_name='us-west-2',

I made a mistake in here, the region name is “us-east-1” and not “us-east-1a“. “us-east-1a” is the availability zone. So the SDK was giving a timeout because in order to connect to the endpoint it uses the region name as part of the hostname. So it doesn’t find that endpoint because it doesn’t exist.

I never understood why a company like Amazon is unable to provide the SDK with a sample project or projects 100% working, with the source code so people has a base that works to build up.

Every API that I have created, I have provided it with documentation but also with example for several languages for how to use it.

In 2013 I was CTO of an online travel agency, and we had meta-searchers consuming our API and we were having several hundreds of thousands requests per second. Everything was perfectly documented, examples were provided for several languages, the document and the SDK had version numbers…

Everybody forgets about Developers and companies throw terrible and cold products to the poor Developers, so difficult to use. How many Developers would like to say: Listen Mr. President of the big Cloud Company XXXX, I only want to spawn a VM that works, and fast, with easy wizards. I don’t want to learn 50 hours before being able to use your overpriced platform, by doing 20 things before your Ip’s are reflexes of your infrastructure and based in Microservices. Modern JavaScript frameworks can create nice gently wizards even if you have supercold APIs.

Honestly, I didn’t realize my typo in the region and I connected to the Amazon Console to investigate and I saw this.

Honestly, when I read it I understood that they were going to end my EC2 Networking the 30th of October. It was 29th. I misunderstood.

It was my fault not reading it well to the end, I got shocked by the first part telling about shutdown and I didn’t fully understood as they were going to shutdown EC2-Classic for the zones I didn’t had anything running only.

From the long errors (3 exceptions chained) I didn’t realize that the endpoint is built with the region name. (And I was passing the availability zone)

botocore.exceptions.EndpointConnectionError: Could not connect to the endpoint URL: "https://ec2.us-east-1a.amazonaws.com/"

Here is when I say that a good SDM would had thought and cared for the Developers more, and would had made the SDK to check if that region exists. How difficult is to create a SDK a bit more clever that detects a invalid region id?. It is not difficult.

It is true that it was late in the evening and I was tired of all the day, and two days of the week between work and zoom university classes I work 15 hours and 13 hours respectively, not counting the assignments, so by the end of the week I am very tired. But that’s why it is very important to follow methodology and to read well. I think Amazon has 50% of the fault by the way they do things: how the created the SDK, how they communicate, and by the errors that the console returned me when I tried to create a VPC instance of an EC2-Classic AMI (they seem related to the fact I had old VPC Network objects with shorter hash than the current they use) and the other 50% was my fault for not identifying the source of the error, and not reading the message in their website well.

But the fact that there were having those errors in the API’s and timeouts made me believe they were going to cut the EC2-Classic Networking the next day.

All the mistakes fall together in a perfect storm.

I checked for documentation and I saw it was possible to migrate my Static Ip’s to VPC Static Ip’s.

It was Friday evening, and I cancelled my plans, in order to migrate the Blog to VPC in an attempt to keep running it with Amazon.

As Cloud Architect, I like to have running instances in several CSP as it allows me to stay up to date with the changes they do.

I checked the documentation for the migration. Disassociating the Static Ip (Elastic Ip in AWS jargon) was easy. Turning into VPC as well.

As I progressed, what had to be easy turned into a nightmare, as I was getting many errors from the Amazon API, without any information, and my Instances were not created.

I figured out that their API could have problems with old VPC objects I created time ago, so I had to create new objects for several things.

I managed to spawn my instances but they were being launch and terminated instantly without information. Frustrating.

When launching a new instance from the AMI (a Snapshot of the blog), I was giving shown options to add more volumes without any sense. My Instance was using 16GB from a 20GB total Space, and I was shown different volume configs, depending on the instance, in some case an additional 20GB volume, in other small SSD, ephemeral and 10 GB for the AMI (which requires at least 16GB).

After some fight I manage to make it work after deleting the volumes that made no sense, and keeping only one of 20GB, the same size of my AMI.

But then my nightmare started to make the VPC Instance to have Internet access and to be seen from outside. I had to create a new Internet Gateway, NAT, Network, etc…

As mentioned the old objects I was trying to reusing were making the process to fail.

I was running out of time, and I thought in few time they were going to shutdown EC2-Classic network (as I did not read correctly), so I decided to download everything and to migrate to another provider. For doing that first I blocked all the traffic, except for my Ip.

I worked in parallel, creating the new config in Google Cloud, just in case I had forgot something. I had created a document for the migration and it was accurate.

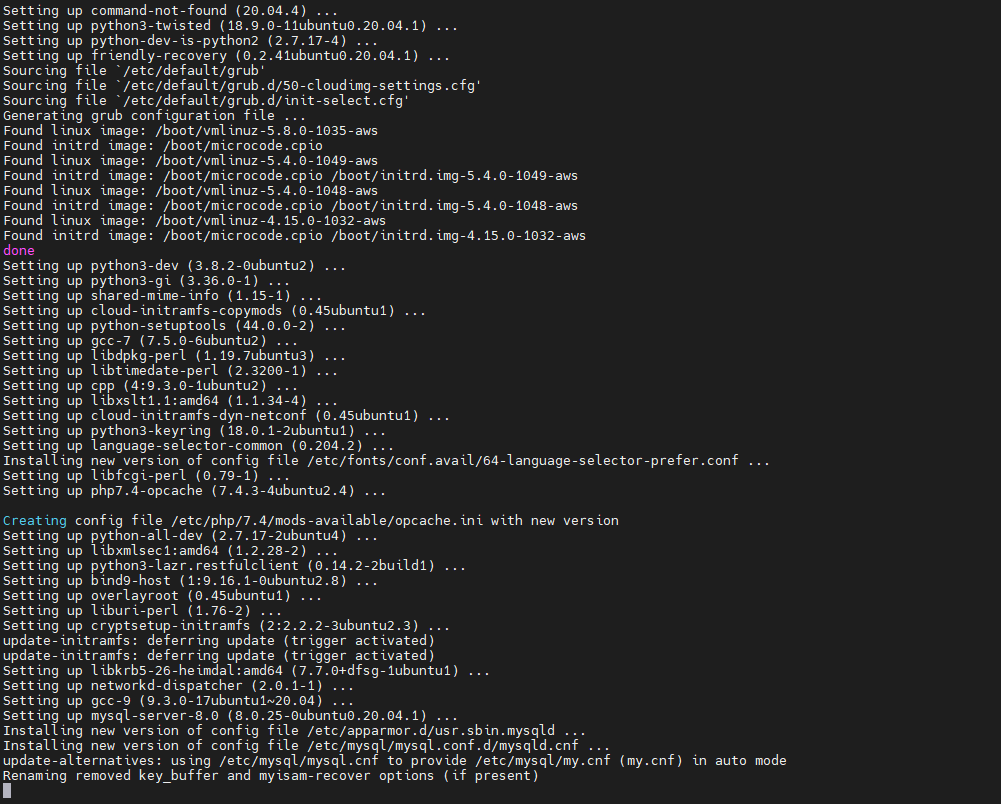
I managed to do everything fast enough. The slower part was to download all the Data, as I hold entire VM’s for projects like Cassandra Universal Driver.

Then I powered off my Amazon Instance for the Blog forever.

In GCP I blocked all the traffic in the firewall, except for my Ip, so I could work calmly.

When everything was ready, I had to redirect the DNS to the new static Ip from Google.

The DNS provider I used had implemented some changes in their API so I was getting errors replacing my old entry ‘.’ (their JSON calls returned Internal Server Error). Finally I figured it out how to workaround it and I was able to confirm that the first service was up and running.

I did some tests to make sure there were not unexpected permission problems, entries in the logs, etc…

Only then I opened the Google Firewall. I have a second firewall in each instance where I block or open at Ip tables level what I want. Basically abusive bot’s IPs trying to find exploits or brute force by dictionary passwords.

I checked with my phone, without Wifi that the Firewall was all good. (It is always a good idea to use another external Ip, different from the management one, to check)

I added a post explaining that I was migrating some of my Services and were under maintenance.

I mentioned in the blog that some of my services were being migrated from Amazon to Digital Ocean.

For some reasons, in the Backup of the Database one user was lost, so I created it in the MySQL with the typical commands:

CREATE USER 'username'@'localhost' IDENTIFIED BY 'password';
FLUSH PRIVILEGES;
GRANT ALL PRIVILEGES ON mydatabase.* TO 'username'@'localhost';

My Sites are under Maintenance

2021-11-08 Update: There is a Postmortem analysis of what happened with Amazon here.

TLTR: I’m undergoing a Maintenance on all my sites.

The main reason was that I was getting unexpected API Exceptions on the AWS SDK for Python (boto3), so I connected to the AWS Console to get more information.

Then I saw a message indicating that they will stop EC2-Classic today 30th of October. (Please read the Update on the Postmortem analysis as I understood incorrectly that banner message)

I already started migrating my Services, some I move to other providers like Digital Ocean. Other I had plant to keep in Amazon.

EOL (End of Life) was scheduled for 2022 August, so when I saw the message from Amazon the evening of the 29th, I decided to migrate my EC2-Classic Public Ip’s and Compute to VPC. Trying to deploy from an AMI, Amazon APIs were returning many internal errors, and as I figured out where their failures would be I was able get instances being launch without being Terminated immediately without an explanation. Still I had many problems with the Internet Gateway, VPC NAT, etc… after hours fighting with their errors, and their console, that is more a bunch of pages to manage Infrastructure rather than a user/developer friendly Cloud Tool I decided that I had enough.

After 11 years using Amazon AWS, including a trip to Dublin to be hired as Manager for Cloud Watch, and giving them the idea to add AutoScaling (I was told the project was too easy for me and that I would get bored in a year or too so I was not hired), I decided to move my Services to Google Cloud and to Digital Ocean.

I’m very polite and I saw that when I told to one Manager that the User Interface was terrible he didn’t like, but I have to speak up and say that tools for developers cannot be cold as your evil girlfriend. Cannot be API alike, stand alone pages to manage infinite parts of Architecture. Web providing services for developers cannot be created like in cold SysAdmin style. If the infrastructure is hard to manage and internally you use APIs, build nice Wizards in Javascript. I was leading a Team of Developers with infinite less resources than Amazon or Google and we wrote a Multi-Cloud product, with nice, and clever, and easy to use Wizards, and they were infinitely more better that those giant CSPs. We won a prize at European level at that time. But it was 2013.

I’ve migrated everything, moved all the data, statics, VMs… but I’m completing the adjustments for certain services like Cassandra nodes, web sites, bootstrapping some of my sites based of my PHP Catalonia Framework, adding Firewall rules to GCP, doing changes for Ansible provisioning, deploying the Server scripts from IaC, Docker, etc…

I’ll be posting updates in Twitter.

Upgrading Amazon AWS EC2 Ubuntu 18.04 LTS to Ubuntu 20.04 LTS

I’ve upgraded one of my AWS machines from Ubuntu 18.04 LTS to Ubuntu 20.04 LTS.

The process was really straightforward, basically run:

sudo apt update
sudp apt upgrade

Then Reboot in order to load the last kernel.

Then execute:

sudo do-release-upgrade

And ask two or three questions in different moments.

After, reboot, and that’s it.

All my Firewall rules, were kept, the services were restarted as they were available, or deferred to be executed when the service is reinstalled in case of dependencies (like for PHP, which was upgraded before Apache) and I’ve not found anything out of place, by the moment. The Kernels were special, with Amazon customization too.

I also recommend you to make sure to disable your Apache directory browsing, if you had like that, as new software install may have enabled it:

a2dismod autoindex
systemctl restart apache2

I always recommend, for Production, to run the Ubuntu LTS version.

Creating Jenkins configurations for your projects

Obviously for companies is a must, but if you work in your own projects, it will be super great that you configure Jenkins, so you have continuous feedback about if something breaks.

I’ll show you how to configure Jenkins for several projects using only your main computer/laptop.

Check my past article about setting up Jenkins in Docker.

Adding a new Freestyle project

Click on top left: New item.

Then give it an appropriate name and choose Freestyle Project.

Take in count that the name given will be used as the name of the workspace, so you may want to avoid special characters.

It is very convenient to let Jenkins deal with your repository changes instead of using shell commands. So I’m going to fill this section.

I also provided credentials, so Jenkins can log to my Gitlab.

This kind of project is the most simple and we will use the same Docker Container where Jenkins resides, to run the Unit Testing of our code.

We are going to select to Build periodically.

If your Server is in Internet, you can active the Web Hooks so your Jenkins is noticed via a web connection from GitLab, GitHub or your CVS provider. As I’m strictly running this at home, Jenkins will be periodically check for changes in the repository and do nothing if there are no changes.

I’ll set H * * * * so Jenkins will try every hour.

Go down and select Add Build Step:

Select Execute shell.

Then add a basic echo command to print in the Console Output, and ls command so you see what is in the default’s directory your shell script is executing in.

Now save your project.

And go back to Dashboard.

Click inside of Neurona.cat to view Project’s Dashboard.

Click: Build Now. And then click on the Build task (Apr 5, 2021, 10:31 AM)

Click on Console Output.

You’ll see a verbose log of everything that happened.

You’ll see for example that Jenkins has put the script on the path of the git project folder that we instructed before to clone/pull.

This example doesn’t have test. Let’s see one with Unit Test.

Running Unit Testing with pytest

If we enter the project CTOP and then select Configure you’ll see the steps I did for making it do the Unite Testing.

In my case I wanted to have several steps, one per each Unit Test file.

If each one of them I’ve to enter the right directory before launching any test.

If you open the last successful build and and select Console Output you’ll see all the tests, going well.

If a test will go wrong, pytest will exit with Exit Code different of 0, and so Jenkins will detect it and show that the Build Fails.

Building a Project from Pipeline

Pipeline is the set of plugins that allow us to do Continuous Deployment.

Inform the information about your git project.

Then in your gitlab or github project create a file named Jenkinsfile.

Jenkins will look for it when it clones your repo, to build the Pipeline.

Here is my Jenkinsfile in https://gitlab.com/carles.mateo/python_combat_guide/-/blob/master/Jenkinsfile

pipeline {
    agent any
    stages {
        stage('Show Environment') {
            steps {
                echo 'Showing the environment'
                sh 'ls -hal'
            }
        }
        stage('Updating from repository') {
            steps {
                echo 'Grabbing from repository'
                withCredentials([usernamePassword(credentialsId: 'ssh-fast', usernameVariable: 'USERNAME', passwordVariable: 'USERPASS')]) {
                    script {
                        sh "sshpass -p '$USERPASS' -v ssh -o StrictHostKeyChecking=no $USERNAME@$ip_fast 'git clone https://gitlab.com/carles.mateo/python_combat_guide.git; cd python_combat_guide; git pull'"
                    }
                }
            }
        }
        stage('Build Docker Image') {
            steps {
                echo 'Building Docker Container'
                withCredentials([usernamePassword(credentialsId: 'ssh-fast', usernameVariable: 'USERNAME', passwordVariable: 'USERPASS')]) {
                    script {
                        sh "sshpass -p '$USERPASS' -v ssh -o StrictHostKeyChecking=no $USERNAME@$ip_fast 'cd python_combat_guide; docker build -t python_combat_guide .'"
                    }
                }
            }
        }
        stage('Run the Tests') {
            steps {
                echo "Running the tests from the Container"
                withCredentials([usernamePassword(credentialsId: 'ssh-fast', usernameVariable: 'USERNAME', passwordVariable: 'USERPASS')]) {
                    script {
                        sh "sshpass -p '$USERPASS' -v ssh -o StrictHostKeyChecking=no $USERNAME@$ip_fast 'cd python_combat_guide; docker run  python_combat_guide'"
                    }
                }
            }
        }
    }
}

My Jenkins Docker installation has the sshpass command, and I use it to connect via SSH, with username and Password to the server defined by ip_fast environment variable.

We defined the variable ip_fast in Manage Jenkins > Configure System.

There in Global Properties , Environment Variables I defined ip_fast:

In the Build Server I’ll make a new user and allow it to build Docker:

sudo adduser jenkins_build

sudo usermod -aG docker jenkins_build

The Credentials can be managed from Manage Jenkins > Manage Credentials.

You can see how I use all this combined in the Jenkinsfile so I don’t have to store credentials in the CVS and Jenkins (Docker Container) will connect via SSH to make the computer after ip_fast Ip, to build and run another Container. That Container will run with a command to do the Unit Testing. If something goes wrong, that is, if any program return an Exit Code different from 0, Jenkins will consider the build fail.

Take in count that $? only stores the Exit Code of the last program. So be careful if you pass multiple commands in one single line, as this may mask an error.

Separating the execution in multiple Stages helps to save time, as after a failure, execution will not continue.

Also visually is easy to see where the error is.

A base Dockerfile for my Jenkins deployments

Update: I’ve created a video and article about how to install jenkins in Docker with docker CLI and Blue Ocean plugins following the official Documentation. You may prefer to follow that one.

Update: Second part of this article: Creating Jenkins configurations for your projects

So I share with you my base Jenkins Dockerfile, so you can spawn a new Jenkins for your projects.

The Dockerfile installs Ubuntu 20.04 LTS as base image and add the required packages to run jenkins but also Development and Testing tools to use inside the Container to run Unit Testing on your code, for example. So you don’t need external Servers, for instance.

You will need 3 files:

  • Dockerfile
  • docker_run_jenkins.sh
  • requirements.txt

The requirements.txt file contains your PIP3 dependencies. In my case I only have pytest version 4.6.9 which is the default installed with Ubuntu 20.04, however, this way, I enforce that this and not any posterior version will be installed.

File requirements.txt:

pytest==4.6.9

The file docker_run_jenkins.txt start Jenkins when the Container is run and it will wait until the initial Admin password is generated and then it will display it.

File docker_run_jenkins.sh:

#!/bin/bash

echo "Starting Jenkins..."

service jenkins start

echo "Configure jenkins in http://127.0.0.1:8080"

s_JENKINS_PASSWORD_FILE="/var/lib/jenkins/secrets/initialAdminPassword"

i_PASSWORD_PRINTED=0

while [ true ];
do
    sleep 1
    if [ $i_PASSWORD_PRINTED -eq 1 ];
    then
        # We are nice with multitasking
        sleep 60
        continue
    fi

    if [ ! -f "$s_JENKINS_PASSWORD_FILE" ];
    then
        echo "File $s_FILE_ORIGIN does not exist"
    else
        echo "Password for Admin is:"
        cat $s_JENKINS_PASSWORD_FILE
        i_PASSWORD_PRINTED=1
    fi
done

That file has the objective to show you the default admin password, but you don’t need to do that, you can just start a shell into the Container and check manually by yourself.

However I added it to make it easier for you.

And finally you have the Dockerfile:

FROM ubuntu:20.04

LABEL Author="Carles Mateo" \
      Email="jenkins@carlesmateo.com" \
      MAINTAINER="Carles Mateo"

# Build this file with:
# sudo docker build -f Dockerfile -t jenkins:base .
# Run detached:
# sudo docker run --name jenkins_base -d -p 8080:8080 jenkins:base
# Run seeing the password:
# sudo docker run --name jenkins_base -p 8080:8080 -i -t jenkins:base
# After you CTRL + C you will continue with:
# sudo docker start
# To debug:
# sudo docker run --name jenkins_base -p 8080:8080 -i -t jenkins:base /bin/bash

ARG DEBIAN_FRONTEND=noninteractive

ENV SERVICE jenkins

RUN set -ex

RUN echo "Creating directories and copying code" \
    && mkdir -p /opt/${SERVICE}

COPY requirements.txt \
    docker_run_jenkins.sh \
    /opt/${SERVICE}/

# Java with Ubuntu 20.04 LST is 11, which is compatible with Jenkins.
RUN apt update \
    && apt install -y default-jdk \
    && apt install -y wget curl gnupg2 \
    && apt install -y git \
    && apt install -y python3 python3.8-venv python3-pip \
    && apt install -y python3-dev libsasl2-dev libldap2-dev libssl-dev \
    && apt install -y python3-venv \
    && apt install -y python3-pytest \
    && apt install -y sshpass \
    && wget -qO - https://pkg.jenkins.io/debian-stable/jenkins.io.key | apt-key add - \
    && echo "deb http://pkg.jenkins.io/debian-stable binary/" > /etc/apt/sources.list.d/jenkins.list \
    && apt update \
    && apt -y install jenkins \
    && apt-get clean

RUN echo "Setting work directory and listening port"
WORKDIR /opt/${SERVICE}

RUN chmod +x docker_run_jenkins.sh

RUN pip3 install --upgrade pip \
    && pip3 install -r requirements.txt


EXPOSE 8080


ENTRYPOINT ["./docker_run_jenkins.sh"]

Build the Container

docker build -f Dockerfile -t jenkins:base .

Run the Container displaying the password

sudo docker run --name jenkins_base -p 8080:8080 -i -t jenkins:base

You need this password for starting the configuration process through the web.

Visit http://127.0.0.1:8080 to configure Jenkins.

Configure as usual

Resuming after CTRL + C

After you configured it, on the terminal, press CTRL + C.

And continue, detached, by running:

sudo docker start jenkins_base

The image is 1.2GB in size, and will allow you to run Python3, Virtual Environments, Unit Testing with pytest and has Java 11 (not all versions of Java are compatible with Jenkins), use sshpass to access other Servers via SSH with Username and Password…

Solving the problem when running a Docker Container: standard_init_linux.go:190: exec user process caused “no such file or directory”

When you see this error for the first time it can be pretty ugly to detect why it happens.

At personal level I use only Linux for my computers, with an exception of a windows laptop that I keep for specific tasks. But my employers often provide me laptops with windows.

I suffered this error for first time when I inherited a project, in a company I joined time ago. And I suffered some time later, by the same reason, so I decided to explain it easily.

In the project I inherited the build process was broken, so I had to fix it, and when this was done I got the mentioned error when trying to run the Container:

standard_init_linux.go:190: exec user process caused "no such file or directory"

The Dockerfile was something like this:

FROM docker-io.battle.net/alpine:3.10.0

LABEL Author="Carles Mateo" \
      Email="docker@carlesmateo.com" \
      MAINTAINER="Carles Mateo"

ENV SERVICE cservice

RUN set -ex

RUN echo "Creating directories and copying code" \
    && mkdir -p /opt/${SERVICE}
    
COPY config.prod \
    config.dev \
    config.st \
    requirements.txt \
    utils.py \
    cservice.py \
    tests/test_cservice.py \
    run_cservice.sh \
    /opt/${SERVICE}/

RUN echo "Setting work directory and listening port"
WORKDIR /opt/${SERVICE}
EXPOSE 7000

RUN echo "Installing dependencies" \
    && apk add build-base openldap-dev python3-dev py-pip \
    && pip3 install --upgrade pip \
    && pip3 install -r requirements.txt \
    && pip3 install pytest

ENTRYPOINT ["./run_cservice.sh"]

So the project was executing a Bash script run_cservice.sh, via Dockerfile ENTRYPOINT.

That script would do the necessary amends depending if the Container is launched with prod, dev, or staging parameter.

I debugged until I saw that the Container never executed this in the expected way.

A echo “Debug” on top of the Bash Script would be enough to know that very basic call was never executed. The error was first.

After much troubleshooting the Container I found that the problem was that the Bash script, that was copied to the container with COPY in the Dockerfile, from a Windows Machines, contained CRLF Windows carriage return. While for Linux and Mac OS X carriage return is just a character, LF.

In that company we all use Windows. And trying to build the Container worked after removing the CRLF, but the Bash script with CRLF was causing that problem.

When I replace the CRLF by Unix type LF, and rebuild the image, and ran the container, it worked lovely.

A very easy, manual way, to do this in Windows, is opening your file with Notepad++ and setting LF as carriage return. Save the file, rebuild, and you’ll see your Container working.

Please note that in the Dockerfile provided I install pytest Framework and a file calles tests/test_cservice.py. That was not in the original Dockerfile, but I wanted to share with you that I provide Unit Testing that can be ran from a Linux Container, for all my projects. What normally I do is to have two Dockerfiles. One for the Production version to be deployed, another for running Unit Testing, and some time functional testing as well, from inside the Docker Container. So strictly speaking for the production version, I would not copy the tests/test_cservice.py and install pytest. A different question are internal Automation Tools, where it may be interested providing a All-in-One image, that can run the Unit Testing before start the service. It is interesting to provide some debugging tools in out Internal Automation Tools, so we can troubleshoot what’s going on in case of problems. Take a look at my previous article about Python version for Docker and Automation tools, for more considerations.

Why I propose you to use Python 3.8, at least, for your Internal Automation Tools in Docker Containers

This article is written at 2021-03-22 so this conclusion will evolve as time passes.

Some of my articles are checked after 7 years, so be advised this choice will not be valid in a year. Although the reasoning and considerations to take in count will be the same.

I answer to the question: Why Carles, do you suggest to adopt Python 3.8, and not 3.9 or 3.7 for our Internal Automation Tools?.

Reliability and Maturity

If you look at page https://devguide.python.org/#status-of-python-branches you will see the next table:

So you can see that:

  • Python 3.6 was released on 2016-12-23 and will get EOL on 2021-12-23.
    • That’s EOL in 9 months. We don’t want to recommend that.
  • Python 3.7 was released on 2018-06-27 and will get EOL 2023-06-27.
    • That’s 2 years and 3 months from now. The Status of development is focus in Security bugfixes.
  • Python 3.9 was released 2020-10-05 that’s 5 months approx from now.
    • Honestly, I don’t recommend for Production a version of Software that has not been in the market for a year.
      • Most of the bugs and security bugs appears before the first year.
      • New features released, often are not widely fully tested , and bugs found and fixed, once a year has passed.
  • Python 3.8 was released on 2019-10-14.
    • That means that the new features have been tested for a year and five months approximately.
    • This is enough time to make appear most bugs.
    • EOL is 2024-10, that is 3 years and 7 months from now. A good balance of EOL for the effort to standardize.
    • Finally Python 3.8 is the Python mainline for Ubuntu 20.04 LTS.
      • If our deploy strategy is synchronized, we want to use Long Time Support versions, of course.

So my recommendation would be, at least for your internal tools, to use containers based in Ubuntu 20.04 LTS with Python 3.8.

We know Docker images will be bigger using Ubuntu 20.04 LTS than using other images, but that disk space is really a small difference, and we get the advantage of being able to install additional packages in the Containers if we need to debug.

An Ubuntu 20.04 Image with Pyhton 3.8 and pytest, uses 540 MB.

This is a small amount of space nowadays. Even if very basic Alpine images can use 25MB only, when you install Python they start to grow close to Ubuntu, to 360MB. The difference is not much, and if you used Alpine and you have suffered from Community packages being updated and becoming incompatible with wheel and you lost hours fixing the dependencies, you’ll really appreciate using my Ubuntu LTS packages approach.

Adding a swapfile on the fly as a temporary solution for a Server with few memory

Here is an easy trick that you can use for adding swap temporarily to a Server, VMs or Workstations, if you are in an emergency.

In this case I had a cluster composed from two instances running out of memory.

I got an alert for one of the Servers, reporting that only had 7% of free memory.

Immediately I checked it, but checked also any other forming part of the cluster.

Another one appeared, had just only a bit more memory than the other, but was considered in Critical condition too.

The owner of the Service was contacted and asked if we can hold it until US Business hours. Those Servers were going to be replaced next day in US Business hours, and when possible it would be nice not to wake up the Team. It was day in Europe, but night in US.

I checked the status of the Server with those commands:

# df -h

There are 13GB of free space in /. More than enough to be safe as this service doesn’t use much.

# free -h
              total        used        free      shared  buff/cache   available
Mem:           5.7G        4.8G        139M        298M        738M        320M
Swap:            0B          0B          0B

I checked the memory, ok, there are only 139MB free in this node, but 738MB are buff/cache. Buff/Cache is memory used by Linux to optimize I/O as long as it is not needed by application. These 738 MB in buff/cache (or most of it) will be used if needed by the System. The field available corresponds to the memory that is available for starting new applications (not counting the swap if there was any), and basically is the free memory plus a fragment of the buff/cache. I’m sure we could use more than 320MB and there is a lot if buff/cache, but to play safe we play by the book.

With that in mind it seemed that it would hold perfectly to Business hours.

I checked top. It is interesting to mention the meaning of the Column RES, which is resident memory, in other words, the real amount of memory that the process is using.

I had a Java process using 4.57GB of RAM, but a look at how much Heap Memory was reserved and actually being used showed a Heap of 4GB (Memory reserved) and 1.5GB actually being used for real, from the Heap, only.

It was unlikely that elastic search would use all those 4GB, and seemed really unlikely that the instance will suffer from memory starvation with 2.5GB of 4GB of the Heap free, ~1GB of RAM in buffers/cache plus free, so looked good.

To be 100% sure I created a temporary swap space in a file on the SSD.

(# means that I’m executing this as root, if you type literally with # in front, this will be a comment)

# fallocate -l 1G /swapfile-temp

# dd if=/dev/zero of=/swapfile-temp bs=1024 count=1048576 status=progress
1034236928 bytes (1.0 GB) copied, 4.020716 s, 257 MB/s
1048576+0 records in
1048576+0 records out
1073741824 bytes (1.1 GB) copied, 4.26152 s, 252 MB/s

If you ask me why I had to dd, I will tell you that I needed to. I checked with command blkid and filesystem was xfs. I believe that was the reason.

The speed writing to the file is fair enough for a swap.

# chmod 600 /swapfile-temp

# mkswap /swapfile-temp
Setting up swapspace version 1, size = 1048572 KiB
no label, UUID=5fb12c0c-8079-41dc-aa20-21477808619a

# swapon /swapfile-temp

I check that memory is good:

# free -h
              total        used        free      shared  buff/cache   available
Mem:           5.7G        4.8G        117M        298M        770M        329M
Swap:          1.0G          0B        1.0G

And finally I check that the Kernel parameter swappiness is not too aggressive:

# sysctl vm.swappiness
vm.swappiness = 30

Cool. 30 is a fair enough value.

2022-01-05 Update for my students that need to add additional 16GB of swap to their SSD drive:

sudo fallocate -l 16G /swapfile-temp
sudo dd if=/dev/zero of=/swapfile-temp bs=1024 count=16777216 status=progress
sudo chmod 600 /swapfile-temp
sudo mkswap /swapfile-temp
sudo swapon /swapfile-temp

Post-Mortem: The mystery of the duplicated Transactions into an e-Commerce

Me, with 4 more Senior BackEnd Engineers wrote the new e-Commerce for a multinational.

The old legacy Software evolved into a different code for every country, making it impossible to be maintained.

The new Software we created used inheritance to use the same base code for each country and overloaded only the specific different behavior of every country, like for the payment methods, for example Brazil supporting “parcelados” or Germany with specific payment players.

We rewrote the old procedural PHP BackEnd into modern PHP, with OOP and our own Framework but we had to keep the transactional code in existing MySQL Procedures, so the logic was split. There was a Front End Team consuming our JSONs. Basically all the Front End code was cached in Akamai and pages were rendered accordingly to the JSONs served from out BackEnd.

It was a huge success.

This e-Commerce site had Campaigns that started at a certain time, so the amount of traffic that would come at the same time would be challenging.

The project was working very well, and after some time the original Team was split into different projects in the company and a Team for maintenance and evolutives was hired.

At certain point they started to encounter duplicate transactions, and nobody was able to solve the mystery.

I’m specialized into fixing impossible problems. They used to send me to Impossible Missions, and I am famous for solving impossible problems easily.

So I started the task with a SRE approach.

The System had many components and layers. The problem could be in many places.

I had in my arsenal of tools, Software like mysqldebugger with which I found an unnoticed bug in decimals calculation in the past surprising everybody.

Previous Engineers involved believed the problem was in the Database side. They were having difficulties to identify the issue by the random nature of the repetitions.

Some times the order lines were duplicated, and other times were the payments, which means charging twice to the customer.

Redis Cluster could also play a part on this, as storing the session information and the basket.

But I had to follow the logic sequence of steps.

If transactions from customer were duplicated that mean that in first term those requests have arrived to the System. So that was a good point of start.

With a list of duplicated operations, I checked the Webservers logs.

That was a bit tricky as the Webserver was recording the Ip of the Load Balancer, not the ip of the customer. But we were tracking the sessionid so with that I could track and user request history. A good thing was also that we were using cookies to stick the user to the same Webserver node. That has pros and cons, but in this case I didn’t have to worry about the logs combined of all the Webservers, I could just identify a transaction in one node, and stick into that node’s log.

I was working with SSH and Bash, no log aggregators existing today were available at that time.

So when I started to catch web logs and grep a bit an smile was drawn into my face. :)

There were no transactions repeated by a bad behavior on MySQL Masters, or by BackEnd problems. Actually the HTTP requests were performed twice.

And the explanation to that was much more simple.

Many Windows and Mac User are used to double click in the Desktop to open programs, so when they started to use Internet, they did the same. They double clicked on the Submit button on the forms. Causing two JavaScript requests in parallel.

When I explained it they were really surprised, but then they started to worry about how they could fix that.

Well, there are many ways, like using an UUID in each request and do not accepting two concurrents, but I came with something that we could deploy super fast.

I explained how to change the JavaScript code so the buttons will have no default submit action, and they will trigger a JavaScript method instead, that will set a boolean to True, and also would disable the button so it can not be clicked anymore. Only if the variable was False the submit would be performed. It was almost impossible to get a double click as the JavaScript was so fast disabling the button, that the second click will not trigger anything. But even if that could be possible, only one request would be made, as the variable was set to True on the first click event.

That case was very funny for me, because it was not necessary to go crazy inspecting the different layers of the system. The problem was detected simply with HTTP logs. :)

People often forget to follow the logic steps while many problems are much more simple.

As a curious note, I still see people double clicking on links and buttons on the Web, and some Software not handling it. :)

News from the blog 2020-11-03

Nice articles recommended

This article talks about how at Riot Games they use Slack. Slack is really a powerful tool, and also makes the communication more human in companies with their approach and the funny icons and /giphy. I’m very serious when it comes to work but I recognize the friendly, warm, human and lovely touch these kind of animated icons bring to the conversations.

Remember that life of the SSD is different from spinning drives. I recommend to keep your backups on external spinning drives disconnected most of the time.

Operating at Scale – An Inside Look at Facebook’s Production Engineering Team

CMIPS

I’ve been working on testing performance of more configurations on Azure and GCP.

I’m also looking forward to test the AMD Ryzen™ 7 3700X, AM4, Zen 2, 8 Core, 16 Thread, 3.6GHz, 4.4GHz Turbo that is arriving to me this week.

CTOP.py v. 0.7.8 released

I closed the ticket #21 (Thank Jian!) so ensuring CTOP.py is compatible with Python 3.5 versions.

Feature requests and bugs are listed using gitlab: https://gitlab.com/carles.mateo/ctop/-/issues

My Python Combat Guide Book

I updated it the Nov-01, as I normally do, bringing more content.

I’ve been paid the royalties for he past two months and I reinvested everything (and more from my pocket) in Hardware for working with ZFS.

I was offered by an editorial in The States to publish Python Combat Guide and other of my books worldwide. I was thinking it for a while. It was very good money, translation to multiple languages and platforms and marketing and a lot of promotion, but I would had loss the rights and the Freedom I have now, like the possibility to offer discount coupons to who I want and to update the contents often. So to celebrate my decision for you, readers of the blog, during September, I provide a discounted price of $5 USD for the fist 100 sales instead of the $25 USD suggested price. Use the following link:

https://leanpub.com/pythoncombatguide/c/blog-carles-nov2020

ZFS progress

As part of my effort to contributing with nice Open Source products to the Community I have made some investments to keep contributing to:

  • OpenZFS
  • My old tool for managing ZFS and Network shares easily

I’m writing a new book about managing ZFS for Small Business too, so I show how to operate on this hardware, good points and downsides.

I’m assembling a new Pc with ZFS plenty of Disk Storage within a mix of:

  • SAS Enterprise grade SSD 2.5″
  • SATA 12Gb Enterprise grade SSD 2.5″
  • SATA SSD 2.5″
  • SATA HDD 2TB 2.5″
  • SATA HDD 2TB 3.5″

I’m a big fan of Intel, but this time I have chosen AMD. Concretely a AMD Ryzen 7 3700X AM4 8 Core / 16 Threads, 3.6 GHz to 4.4 GHz with Turbo. The reason I chose this CPU is because it only uses 65W but still has 8 Cores / 16 Threads.

Also I want to see the performance of this AMD Ryzen with CMIPS and another important reason is that AMD motherboards support PCI 4.0. I have bought a NVMe SSD Samsung 980 PRO PCI 4.0 (x4) able to read at 6,400 MB/s. I will use this AMD box for running VMs as well. Basically Virtual Box and Docker.

I’ve been surprised that for 169.99 GBP I can have a very good Asus Motherboard with a 2.5 Gb Ethernet: ASUS ROG STRIX B550-F GAMING, AMD B550, AM4, DDR4, PCIe 4.0, SATA3, Dual M.2, CrossFire, 2.5GbE, USB 3.2 Gen2 A+C, ATX.

In order to have an Asus motherboard with a 2.5 Gb Ethernet for Intel I had to jump to a 254 GBP motherboard and Intel is still PCI 3.0. Actually there are PCI 10Gb NICs at 80 GBP so at some point I’ll upgrade my home network from Gigabit to 10 Gb. That will come slowly, but if the new equipment I assemble has 2.5 Gb when I upgrade the main switches to 10 Gb, at least I’ll be able to communicate at 2.5 Gb without ant additional change.

Also memory at 3200, speed that the AMD motherboard can provide, is more than affordable.

This new server will have 64 GB of RAM (Corsair DDR4 Vengeance PC4-25600 (3200)), as I plan to run VMs and use Volumes mounted via iSCSI and locally as block devices to improve my Software. I’ve bought a new UPS to keep it running in case power goes down. That’s something that doesn’t happen often in my city in Ireland, honestly, but I never forget that this happens in Barcelona two or three times per year, and that a high tension spike can burn your motherboard, drives, or electronics like the TV or the fridge. I’ve bought as well a new KVM Switch, a HDMI 4K and USB too one, so I don’t have to have so many keyboards. My logitech M720 allowed me to use it with 3 computers, but still I want something more operational. The KVM I bought allow me to switch with a button or within a hotkey in the keyboard.

I bought a new Icy box fox handling 6 2.5 drives in just one bay of the tower, and a 850 Watt Corsair PSU that will be able to power the many drives I want at the same time.

More books coming

I started two new books:

Those can be purchased while I’m still working on them and get the updates that I’ll be publishing and keeping a communication with me about doubts or improvements.

Halloween Software Offers

I saw some Halloween offers and I purchased Software licenses for Software I use.

Backup Guard is one of the products I registered:

https://backup-guard.com/

I contribute a lot to Open Source, and many years ago before Open Source existed I was creating Freeware Software. But I think that good commercial Software deserves to be supported. Like everything in life, if they are doing a good work that is useful to me, why not giving them support?. It is also a way to make sure they will continue producing amazing Software. And in the other hand, myself, I create Software. Some times commercial Software, and I like to be paid, so I apply the same principle.