Tag Archives: Linux

Backup and Restore your Ubuntu Linux Workstations

This is a mechanism I invented and I’ve been using for decades, to migrate or clone my Linux Desktops to other physical servers.

This script is focused on doing the job for Ubuntu but I was doing this already 30 years ago, for X Window as I was responsible of the Linux platform of a ISP (Internet Service Provider). So, it is compatible with any Linux Desktop or Server.

It has the advantage that is a very lightweight backup. You don’t need to backup /etc or /var as long as you install a new OS and restore the folders that you did backup. You can backup and restore Wine (Windows Emulator) programs completely and to/from VMs and Instances as well.

It’s based on user/s rather than machine.

And it does backup using the Timestamp, so you keep all the different version, modified over time. You can fusion the backups in the same folder if you prefer avoiding time versions and keep only the latest backup. If that’s your case, then replace s_PATH_BACKUP_NOW=”${s_PATH_BACKUP}${s_DATETIME}/” by s_PATH_BACKUP_NOW=”${s_PATH_BACKUP}” for instance. You can also add a folder for machine if you prefer it, for example if you use the same userid across several Desktops/Servers.

I offer you a much simplified version of my scripts, but they can highly serve your needs.

#!/usr/bin/env bash

# Author: Carles Mateo
# Last Update: 2022-10-23 10:48 Irish Time

# User we want to backup data for
s_USER="carles"
# Target PATH for the Backups
s_PATH_BACKUP="/home/${s_USER}/Desktop/Bck/"

s_DATE=$(date +"%Y-%m-%d")
s_DATETIME=$(date +"%Y-%m-%d-%H-%M-%S")

s_PATH_BACKUP_NOW="${s_PATH_BACKUP}${s_DATETIME}/"

echo "Creating path $s_PATH_BACKUP and $s_PATH_BACKUP_NOW"
mkdir $s_PATH_BACKUP
mkdir $s_PATH_BACKUP_NOW

s_PATH_KEY="/home/${s_USER}/Desktop/keys/2007-01-07-cloud23.pem"
s_DOCKER_IMG_JENKINS_EXPORT=${s_DATE}-jenkins-base.tar
s_DOCKER_IMG_JENKINS_BLUEOCEAN2_EXPORT=${s_DATE}-jenkins-blueocean2.tar
s_PGP_FILE=${s_DATETIME}-pgp.zip

# Version the PGP files
echo "Compressing the PGP files as ${s_PGP_FILE}"
zip -r ${s_PATH_BACKUP_NOW}${s_PGP_FILE} /home/${s_USER}/Desktop/PGP/*

# Copy to BCK folder, or ZFS or to an external drive Locally as defined in: s_PATH_BACKUP_NOW
echo "Copying Data to ${s_PATH_BACKUP_NOW}/Data"
rsync -a --exclude={} --acls --xattrs --owner --group --times --stats --human-readable --progress -z "/home/${s_USER}/Desktop/data/" "${s_PATH_BACKUP_NOW}data/"
rsync -a --exclude={'Desktop','Downloads','.local/share/Trash/','.local/lib/python2.7/','.local/lib/python3.6/','.local/lib/python3.8/','.local/lib/python3.10/','.cache/JetBrains/'} --acls --xattrs --owner --group --times --stats --human-readable --progress -z "/home/${s_USER}/" "${s_PATH_BACKUP_NOW}home/${s_USER}/"
rsync -a --exclude={} --acls --xattrs --owner --group --times --stats --human-readable --progress -z "/home/${s_USER}/Desktop/code/" "${s_PATH_BACKUP_NOW}code/"


echo "Showing backup dir ${s_PATH_BACKUP_NOW}"
ls -hal ${s_PATH_BACKUP_NOW}

df -h /

See how I exclude certain folders like the Desktop or Downloads with –exclude.

It relies on the very useful rsync program. It also relies on zip to compress entire folders (PGP Keys on the example).

If you use the second part, to compress Docker Images (Jenkins in this example), you will run it as sudo and you will need also gzip.

# continuation... sudo running required.

# Save Docker Images
echo "Saving Docker Jenkins /home/${s_USER}/Desktop/Docker_Images/${s_DOCKER_IMG_JENKINS_EXPORT}"
sudo docker save jenkins:base --output /home/${s_USER}/Desktop/Docker_Images/${s_DOCKER_IMG_JENKINS_EXPORT}
echo "Saving Docker Jenkins /home/${s_USER}/Desktop/Docker_Images/${s_DOCKER_IMG_JENKINS_BLUEOCEAN2_EXPORT}"
sudo docker save jenkins:base --output /home/${s_USER}/Desktop/Docker_Images/${s_DOCKER_IMG_JENKINS_BLUEOCEAN2_EXPORT}
echo "Setting permissions"
sudo chown ${s_USER}.${s_USER} /home/${s_USER}/Desktop/Docker_Images/${s_DOCKER_IMG_JENKINS_EXPORT}
sudo chown ${s_USER}.${s_USER} /home/${s_USER}/Desktop/Docker_Images/${s_DOCKER_IMG_JENKINS_BLUEOCEAN2_EXPORT}
echo "Compressing /home/${s_USER}/Desktop/Docker_Images/${s_DOCKER_IMG_JENKINS_EXPORT}"
gzip /home/${s_USER}/Desktop/Docker_Images/${s_DOCKER_IMG_JENKINS_EXPORT}
gzip /home/${s_USER}/Desktop/Docker_Images/${s_DOCKER_IMG_JENKINS_BLUEOCEAN2_EXPORT}

rsync -a --exclude={} --acls --xattrs --owner --group --times --stats --human-readable --progress -z "/home/${s_USER}/Desktop/Docker_Images/" "${s_PATH_BACKUP_NOW}Docker_Images/"

There is a final part, if you want to backup to a remote Server/s using ssh:

# continuation... to copy to a remote Server.

s_PATH_REMOTE="bck7@cloubbck11.carlesmateo.com:/Bck/Desktop/${s_USER}/data/"

# Copy to the other Server
rsync -e "ssh -i $s_PATH_KEY" -a --exclude={} --acls --xattrs --owner --group --times --stats --human-readable --progress -z "/home/${s_USER}/Desktop/data/" ${s_PATH_REMOTE}

I recommend you to use the same methodology in all your Desktops, like for example, having a data/ folder in the Desktop for each user.

You can use Erasure Code to split the Backups in blocks and store a piece in different Cloud Providers.

Also you can store your Backups long-term, with services like Amazon Glacier.

Other ideas are storing certain files in git and in Hadoop HDFS.

If you want you can CRC your files before copying to another device or server.

You will use tools like: sha512sum or md5sum.
Video: How to create a Docker Container for LAMPP step by step

How to create a Docker Container for Linux Apache MySQL PHP and Python for beginners.

Note: Containers are not persistent. Use this for tests only. If you want to keep persistent information use Volumes.

Sources: https://gitlab.com/carles.mateo/blog.carlesmateo.com-source-code/-/tree/master/twitch/live_20220708_dockerfile_lamp

File: Dockerfile

FROM ubuntu:20.04

MAINTAINER Carles Mateo

ARG DEBIAN_FRONTEND=noninteractive

RUN apt update && \
    apt install -y vim python3-pip &&  \
    apt install -y net-tools mc vim htop less strace zip gzip lynx && \
    apt install -y apache2 mysql-server ntpdate libapache2-mod-php7.4 mysql-server php7.4-mysql php-dev libmcrypt-dev php-pear && \
    apt install -y git && apt autoremove && apt clean && \
    pip3 install pytest

RUN a2enmod rewrite

RUN echo "Europe/Ireland" | tee /etc/timezone

ENV APACHE_RUN_USER  www-data
ENV APACHE_RUN_GROUP www-data
ENV APACHE_LOG_DIR   /var/log/apache2
ENV APACHE_PID_FILE  /var/run/apache2/apache2.pid
ENV APACHE_RUN_DIR   /var/run/apache2
ENV APACHE_LOCK_DIR  /var/lock/apache2
ENV APACHE_LOG_DIR   /var/log/apache2

COPY phpinfo.php /var/www/html/

RUN service apache2 restart

EXPOSE 80

CMD ["/usr/sbin/apache2", "-D", "FOREGROUND"]

File: phpinfo.php

<html>
<?php

// Show all information, defaults to INFO_ALL
phpinfo();

// Show just the module information.
// phpinfo(8) yields identical results.
phpinfo(INFO_MODULES);
?>
</html>

File: build_docker.sh

#!/bin/bash

s_DOCKER_IMAGE_NAME="lampp"

echo "We will build the Docker Image and name it: ${s_DOCKER_IMAGE_NAME}"
echo "After, we will be able to run a Docker Container based on it."

printf "Removing old image %s\n" "${s_DOCKER_IMAGE_NAME}"
sudo docker rm "${s_DOCKER_IMAGE_NAME}"

printf "Creating Docker Image %s\n" "${s_DOCKER_IMAGE_NAME}"
# sudo docker build -t ${s_DOCKER_IMAGE_NAME} . --no-cache
sudo docker build -t ${s_DOCKER_IMAGE_NAME} .

i_EXIT_CODE=$?
if [ $i_EXIT_CODE -ne 0 ]; then
    printf "Error. Exit code %s\n" ${i_EXIT_CODE}
    exit
fi

echo "Ready to run ${s_DOCKER_IMAGE_NAME} Docker Container"
echo "To run in type: sudo docker run -p 80:80 --name ${s_DOCKER_IMAGE_NAME} ${s_DOCKER_IMAGE_NAME}"
echo "or just use run_in_docker.sh"

echo
echo "If you want to debug do:"
echo "docker exec -i -t ${s_DOCKER_IMAGE_NAME} /bin/bash"

Fixing the Error Can’t locate IPC/Run.pm in @INC in CentOS 7.5

So if you get an error like this:

Can't locate IPC/Run.pm in @INC (@INC contains: /usr/local/lib64/perl5 /usr/local/share/perl5 /usr/lib64/perl5/vendor_perl /usr/share/perl5/vendor_perl /usr/lib64/perl5 /usr/share/perl5 .) at ./check_ipmi_sensor line 35.
BEGIN failed--compilation aborted at ./check_ipmi_sensor line 35.

The solutions is simple.

sudo yum makecache

yum install perl-IPC-Run

You’ll see the list of mirrors and an output similar to this:

Loaded plugins: fastestmirror, versionlock
Loading mirror speeds from cached hostfile
centos-updates                                                                                                                                          | 3.4 kB  00:00:00
epel                                                                                                                                                    | 4.7 kB  00:00:00
extras                                                                                                                                                  | 3.4 kB  00:00:00
Resolving Dependencies
--> Running transaction check
---> Package perl-IPC-Run.noarch 0:0.92-2.el7 will be installed
--> Processing Dependency: perl(IO::Pty) >= 1.08 for package: perl-IPC-Run-0.92-2.el7.noarch
--> Running transaction check
---> Package perl-IO-Tty.x86_64 0:1.10-11.el7 will be installed
--> Finished Dependency Resolution

Dependencies Resolved

===============================================================================================================================================================================
 Package                                     Arch                                  Version                                    Repository                                  Size
===============================================================================================================================================================================
Installing:
 perl-IPC-Run                                noarch                                0.92-2.el7                                 centos-base                                122 k
Installing for dependencies:
 perl-IO-Tty                                 x86_64                                1.10-11.el7                                centos-base                                 42 k

Transaction Summary
===============================================================================================================================================================================
Install  1 Package (+1 Dependent package)

Total download size: 163 k
Installed size: 397 k
Downloading packages:
(1/2): perl-IO-Tty-1.10-11.el7.x86_64.rpm                                                                                                               |  42 kB  00:00:00
(2/2): perl-IPC-Run-0.92-2.el7.noarch.rpm                                                                                                               | 122 kB  00:00:11
-------------------------------------------------------------------------------------------------------------------------------------------------------------------------------
Total                                                                                                                                           15 kB/s | 163 kB  00:00:11
Running transaction check
Running transaction test
Transaction test succeeded
Running transaction
  Installing : perl-IO-Tty-1.10-11.el7.x86_64                                                                                                                              1/2
  Installing : perl-IPC-Run-0.92-2.el7.noarch                                                                                                                              2/2
  Verifying  : perl-IPC-Run-0.92-2.el7.noarch                                                                                                                              1/2
  Verifying  : perl-IO-Tty-1.10-11.el7.x86_64                                                                                                                              2/2

Installed:
  perl-IPC-Run.noarch 0:0.92-2.el7

Dependency Installed:
  perl-IO-Tty.x86_64 0:1.10-11.el7

Complete!

Upgrading Amazon AWS EC2 Ubuntu 18.04 LTS to Ubuntu 20.04 LTS

I’ve upgraded one of my AWS machines from Ubuntu 18.04 LTS to Ubuntu 20.04 LTS.

The process was really straightforward, basically run:

sudo apt update
sudp apt upgrade

Then Reboot in order to load the last kernel.

Then execute:

sudo do-release-upgrade

And ask two or three questions in different moments.

After, reboot, and that’s it.

All my Firewall rules, were kept, the services were restarted as they were available, or deferred to be executed when the service is reinstalled in case of dependencies (like for PHP, which was upgraded before Apache) and I’ve not found anything out of place, by the moment. The Kernels were special, with Amazon customization too.

I also recommend you to make sure to disable your Apache directory browsing, if you had like that, as new software install may have enabled it:

a2dismod autoindex
systemctl restart apache2

I always recommend, for Production, to run the Ubuntu LTS version.

Graphical programs I use usually in Linux

Those are the programs that more or less, I use always in all my Linux workstations.

I use Ubuntu LTS. I like how they maintain the packages.

I like to run the same base version in my Desktops, like I have in the Servers. So if I have my Servers deployed with Ubuntu 20.04 LTS, then my Desktops will run with the same version. Is a way to get to better know the distribution, compatibilities, run faster than the problems, and an easy way to test things. If I have several deployments with several versions (so LTS not upgraded) I may run VMs with that version as Desktop or Server, to ensure compatibility. And obviously I use Docker and a lot of Command Line Tools, which I covered in another article.

Audacity sound recorder and editor

Charles Proxy

Chromium web browser

The Chrome Extension of LastPass for Teams

Filezilla

Firefox

GIMP

IntelliJ

LibreOffice

OpenShot Video Editor

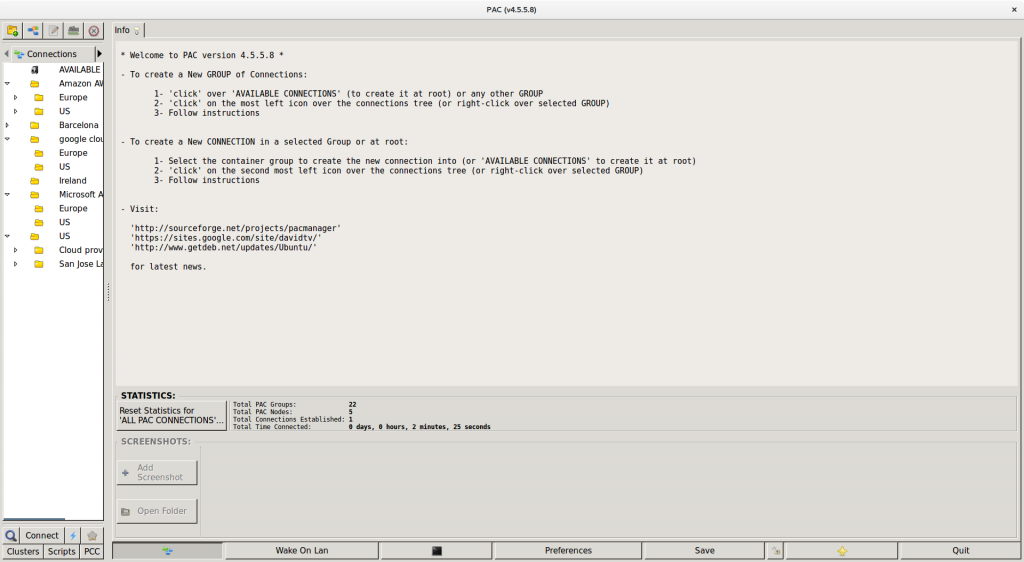
PAC

Packet Tracer from Cisco

PHPStorm

PyCharm

Slack

Skype (usage going down in favor of Zoom and Slack)

VirtualBox

Vmware Workstation

VokoscreenNG Screen Recorder

Wine (Windows Emulator)

Zoom

Cloning a Windows Application running in Wine

I’ve some very old Windows Applications running in Wine in my Linux workstations.

It’s Software I bought years ago and that is not available anymore.

Keeping and migrating or cloning to another Linux Workstation or Virtual machine is really easy.

I share the steps with you.

You just have to copy the contents from your /home/username/.wine folder.

Then, in the new workstation install wine. For Ubuntu this is:

sudo apt update && sudo apt install wine

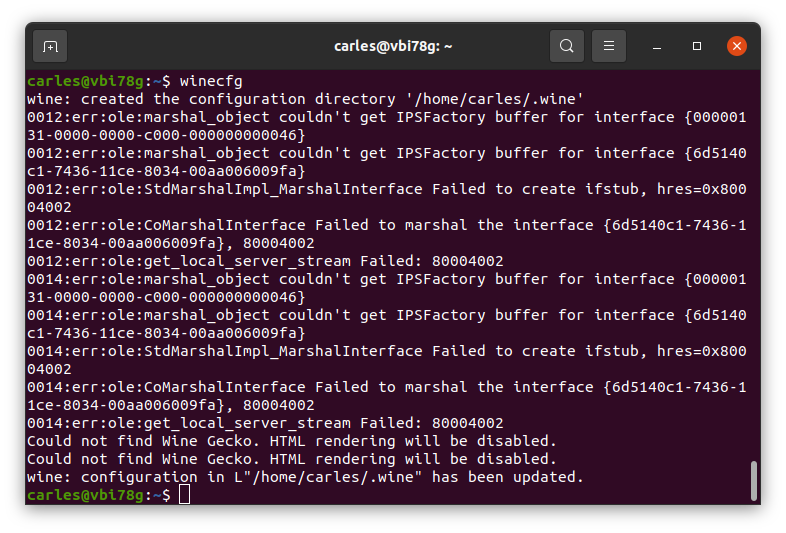
Run winecfg so basic links and structures are created.

Then simply copy the .wine folder backup to your new machine /home/username/

Your programs will be in /home/username/.wine/drive_c_/Program Files/ or /home/username/.wine/drive_c_/Program Files (x86)/

If you want you can just copy your programs folder.

Remember that to cd to a directory with spaces you have to use “

For example:

$ pwd
/home/carles/.wine/drive_c
$ cd "Program Files"
$ pwd
/home/carles/.wine/drive_c/Program Files

You can also use \ (slash space) to escape space.

Then start your favorite program with:

wine yourprogram.exe

If that fails is very probably that creating a new configuration, for a new user, will make things right.

Update 2022-01-05: Take in count that you will be copying the Windows registry when doing this. I use this trick to clone applications that are no longer downloadable from the Internet. I clone wine to dedicated Virtual Machines. You may need different Virtual Machines for different programs if windows registry is different for them.

Install Windows Subsystem for Linux, WSL 2 on Windows 10 64 bit, with Ubuntu, solution to error WslRegisterDistribution failed with error: 0x80070057

You know I love Linux. I was compiling my own Kernels back in 1995, when it took more than 24 hours in a 386, and working on the first ISPs in Barcelona managing the Linux Systems.

For my computers I prefer Linux, no doubt about it, but many multinationals I worked for have Windows option only for the Laptops and Desktops.

During years I had to deal with sending files to Linux or Unix (HP UX, Sun Solaris…) to process them and getting back the result. Some sort of ETL and Map Reduce in the prehistory of personal computers, taking in count aspects like Networks speeds too, available space, splitting files for processing.

When I was working as Senior Project Manager in Winterthur Insurance, now Axa, I had to run a lot of ETL (Extract Transform Load) for considerably big files, or when I was project manager and later head of department in Volkswagen gedas or later helping Start ups like Privalia. I can tell you that Windows didn’t like you to open editors to work with 1GB text or CSV file, and doesn’t like it, even if your computer has 16GB of Memory, and even if they do the simplicity of Bash scripts and using pipes, grep, awk… is so powerful that is very convenient to have those files processed using Linux.

And honestly is a pain to send back and forth files to a UNIX System just for Data Crunch. And a VM will be slow and use memory, and you have enable some sort of sharing with it so it can access the Data. Not to talk if you need to split the data files in blocks to be processed in parallel by several computers.

There are many solutions, like using Virtual Machines, Docker, external Servers, etc…

WSL allows you to run Linux command line tools inside Windows.

https://wiki.ubuntu.com/WSL

Having WSL allows things to be done much more straightforward, processing the files in your local windows hard drives.

Please note: Maybe you have enough using GitBash.

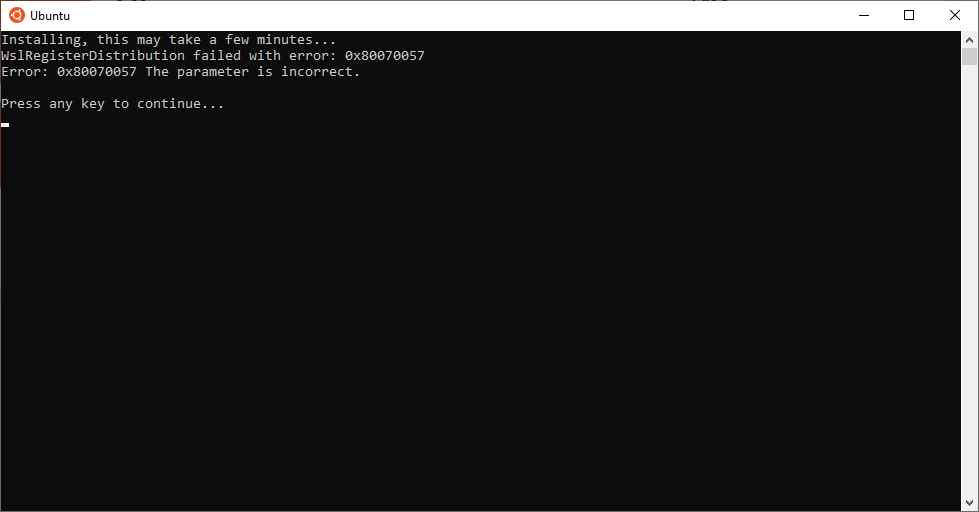
Error installing: WslRegisterDistribution failed with error: 0x80070057

When I installed it I found this error and look for an answer online. I found no solutions and many people suffering from the same problem, so I decided to publish an article on how to make it work.

The instructions I detail are based on the documentation from Canonical https://wiki.ubuntu.com/WSL and from Microsoft https://docs.microsoft.com/en-us/windows/wsl/install-win10 and the final solution I found.

Microsoft use Powershell to activate the features disabled in Windows, I did the same with Command Line, which I found more convenient for most of the non extremely tech people.

You will need:

  • For x64 systems: Version 1903 or higher, with Build 18362 or higher.

You can check your version of windows opening a Terminal (CMD.exe) and typing:

winver
  • For ARM64 systems: Version 2004 or higher, with Build 19041 or higher.

I’m not covering installing WSL for ARM, only for Intel/AMD Desktop/Laptops with Windows 10.

If you’re unsure, you can open a Terminal (CMD.exe) and run:

systeminfo | find "System Type"

If is a x64 system it will return: x64-based PC

Launch CMD.exe as Administrator and type:

dism /online /enable-feature /featurename:Microsoft-Windows-Subsystem-Linux /all /norestart

Enable Virtual Machine Feature:

dism /online /enable-feature /featurename:VirtualMachinePlatform /all /norestart

At this point you have to Restart Windows to complete this part of the installation, otherwise next step won’t work.

Download the Linux Kernel Update Package from here:

https://wslstorestorage.blob.core.windows.net/wslblob/wsl_update_x64.msi

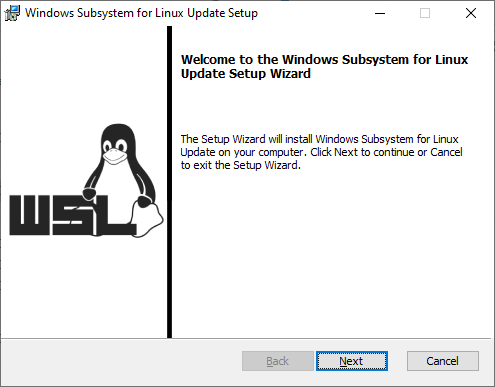
Execute wsl_update_x64.msi and grant permissions for modifying the system.

Now it’s crucial that you reboot again. Even if you’re not asked for.

That’s the tricky part.

Then set the version 2 of WSL as default:

C:\WINDOWS\system32>wsl --set-default-version 2
 For information on key differences with WSL 2 please visit https://aka.ms/wsl2

Installing Ubuntu (or Kali, or Debian, or openSUSE…)

Open the Microsoft Store or use Microsoft Store link to go directly to the installation of Ubuntu.

You have also several options as indicated in https://wiki.ubuntu.com/WSL:

The recommended way to install Ubuntu on WSL is through the Microsoft Store.

The following Ubuntu releases are available as apps on the Microsoft Store:

  • Ubuntu 16.04 LTS (Xenial) is the first release available for WSL. It supports the x64 architecture only. (offline installer: x64)
  • Ubuntu 18.04 LTS (Bionic) is the second LTS release and the first one supporting ARM64 systems, too. (offline installers: x64, ARM64)
  • Ubuntu 20.04 LTS (Focal) is the current LTS release, supporting both x64 and ARM64 architecture.
  • Ubuntu (without the release version) always follows the recommended release, switching over to the next one when it gets the first point release. Right now it installs Ubuntu 20.04 LTS.

Each app creates a separate root file system in which Ubuntu shells are opened but app updates don’t change the root file system afterwards. Installing a different app in parallel creates a different root file system allowing you to have both Ubuntu LTS releases installed and running in case you need it for keeping compatibility with other external systems. You can also upgrade your Ubuntu 16.04 to 18.04 by running ‘do-release-upgrade’ and have three different systems running in parallel, separating production and sandboxes for experiments.

But if you prefer, instead of using the Windows Store, you can download the appx.

In the same page mentioned you can do it for several versions, I attach the link for Ubuntu 20.04 LTS: https://aka.ms/wslubuntu2004

Assuming you used the Windows Store, if you did not reboot and try now to execute it for the first time, or you go to the Command Line and write bash, or open Ubuntu from Windows menu, whatever method you use, you’ll get the abovementioned error.

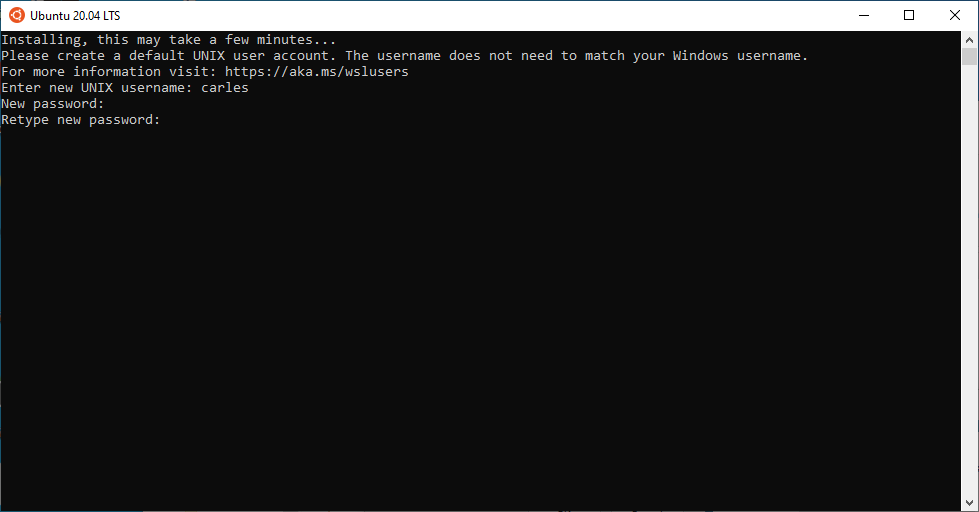
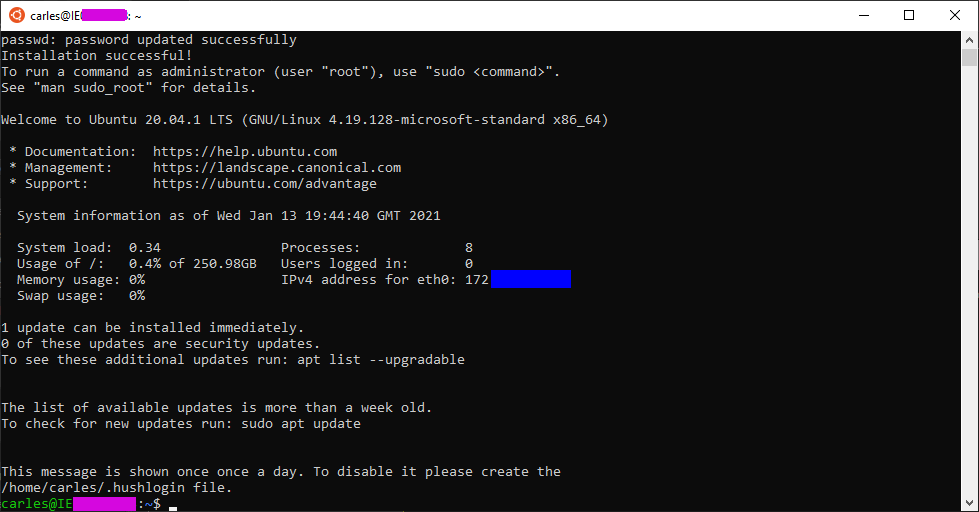
If that happens to you, just reboot and when you open it will work and will start the install and ask for a user and password:

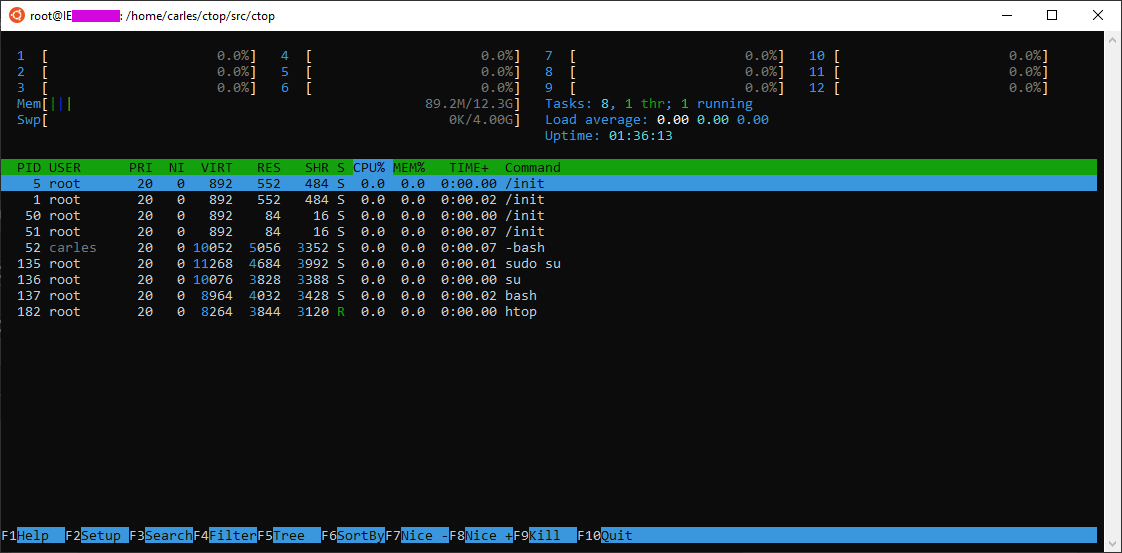
From here you’re able to update the system, execute the text commands available in Linux, access to the Windows drives, launch htop, git, Python3, apt, wget… copy and paste between windows and Linux terminal, share PATH…

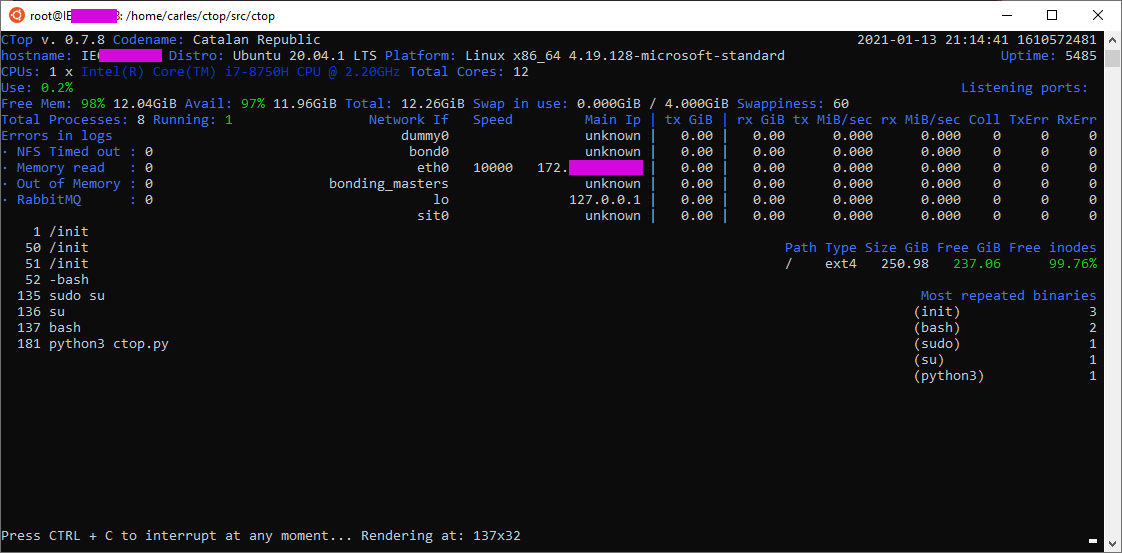
And of course you can run CTOP.py

Take in count that the space reported in / partition is not real, and that you have a 4GB swap.

You can access your C:\ Windows files from:

/mnt/c/

A sample forensic post mortem for a iSCSI Initiator (client) that had connectivity problems to the Server

My Team in The States report an issue with a Red Hat iSCSI Initiator having issues connecting to a Volume exported by a ZFS Server.

There is an issue on GitLab.

As I always do when I troubleshot a problem, I create a forensics post-mortem document recording everything I do, so later, others can learn how I fix it, or they can learn the steps I did in order to troubleshoot.

Please note: Some Ip addresses have been manually edited.

2019-08-09 10:20:10 Start of the investigation

I log into the Server, with Ip Address: xxx.yyy.16.30. Is an All-Flash-Array Server with RHEL6.10 and DRAID v.08091350.

Htop shows normal/low activity.

I check the addresses in the iSCSI Initiator (client), to make sure it is connecting to the right Server.

[root@Host-164 ~]# ip addr list 
1: lo: <LOOPBACK,UP,LOWER_UP> mtu 65536 qdisc noqueue state UNKNOWN qlen 1
    link/loopback 00:00:00:00:00:00 brd 00:00:00:00:00:00
    inet 127.0.0.1/8 scope host lo
    valid_lft forever preferred_lft forever
    inet6 ::1/128 scope host
    valid_lft forever preferred_lft forever
2: eno1: <BROADCAST,MULTICAST,UP,LOWER_UP> mtu 1500 qdisc mq state UP qlen 1000
    link/ether 00:25:90:c5:1e:ea brd ff:ff:ff:ff:ff:ff
    inet xxx.yyy.13.164/16 brd xxx.yyy.255.255 scope global eno1
    valid_lft forever preferred_lft forever
    inet6 fe80::225:90ff:fec5:1eea/64 scope link
    valid_lft forever preferred_lft forever
3: eno2: <NO-CARRIER,BROADCAST,MULTICAST,UP> mtu 1500 qdisc mq state DOWN qlen 1000
    link/ether 00:25:90:c5:1e:eb brd ff:ff:ff:ff:ff:ff 
4: enp3s0f0: <BROADCAST,MULTICAST,UP,LOWER_UP> mtu 1500 qdisc mq state UP qlen 1000
    link/ether 24:8a:07:a4:94:9c brd ff:ff:ff:ff:ff:ff
    inet 192.168.100.164/24 brd 192.168.100.255 scope global enp3s0f0
    valid_lft forever preferred_lft forever
    inet6 fe80::268a:7ff:fea4:949c/64 scope link
    valid_lft forever preferred_lft forever 
5: enp3s0f1: <BROADCAST,MULTICAST,UP,LOWER_UP> mtu 1500 qdisc mq state UP qlen 1000
    link/ether 24:8a:07:a4:94:9d brd ff:ff:ff:ff:ff:ff
    inet 192.168.200.164/24 brd 192.168.200.255 scope global enp3s0f1
    valid_lft forever preferred_lft forever inet6 fe80::268a:7ff:fea4:949d/64 scope link
    valid_lft forever preferred_lft forever                                                                                                       
                                                                                                                                

I see the luns on the host, connecting to the 10Gbps of the Server:

[root@Host-164 ~]# iscsiadm -m session
 tcp: [10] 192.168.100.30:3260,1 iqn.2003-01.org.linux-iscsi:vol4 (non-flash)
 tcp: [11] 192.168.100.30:3260,1 iqn.2003-01.org.linux-iscsi:vol5 (non-flash)
 tcp: [7] 192.168.100.30:3260,1 iqn.2003-01.org.linux-iscsi:vol1 (non-flash)
 tcp: [8] 192.168.100.30:3260,1 iqn.2003-01.org.linux-iscsi:vol2 (non-flash)
 tcp: [9] 192.168.100.30:3260,1 iqn.2003-01.org.linux-iscsi:vol3 (non-flash)

Finding the misteries…

Executing cat /proc/partitions is a bit strange respect mount:

[root@Host-164 ~]# cat /proc/partitions
 major minor #blocks name
 8  0 125034840 sda
 8  1 512000 sda1
 8  2 124521472 sda2
 253 0 12505088 dm-0
 253 1 112013312 dm-1
 8 32 104857600 sdc
 8 16 104857600 sdb
 8 48 104857600 sdd
 8 64 104857600 sde
 8 80 104857600 sdf

As mount has this:

/dev/sdg1 on /mnt/large type ext4 (ro,relatime,seclabel,data=ordered)

Lsblk shows that /dev/sdg is not present:

[root@Host-164 ~]# lsblk
 NAME
 MAJ:MIN RM SIZE RO TYPE MOUNTPOINT
 sda 8:0 0 119.2G 0 disk
 ├─sda1 8:1 0 500M 0 part /boot
 └─sda2 8:2 0 118.8G 0 part
  ├─rhel-swap 253:0 0 11.9G 0 lvm [SWAP]
  └─rhel-root 253:1 0 106.8G 0 lvm /
 sdb 8:16 0 100G 0 disk
 sdc 8:32 0 100G 0 disk
 sdd 8:48 0 100G 0 disk
 sde 8:64 0 100G 0 disk
 sdf 8:80 0 100G 0 disk

And as expected:

[root@Host-164 ~]# ls -al /mnt/large
 ls: reading directory /mnt/large: Input/output error
 total 0

I see that the Volumes appear to not having being partitioned:

[root@Host-164 ~]# fdisk /dev/sdf
 Welcome to fdisk (util-linux 2.23.2).
 Changes will remain in memory only, until you decide to write them.
 Be careful before using the write command.
 Device does not contain a recognized partition table
 Building a new DOS disklabel with disk identifier 0xddf99f40.
 Command (m for help): p
 Disk /dev/sdf: 107.4 GB, 107374182400 bytes, 209715200 sectors
 Units = sectors of 1 * 512 = 512 bytes
 Sector size (logical/physical): 512 bytes / 512 bytes
 I/O size (minimum/optimal): 512 bytes / 512 bytes
 Disk label type: dos
 Disk identifier: 0xddf99f40
 Device Boot
 Start
 End
 Blocks Id System
 Command (m for help): q

I create a partition and format with ext2

[root@Host-164 ~]# mke2fs /dev/sdb1
 mke2fs 1.42.9 (28-Dec-2013)
 Filesystem label=
 OS type: Linux
 Block size=4096 (log=2)
 Fragment size=4096 (log=2)
 Stride=0 blocks, Stripe width=0 blocks
 6553600 inodes, 26214144 blocks
 1310707 blocks (5.00%) reserved for the super user
 First data block=0
 Maximum filesystem blocks=4294967296
 800 block groups
 32768 blocks per group, 32768 fragments per group
 8192 inodes per group
 Superblock backups stored on blocks:
 32768, 98304, 163840, 229376, 294912, 819200, 884736, 1605632, 2654208,
 4096000, 7962624, 11239424, 20480000, 23887872
 Allocating group tables: done
 Writing inode tables: done
 Writing superblocks and filesystem accounting information: done

I mount:

[root@Host-164 ~]# mount /dev/sdb1 /mnt/vol1

I fill the volume from the client, and it works. I check the activity in the Server with iostat and there are more MB/s written to the Server’s drives than actually speed copying in the client.

I completely fill 100GB but speed is slow. We are working on a 10Gbps Network so I expected more speed.

I check the connections to the Server:

[root@obs4602-1810 ~]# netstat | grep -v "unix"
Active Internet connections (w/o servers)
Proto Recv-Q Send-Q Local Address               Foreign Address             State      
tcp        0      0 192.168.10.10:iscsi-target  192.168.10.180:55300        ESTABLISHED
tcp        0      0 192.168.10.10:iscsi-target  192.168.10.180:55298        ESTABLISHED
tcp        0      0 xxx.yyy.18.10:ssh            xxx.yyy.12.154:57137         ESTABLISHED
tcp        0      0 192.168.10.10:iscsi-target  192.168.10.180:55304        ESTABLISHED
tcp        0      0 192.168.10.10:iscsi-target  192.168.10.180:55301        ESTABLISHED
tcp        0      0 192.168.10.10:iscsi-target  192.168.10.180:55306        ESTABLISHED
tcp        0      0 xxx.yyy.18.10:ssh            xxx.yyy.12.154:56395         ESTABLISHED
tcp        0      0 xxx.yyy.18.10:ssh            xxx.yyy.14.52:57330          ESTABLISHED
tcp        0      0 192.168.10.10:iscsi-target  192.168.10.180:55296        ESTABLISHED
tcp        0      0 192.168.10.10:iscsi-target  192.168.10.180:55305        ESTABLISHED
tcp        0      0 xxx.yyy.18.10:ssh            xxx.yyy.12.154:57133         ESTABLISHED
tcp        0      0 192.168.10.10:iscsi-target  192.168.10.180:55303        ESTABLISHED
tcp        0      0 192.168.10.10:iscsi-target  192.168.10.180:55299        ESTABLISHED
tcp        0      0 192.168.10.10:iscsi-target  192.168.10.176:57542        ESTABLISHED
tcp        0      0 192.168.10.10:iscsi-target  192.168.10.180:55302        ESTABLISHED

I see many connections from Host 180, I check that and another member of the Team is using that client to test with vdbench against the Server.

This explains the slower speed I was getting.

Conclusions

  1. There was a local problem on the Host. The problems with the disconnection seem to be related to a connection that was lost (sdg). All that information was written to iSCSI buffer, not to the Server. In fact, that volume was mapped in the system with another letter, sdg was not in use.
  2. Speed was slow due to another client pushing Data to the Server too
  3. Windows clients with auto reconnect option are not reporting timeout reports while in Red Hat clients iSCSI connection timeouts. It should be increased

2020-03-10 22:16 IST TIP: At that time we were using Google suite and Skype to communicate internally with the different members across the world. If we had used a tool like Slack, and we had a channel like #engineering for example or #sanjoselab, then I could have paged and asked “Is somebody using obs4602-1810?