Tag Archives: Ubuntu

Backup and Restore your Ubuntu Linux Workstations

This is a mechanism I invented and I’ve been using for decades, to migrate or clone my Linux Desktops to other physical servers.

This script is focused on doing the job for Ubuntu but I was doing this already 30 years ago, for X Window as I was responsible of the Linux platform of a ISP (Internet Service Provider). So, it is compatible with any Linux Desktop or Server.

It has the advantage that is a very lightweight backup. You don’t need to backup /etc or /var as long as you install a new OS and restore the folders that you did backup. You can backup and restore Wine (Windows Emulator) programs completely and to/from VMs and Instances as well.

It’s based on user/s rather than machine.

And it does backup using the Timestamp, so you keep all the different version, modified over time. You can fusion the backups in the same folder if you prefer avoiding time versions and keep only the latest backup. If that’s your case, then replace s_PATH_BACKUP_NOW=”${s_PATH_BACKUP}${s_DATETIME}/” by s_PATH_BACKUP_NOW=”${s_PATH_BACKUP}” for instance. You can also add a folder for machine if you prefer it, for example if you use the same userid across several Desktops/Servers.

I offer you a much simplified version of my scripts, but they can highly serve your needs.

#!/usr/bin/env bash

# Author: Carles Mateo
# Last Update: 2022-10-23 10:48 Irish Time

# User we want to backup data for
s_USER="carles"
# Target PATH for the Backups
s_PATH_BACKUP="/home/${s_USER}/Desktop/Bck/"

s_DATE=$(date +"%Y-%m-%d")
s_DATETIME=$(date +"%Y-%m-%d-%H-%M-%S")

s_PATH_BACKUP_NOW="${s_PATH_BACKUP}${s_DATETIME}/"

echo "Creating path $s_PATH_BACKUP and $s_PATH_BACKUP_NOW"
mkdir $s_PATH_BACKUP
mkdir $s_PATH_BACKUP_NOW

s_PATH_KEY="/home/${s_USER}/Desktop/keys/2007-01-07-cloud23.pem"
s_DOCKER_IMG_JENKINS_EXPORT=${s_DATE}-jenkins-base.tar
s_DOCKER_IMG_JENKINS_BLUEOCEAN2_EXPORT=${s_DATE}-jenkins-blueocean2.tar
s_PGP_FILE=${s_DATETIME}-pgp.zip

# Version the PGP files
echo "Compressing the PGP files as ${s_PGP_FILE}"
zip -r ${s_PATH_BACKUP_NOW}${s_PGP_FILE} /home/${s_USER}/Desktop/PGP/*

# Copy to BCK folder, or ZFS or to an external drive Locally as defined in: s_PATH_BACKUP_NOW
echo "Copying Data to ${s_PATH_BACKUP_NOW}/Data"
rsync -a --exclude={} --acls --xattrs --owner --group --times --stats --human-readable --progress -z "/home/${s_USER}/Desktop/data/" "${s_PATH_BACKUP_NOW}data/"
rsync -a --exclude={'Desktop','Downloads','.local/share/Trash/','.local/lib/python2.7/','.local/lib/python3.6/','.local/lib/python3.8/','.local/lib/python3.10/','.cache/JetBrains/'} --acls --xattrs --owner --group --times --stats --human-readable --progress -z "/home/${s_USER}/" "${s_PATH_BACKUP_NOW}home/${s_USER}/"
rsync -a --exclude={} --acls --xattrs --owner --group --times --stats --human-readable --progress -z "/home/${s_USER}/Desktop/code/" "${s_PATH_BACKUP_NOW}code/"


echo "Showing backup dir ${s_PATH_BACKUP_NOW}"
ls -hal ${s_PATH_BACKUP_NOW}

df -h /

See how I exclude certain folders like the Desktop or Downloads with –exclude.

It relies on the very useful rsync program. It also relies on zip to compress entire folders (PGP Keys on the example).

If you use the second part, to compress Docker Images (Jenkins in this example), you will run it as sudo and you will need also gzip.

# continuation... sudo running required.

# Save Docker Images
echo "Saving Docker Jenkins /home/${s_USER}/Desktop/Docker_Images/${s_DOCKER_IMG_JENKINS_EXPORT}"
sudo docker save jenkins:base --output /home/${s_USER}/Desktop/Docker_Images/${s_DOCKER_IMG_JENKINS_EXPORT}
echo "Saving Docker Jenkins /home/${s_USER}/Desktop/Docker_Images/${s_DOCKER_IMG_JENKINS_BLUEOCEAN2_EXPORT}"
sudo docker save jenkins:base --output /home/${s_USER}/Desktop/Docker_Images/${s_DOCKER_IMG_JENKINS_BLUEOCEAN2_EXPORT}
echo "Setting permissions"
sudo chown ${s_USER}.${s_USER} /home/${s_USER}/Desktop/Docker_Images/${s_DOCKER_IMG_JENKINS_EXPORT}
sudo chown ${s_USER}.${s_USER} /home/${s_USER}/Desktop/Docker_Images/${s_DOCKER_IMG_JENKINS_BLUEOCEAN2_EXPORT}
echo "Compressing /home/${s_USER}/Desktop/Docker_Images/${s_DOCKER_IMG_JENKINS_EXPORT}"
gzip /home/${s_USER}/Desktop/Docker_Images/${s_DOCKER_IMG_JENKINS_EXPORT}
gzip /home/${s_USER}/Desktop/Docker_Images/${s_DOCKER_IMG_JENKINS_BLUEOCEAN2_EXPORT}

rsync -a --exclude={} --acls --xattrs --owner --group --times --stats --human-readable --progress -z "/home/${s_USER}/Desktop/Docker_Images/" "${s_PATH_BACKUP_NOW}Docker_Images/"

There is a final part, if you want to backup to a remote Server/s using ssh:

# continuation... to copy to a remote Server.

s_PATH_REMOTE="bck7@cloubbck11.carlesmateo.com:/Bck/Desktop/${s_USER}/data/"

# Copy to the other Server
rsync -e "ssh -i $s_PATH_KEY" -a --exclude={} --acls --xattrs --owner --group --times --stats --human-readable --progress -z "/home/${s_USER}/Desktop/data/" ${s_PATH_REMOTE}

I recommend you to use the same methodology in all your Desktops, like for example, having a data/ folder in the Desktop for each user.

You can use Erasure Code to split the Backups in blocks and store a piece in different Cloud Providers.

Also you can store your Backups long-term, with services like Amazon Glacier.

Other ideas are storing certain files in git and in Hadoop HDFS.

If you want you can CRC your files before copying to another device or server.

You will use tools like: sha512sum or md5sum.
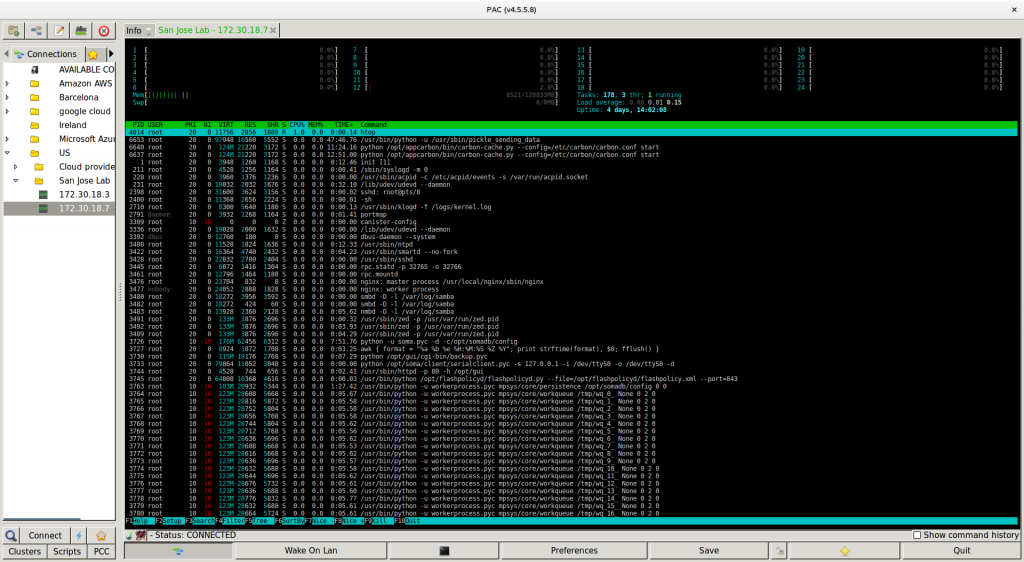
Graphical programs I use usually in Linux

Those are the programs that more or less, I use always in all my Linux workstations.

I use Ubuntu LTS. I like how they maintain the packages.

I like to run the same base version in my Desktops, like I have in the Servers. So if I have my Servers deployed with Ubuntu 20.04 LTS, then my Desktops will run with the same version. Is a way to get to better know the distribution, compatibilities, run faster than the problems, and an easy way to test things. If I have several deployments with several versions (so LTS not upgraded) I may run VMs with that version as Desktop or Server, to ensure compatibility. And obviously I use Docker and a lot of Command Line Tools, which I covered in another article.

Audacity sound recorder and editor

Charles Proxy

Chromium web browser

The Chrome Extension of LastPass for Teams

Filezilla

Firefox

GIMP

IntelliJ

LibreOffice

OpenShot Video Editor

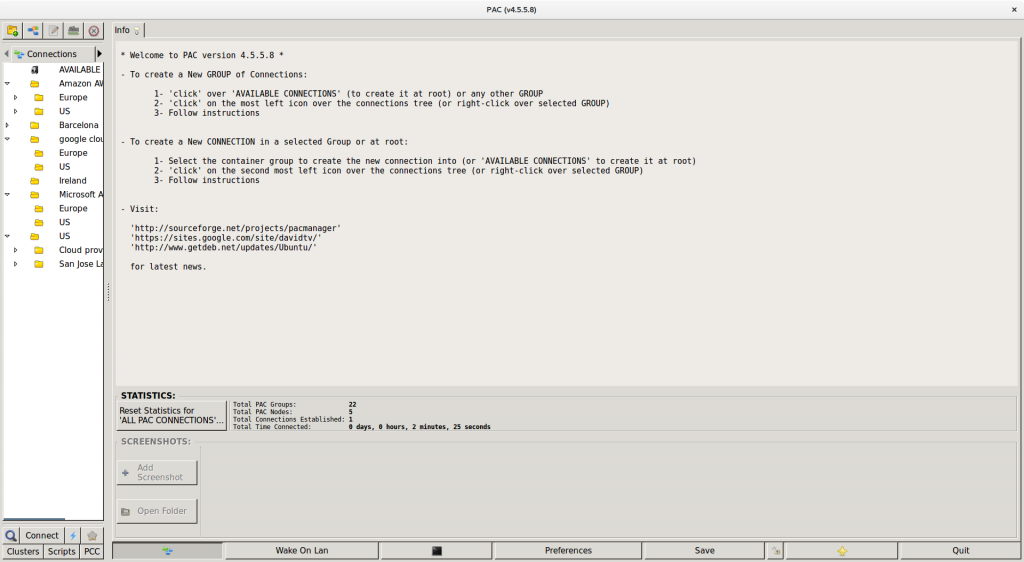
PAC

Packet Tracer from Cisco

PHPStorm

PyCharm

Slack

Skype (usage going down in favor of Zoom and Slack)

VirtualBox

Vmware Workstation

VokoscreenNG Screen Recorder

Wine (Windows Emulator)

Zoom

News from the blog 2020-10-16

  • I’ve been testing and adding more instances to CMIPS. I’m planning on testing the Azure instance with 120 cores.
  • News: Microsoft makes an option to permanently remote work

https://www.bbc.com/news/business-54482245

  • One of my colleagues showed me dstat, a very nice tool for system monitoring, and bandwidth of a drive monitoring. Also ifstat, as complement to iftop is very cool for Network too. This functionality is also available in CTOP.py
  • As I shared in the past news of the blog, I’m resuming my contributions to ZFS Community.

Long time ago I created some ZFS tools that I want to share soon as Open Source.

I equipped myself with the proper Hardware to test on SAS and SATA:

  • 12G Internal PCI-E SAS/SATA HBA RAID Controller Card, Broadcom’s SAS 3008, compatible for SAS 9300-8I.
    This is just an HDA (Host Data Adapter), it doesn’t support RAID. Only connects up to 8 drives or 1024 through expander, to my computer.
    It has a bandwidth of 9,600 MB/s which guarantees me that I’ll be able to add 12 SAS SSD Enterprise grade at almost the max speed of the drives. Those drives perform at 900 MB/s so if I’m using all of them at the same time, like if I have a pool of 8 + 3 and I rebuild a broken drive or I just push Data, I would be using 12×900 = 10,800 MB/s. Close. Fair enough.
  • VANDESAIL Mini-SAS Cables, 1m Internal Mini-SAS to 4x SAS SATA Forward Breakout Cable Hard Drive Data Transfer Cable (SAS Cable).
  • SilverStone SST-FS212B – Aluminium Trayless Hot Swap Mobile Rack Backplane / Internal Hard Drive Enclosure for 12x 2.5 Inch SAS/SATA HDD or SSD, fit in any 3x 5.25 Inch Drive Bay, with Fan and Lock, black
  • Terminator is here.
    I ordered this T-800 head a while ago and finally arrived.

Finally I will have my empty USB keys located and protected. ;)

Remember to be always nice to robots. :)

How to block scanners that look for vulnerabilities to your Ubuntu Apache site

There are many robots scanning sites for vulnerabilities, to gain control or exploit the servers. Most of them come from China and Russia ip’s.

Here I explain an easy way to block them using the Ubuntu Firewall ufw.

If you use a CMS like WordPress and you know there are extensions that have had security exploits, for example, wp-file-manager then you can search directly for this request in Apache Access Logs.

For example:

cat /var/log/apache2/blog_carlesmateo_com-access.log | grep "wp-file-manager" | awk '{ print $1; }' | sort -u >> 2020-10-03-offending-ips.txt

cat /var/log/apache2/blog_carlesmateo_com-access.log.1 | grep "wp-file-manager" | awk '{ print $1; }' | sort -u >> 2020-10-03-offending-ips.txt

zcat /var/log/apache2/blog_carlesmateo_com-access.log.2.gz | grep "wp-file-manager" | awk '{ print $1; }' | sort -u >> 2020-10-03-offending-ips.txt

In the example we look for the access.log file, for the rotated access.log.1 and for the rotated and compressed access.log.2.gz. We use the tool zcat which does a cat over a compressed file.

If we don’t expect to have anybody posting to our xmlrpc Service, we can check for the offending Ip’s by doing:

cat /var/log/apache2/blog_carlesmateo_com-access.log | grep "POST /xmlrpc.php" | wc --lines
2490

In my case I have 2490 request just in the last log.

cat /var/log/apache2/blog_carlesmateo_com-access.log | grep "POST /xmlrpc.php" |awk '{ print $1; }' | sort -u | wc --lines

Interested in how many Ip’s are launching those requests, you can see how many different Ip’s are those:

cat /var/log/apache2/blog_carlesmateo_com-access.log | grep "POST /xmlrpc.php" |awk '{ print $1; }' | sort -u | wc --lines
145

And to add those Ip’s to the offending Ip’s list:

cat /var/log/apache2/blog_carlesmateo_com-access.log | grep "POST /xmlrpc.php" | awk '{ print $1; }' | sort -u >> 2020-10-03-offending-ips.txt

I can also check for repeated requests in the logs:

cat /var/log/apache2/blog_carlesmateo_com-access.log | awk '{ print $7; }' | sort | uniq -c | sort -r | less

That shows me some requests legit and others that are not:

   2532 /xmlrpc.php
    209 /wp-login.php
    205 /wp-admin/admin-ajax.php
     84 /
     83 *
     48 /robots.txt
     21 /favicon.ico
     16 /wp-login.php?redirect_to=https%3A%2F%2Fblog.carlesmateo.com%2Fwp-admin%2F&reauth=1
     15 /wp-includes/js/jquery/jquery.js?ver=1.12.4-wp
     14 /wp-includes/css/dist/block-library/theme.min.css?ver=5.5.1
     14 /wp-includes/css/dist/block-library/style.min.css?ver=5.5.1
     14 /wp-content/themes/2012-carles/style.css?ver=5.5.1
     14 /wp-content/plugins/contact-form-7/includes/js/scripts.js?ver=5.2.2
     14 /wp-content/plugins/captcha/css/front_end_style.css?ver=4.4.5
     13 /wp-includes/css/dashicons.min.css?ver=5.5.1
     13 /wp-content/themes/2012-carles/css/blocks.css?ver=20181230
     13 /wp-content/plugins/contact-form-7/includes/css/styles.css?ver=5.2.2
     12 /wp-includes/js/wp-embed.min.js?ver=5.5.1
     12 /wp-includes/images/w-logo-blue-white-bg.png
     12 /wp-content/themes/2012-carles/js/navigation.js?ver=20140711
     11 /wp-includes/js/wp-emoji-release.min.js?ver=5.5.1
     11 /wp-content/plugins/captcha/css/desktop_style.css?ver=4.4.5
     11 /feed/
     11 /contact/
     10 /wp-comments-post.php
     10 /?author=1
      9 /2016/06/30/creating-a-content-filter-for-postfix-in-php/
      9 /2014/10/13/performance-of-several-languages/
      8 /wp-includes/js/comment-reply.min.js?ver=5.5.1
      8 /wp-content/plugins/captcha/js/front_end_script.js?ver=5.5.1
      8 /e/admin/index.php
      8 /e/admin/
      7 /wp-login.php?action=register
      7 /current-projects/
      7 //xmlrpc.php
      6 /.env
      5 /2019/08/12/a-sample-forensic-post-mortem-for-a-iscsi-initiator-client-that-had-connectivity-problems-to-the-server/
      5 /2017/03/26/csort-multithread-versus-quicksort-java/
      4 /wp-json/wp/v2/types/wp_block?_locale=user
      4 /wp-json/wp/v2/blocks?per_page=100&_locale=user
      4 /wp-admin/
      4 /diguo/index.php
      4 /diguo/
      4 /category/web-development/
      4 /category/news-for-the-blog/
      3 /vendor/phpunit/phpunit/src/Util/PHP/eval-stdin.php
      3 /mt-notation-for-python/
      3 /ebk/index.php
      3 /ebk/
      3 /comments/feed/
      3 /bf/index.php
      3 /bf/
      3 /beifen/index.php
      3 /beifen/
      3 /Ebak/index.php
      3 /Ebak/
      3 /Bak/index.php
      3 /Bak/
      3 /2020/09/21/how-to-recover-access-to-your-amazon-aws-ec2-instance-if-you-loss-your-private-key-for-ssh/
      3 /2020/08/23/adding-a-ramdisk-as-slog-zil-to-zfs/
      3 /2019/07/03/adding-my-server-as-docker-with-php-catalonia-framework-explained/
      3 /2019/06/25/some-handy-tricks-for-working-with-zfs/
      3 /2015/02/01/stopping-definitively-the-massive-distributed-dos-attack/
      2 /ycadmin/login.php?gotopage=%2Fycadmin%2Findex.php
      2 /ueditor/net/controller.ashx
      2 /sql_beifen/index.php
      2 /sql_beifen/
      2 /sql/index.php
      2 /sql/
      2 /dgbf/index.php
      2 /dgbf/
      2 //xmlrpc.php?rsd
      2 //.env
      1 /wp-login.php?registration=disabled
      1 /wp-login.php?action=lostpassword
      1 /wp-json/wp/v2/users/me?_locale=user
      1 /wp-json/wp/v2/users/?who=authors&per_page=100&_locale=user
      1 /wp-json/wp/v2/taxonomies/post_tag?context=edit&_locale=user
      1 /wp-json/wp/v2/taxonomies/category?context=edit&_locale=user
      1 /wp-json/wp/v2/tags?per_page=100&orderby=count&order=desc&_fields=id%2Cname&search=ufw&_locale=user

You can identify manually what are attacks, and what are legit requests.

After you have your definitive list of offending Ip’s (and make sure you didn’t introduce yours accidentally), then you can execute the second part of the script:

echo '#!/bin/bash' > add_ufw_rules.sh

i_COUNTER_RULE=0; for s_OFFENDING_IP in $(cat 2020-10-03-offending-ips.txt); do i_COUNTER_RULE=$((i_COUNTER_RULE+1)); echo "ufw insert $i_COUNTER_RULE deny from $s_OFFENDING_IP to any" >> add_ufw_rules.sh; done

echo "ufw status numbered" >> add_ufw_rules.sh
echo "sudo ufw allow OpenSSH" >> add_ufw_rules.sh
echo "sudo ufw allow 22/tcp" >> add_ufw_rules.sh
echo 'sudo ufw allow "Apache Full"' >> add_ufw_rules.sh
echo "sudo ufw enable" >> add_ufw_rules.sh

Then you less your file add_ufw_rules.sh to see everything is Ok:

#!/bin/bash
ufw insert 1 deny from 40.79.250.88 to any
ufw insert 2 deny from 52.173.148.212 to any
ufw insert 3 deny from 94.103.85.175 to any
ufw insert 4 deny from 40.79.250.88 to any
ufw insert 5 deny from 78.85.208.240 to any
ufw insert 6 deny from 80.82.68.173 to any
ufw insert 7 deny from 188.165.230.118 to any
ufw insert 8 deny from 195.201.117.103 to any
ufw insert 9 deny from 40.79.250.88 to any
ufw insert 10 deny from 5.135.138.188 to any
ufw insert 11 deny from 51.116.189.135 to any
...
ufw insert 223 deny from 95.173.161.167 to any
ufw insert 224 deny from 95.84.228.227 to any
ufw status numbered
sudo ufw allow OpenSSH
sudo ufw allow 22/tcp
sudo ufw allow "Apache Full"
sudo ufw enable

Then you simply give permissions with chmod +x add_ufw_rules.sh and run the script to apply.

It’s up to you to turn on the Firewall logging:

sudo ufw logging on

Blocking some offending Ip’s easily with Ubuntu ufw

Ok, so we know that there are several ip’s that have attempted to hack the blog.

We know they try different urls looking for a exploit, or they try to hack a password by brute force…

We are using Amazon EC2 and the old infrastructure, not a VPC Network, so we cannot block a specific Ip to our Web Server.

In an article from 2015 I explained How to Stop a BitTorrent based DDoS attack, and was using iptables for that.

In this example I will show how to use ufw to block tow specific Ip’s, execute as root or with sudo:

ufw insert 1 deny from 89.35.39.60 to any
ufw insert 2 deny from 85.204.246.240 to any
ufw allow OpenSSH
ufw allow 22/tcp
ufw allow "Apache Full"
ufw enable
ufw status numbered

You can do ufw status numbered to see the status of ufw and the rules order.

root@ip-111-111-111-111:/home/ubuntu# ufw status numbered
Status: active
To Action From
-- ------ ----

[ 1] Anywhere DENY IN 89.35.39.60
[ 2] Anywhere DENY IN 85.204.246.240
[ 3] Apache Full ALLOW IN Anywhere
[ 4] OpenSSH ALLOW IN Anywhere
[ 5] 22/tcp ALLOW IN Anywhere
[ 6] Apache Full (v6) ALLOW IN Anywhere (v6)
[ 7] OpenSSH (v6) ALLOW IN Anywhere (v6)
[ 8] 22/tcp (v6) ALLOW IN Anywhere (v6)
root@ip-111-111-111-111:/home/ubuntu#

If you need to delete a rule, use the number on the left and, just type:

sudo ufw delete 2

Google Compute Engine Talk for Group Google Developers Cork

My talk in Google Developers Cork Group.
It’s about deploying an Instance in GCE and grows in complexity until Deploying a Load Balancer with AutoScaling for a group of LAMP Webservers.

Join the group at: https://www.meetup.com/GDG-Cork/

The videos:

Keshan Sodimana: Tensors